
Best Photo Scanning Equipment to Buy in July 2026
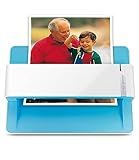
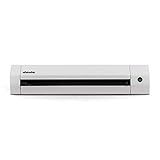
Plustek Photo Scanner ePhoto Z300, Scans 4x6 inch Photos in 2 Seconds, Auto crop and deskew with CCD Sensor, Supports Mac and PC
- EFFORTLESSLY DIGITIZE PHOTOS IN JUST 2 SECONDS EACH-FAST AND EASY!
- SCAN MULTIPLE SIZES, FROM 3X5 TO 8X10-VERSATILE FOR ALL YOUR NEEDS.
- ENHANCE OLD IMAGES INSTANTLY WITH POWERFUL ONE-CLICK RESTORATION TOOLS.


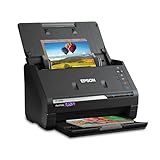
Epson FastFoto FF-680W Wireless High-Speed Photo and Document Scanning System, Black
- SCAN PHOTOS AT LIGHTNING SPEED: 1 PHOTO PER SECOND, BATCH UP TO 36!
- PRESERVE AND RESTORE FADED MEMORIES: AUTO-ENHANCEMENTS FOR LASTING QUALITY.
- SHARE WITH A TOUCH: USE THE APP FOR VOICE, TEXT, AND EASY UPLOADS!

Digital Film & Photo Scanner – Converts 35mm/135 Slides, Negatives & 3.5x5, 4x6, 5x7 Photos to 22MP JPEG – Slide & Negative Scanner with 2.4" LCD, 4GB SD Card
- PRESERVE MEMORIES QUICKLY: SCAN NEGATIVES & PRINTS IN JUST 3 SECONDS!
- EASY ADJUSTMENTS: LIVE PREVIEW AND ADJUST IMAGES FOR PERFECT SCANS.
- HASSLE-FREE SHARING: SAVE IMAGES DIRECTLY TO SD OR TRANSFER VIA USB.
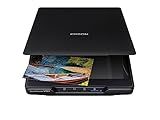
Epson Perfection V19 II Color Photo and Document Flatbed Scanner with 4800 dpi Optical Resolution, USB Power and High-Rise, Removable Lid
- CAPTURE STUNNING DETAIL WITH 4800 DPI - PERFECT FOR ENLARGEMENTS!
- ONE-TOUCH SCANNING MAKES YOUR WORKFLOW FASTER AND SIMPLER!
- CREATE EDITABLE DOCUMENTS AND SEARCHABLE PDFS WITH EASE!

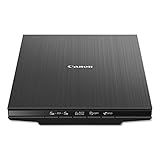
Canon Canoscan Lide 300 Scanner (PDF, AUTOSCAN, COPY, SEND)
- EFFORTLESS SCANNING WITH USB CONNECTIVITY FOR SEAMLESS USE.
- AUTO SCAN MODE AUTOMATICALLY DETECTS DOCUMENTS FOR YOU.
- EASILY DIGITIZE DOCUMENTS AND IMAGES IN ONE QUICK STEP.

Epson - Perfection V39 II - Color Photo and Document Flatbed Scanner - 4800 dpi Optical Resolution - High-Rise, Removable Lid - Scan to Cloud - USB Power - Image Scanning - Black
- ACHIEVE STUNNING CLARITY WITH 4800 DPI FOR ENLARGED IMAGES!
- VERSATILE SCANNING FOR PHOTOS, DOCUMENTS, AND ARTWORK – ALL IN ONE!
- ONE-TOUCH SCANNING AND EASY PHOTO FIX SIMPLIFY YOUR WORKFLOW!
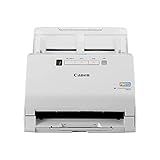
Canon imageFORMULA RS40 - Photo and Document Scanner, Auto Document Feeder, Windows and Mac, Scans Old and New Photos in Varying Sizes, USB Interface
- EFFORTLESSLY CONVERT & SHARE MEMORIES WITH DIGITAL SCRAPBOOKS!
- DUAL-SIDED SCANNING AT 40 PHOTOS/MINUTE-FAST AND HASSLE-FREE!
- ENHANCE IMAGES WITH BUNDLED SOFTWARE FOR PERFECT MEMORIES!
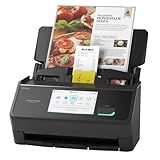
ScanSnap iX2500 Wireless or USB High-Speed Cloud Enabled Document, Photo & Receipt Scanner with Large 5" Touchscreen and 100 Page Auto Document Feeder for Mac or PC, Black
- SPEEDY 45PPM SCANNING WITH 100-SHEET FEEDER FOR EFFICIENCY.
- CUSTOM PROFILES AND QUICK MENU FOR EASY FILE SHARING.
- SECURE WI-FI 6 AND USB-C FOR STABLE CONNECTIONS EVERYWHERE.
Canon CanoScan Lide 400 Slim Scanner, 7.7" x 14.5" x 0.4"
-
SPEEDY SCANS IN JUST 8 SECONDS WITH USB TYPE-C CONVENIENCE!
-
PRESERVE STUNNING IMAGES AT 4800 X 4800 DPI RESOLUTION!
-
EFFORTLESS SCANNING WITH ‘EZ’ BUTTONS FOR MULTI-PAGE PDFS!
Doxie Go SE - The Intuitive Portable Document Scanner with Rechargeable Battery and Easy Software for Home, Office, or Work from Home
- GO PAPERLESS ANYWHERE: SCAN WITHOUT A COMPUTER, ANYTIME, ANYWHERE.
- SPEEDY SCANNING: CAPTURE FULL-COLOR PAGES IN JUST 8 SECONDS.
- PORTABLE POWER: COMPACT DESIGN WITH 400 PAGES PER BATTERY CHARGE.
When scanning black and white photos, there are a few special considerations to keep in mind. One important factor is the resolution of the scanner. Black and white photos typically have finer details and more contrast compared to color photos, so it is important to use a high resolution setting to capture all the nuances of the image.
Additionally, you may want to adjust the brightness and contrast settings on your scanner to ensure that the photo is scanned accurately. Be sure to also clean the scanner bed and the photos themselves before scanning to prevent any dust or debris from affecting the quality of the image.
Finally, consider the format in which you save the scanned black and white photos. TIFF files are a preferred format for preserving the quality of the image, as they are uncompressed and do not lose any detail during the scanning process. Alternatively, you can also save the scanned photos in JPEG format for easier sharing and storage.
Overall, by paying attention to these special considerations, you can ensure that your scanned black and white photos turn out crisp and clear, preserving the memories captured in the images for years to come.
What is the significance of resolution conversion when scanning black and white photos?
Resolution conversion when scanning black and white photos is important because it determines the level of detail and quality of the digital image. Higher resolution scans will capture more detailed information from the original photo, making it possible to preserve fine details such as textures, patterns, and sharp edges.
Additionally, resolution conversion allows for resizing and enhancing the image without losing quality. This can be useful for printing large format photos or making digital edits to improve the overall appearance of the image.
Overall, resolution conversion plays a crucial role in digitizing black and white photos and ensuring that the digital version accurately captures the essence and details of the original image.
What is the best file format for saving scanned black and white photos?
The best file format for saving scanned black and white photos is typically TIFF (Tagged Image File Format) or PNG (Portable Network Graphics). These file formats are lossless and provide high quality image compression for black and white images, ensuring that the scanned photos retain their clarity and details without any loss of quality. Additionally, TIFF and PNG files support transparency and are widely compatible with most image editing software and printing applications.
How to preserve the original quality of black and white photos during scanning?
- Choose the right resolution: When scanning black and white photos, make sure to scan them at a high resolution to preserve the original quality. Aim for a resolution of at least 300 dpi or higher.
- Use a high-quality scanner: Invest in a good quality scanner that is designed for scanning photos. This will help ensure that the scanner captures all the details and nuances of the image.
- Clean the scanner: Before scanning, make sure to clean the scanner bed and glass to remove any dust or debris that could affect the quality of the scan.
- Adjust settings: Adjust the scanner settings to optimize the quality of the scan. This may include adjusting the brightness, contrast, and sharpness settings to enhance the clarity and detail of the image.
- Save in a high-quality format: Save the scanned image in a high-quality file format, such as TIFF or PNG, to preserve the original quality of the image. Avoid saving in compressed formats like JPEG, as this can result in loss of quality.
- Handle with care: Handle the original photo and the scanned image with care to avoid any damage or loss of quality. Store the original photo in a safe place and handle the scanned image gently to prevent any scratches or smudges.
What is the best way to label scanned black and white photos?
The best way to label scanned black and white photos is to include relevant information such as the date the photo was taken, the location, the people in the photo, and any special events or occasions captured. It is also helpful to include any additional details or anecdotes that provide context or background information. The labeling can be done either digitally by adding metadata to the image file or by attaching a physical label to the back of the printed photo. Additionally, organizing the photos in chronological order or categorizing them by subject matter can help make it easier to search and find specific photos in the future.
What is the best way to display and share scanned black and white photos online?
There are several ways to display and share scanned black and white photos online. Here are a few options:
- Create a dedicated online photo gallery: You can create a website or use a platform like Flickr or SmugMug to create a gallery specifically for your scanned black and white photos. This allows you to organize and display your photos in a visually appealing way.
- Share on social media: You can share your scanned black and white photos on social media platforms like Instagram, Facebook, or Twitter. Be sure to use relevant hashtags and tag friends and family members who may be interested in seeing the photos.
- Create a digital photo album: You can create a digital photo album using a service like Google Photos or Apple Photos. This allows you to upload and organize your scanned black and white photos in a digital format that can be easily shared and accessed by others.
- Share in online photo communities: There are online communities and forums dedicated to sharing and discussing photography. You can share your scanned black and white photos in these communities to get feedback and connect with others who appreciate vintage photography.
Overall, the best way to display and share scanned black and white photos online will depend on your personal preferences and the audience you are trying to reach. Experiment with different methods to find the one that works best for you.
How to properly handle and clean your scanner bed for scanning black and white photos?
- Turn off the scanner and unplug it from the power source before cleaning to avoid any potential risks.
- Use a soft, lint-free cloth or microfiber towel to gently wipe the scanner bed to remove any dust, dirt, or smudges. Avoid using paper towels or tissues, as they may leave behind lint or residue.
- If there are stains or marks on the scanner bed, dampen the cloth with a small amount of water or a mild, alcohol-free cleaning solution. Be sure to wring out any excess liquid before wiping down the scanner bed to prevent any moisture from seeping into the scanner.
- For stubborn stains or marks, you can use a gentle cleaning solution specifically designed for electronic devices. Follow the manufacturer's instructions for use and be sure to test a small, inconspicuous area of the scanner bed first to ensure compatibility.
- Avoid using harsh chemicals, abrasive cleaners, or solvents on the scanner bed, as they may damage the surface of the scanner and affect the quality of your scans.
- Once you have finished cleaning the scanner bed, allow it to dry completely before plugging the scanner back in and turning it on.
- It is recommended to clean the scanner bed regularly, especially if you scan black and white photos frequently, to ensure optimal scan quality and prevent dust and debris from affecting your scans.
- Consider investing in a scanner cover or keeping your scanner covered when not in use to protect the scanner bed from dust and dirt buildup.