
Best Ichimoku Cloud Analysis Tools to Buy in July 2026
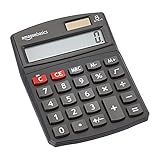
Amazon Basics LCD 8-Digit Desktop Calculator, Portable and Easy to Use, Black, 1-Pack
- BRIGHT 8-DIGIT LCD FOR CLEAR, EASY VIEWING IN ANY LIGHTING.
- VERSATILE FUNCTIONS: ADD, SUBTRACT, MULTIPLY, DIVIDE, & MORE!
- USER-FRIENDLY BUTTONS DESIGNED FOR ALL AGES, EVEN KIDS!


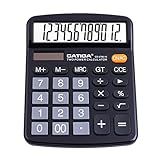
CATIGA 12 Digit Desk Calculator, Desktop Calculators with Large LCD Display & Big Buttons, Dual Power Solar & Battery, Standard Basic 4 Function Calculator for School, Office, Home
- EASY TO READ: LARGE LCD SCREEN FOR CLEAR VISIBILITY FROM A DISTANCE.
- FAST OPERATIONS: SENSITIVE, OVERSIZED BUTTONS PREVENT INPUT ERRORS.
- ECO-FRIENDLY POWER: DUAL POWER WITH SOLAR AND BATTERY FOR CONVENIENCE.
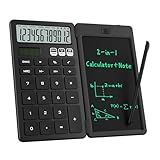
Desk Calculator with Erasable LCD Notepad Calculators ROATEE Desktop Basic Calculators for Middle School Cute Pocket Simple Calculator Office Desk Accessories Supplies Home Office Essential Big Button
-
VERSATILE 2-IN-1 DESIGN: CALCULATOR AND LCD NOTEPAD FOR SEAMLESS USE.
-
ERGONOMIC & STYLISH: CLEAR DISPLAY AND RESPONSIVE KEYS FOR COMFORT.
-
ECO-FRIENDLY POWER: DUAL SOLAR AND BATTERY POWER FOR RELIABLE USE.
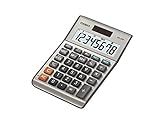
Casio MS-80B Calculator – Desktop Calculator with Tax & Currency Tools | General Purpose | Large Display | Ideal for Home, Office & Everyday Math
- LARGE 8-DIGIT DISPLAY ENSURES ACCURATE, EASY-TO-READ CALCULATIONS.
- INCLUDES TAX AND CURRENCY FUNCTIONS FOR EFFORTLESS FINANCIAL MANAGEMENT.
- COMPACT DESIGN FOR ON-THE-GO USE IN ANY HOME OR OFFICE SETTING.
Casio HS-8VA Mini 6-Function Calculator | Large 8-Digit LCD Display | Solar Powered with Battery Backup | Standard Function | Portable Pocket Size
- ULTRA-COMPACT DESIGN: PERFECT FOR ON-THE-GO CALCULATIONS!
- BIG DISPLAY: CLEAR, EASY-TO-READ 8-DIGIT LCD FOR ALL YOUR NEEDS.
- DUAL POWER: SOLAR WITH BATTERY BACKUP ENSURES RELIABILITY ANYTIME.
Calculating the Ichimoku Cloud using Swift programming involves implementing a series of mathematical formulas to determine key support and resistance levels, as well as potential trend directions. The Ichimoku Cloud is a technical analysis tool used to identify buy and sell signals in financial markets.
To calculate the Ichimoku Cloud in Swift, you will need to write code that calculates various components such as the Tenkan-sen (conversion line), Kijun-sen (base line), Senkou Span A (leading span A), Senkou Span B (leading span B), and the Chikou Span (lagging span). These calculations are based on historical price data and are typically plotted on a price chart to visually represent potential trading opportunities.
By using Swift programming to calculate the Ichimoku Cloud, traders and developers can create custom algorithms and trading strategies that take advantage of this powerful technical analysis tool. This can help traders make more informed decisions and potentially improve their overall trading performance in the financial markets.
How to calculate the Tenkan-sen line for a stock using Swift programming?
To calculate the Tenkan-sen line for a stock using Swift programming, you can use the following formula:
Tenkan-sen = (Highest High + Lowest Low) / 2
Here is a sample Swift code snippet to calculate the Tenkan-sen line for a stock based on the daily highest high and lowest low prices:
// Define an array of daily price data including highest high and lowest low prices let dailyPrices = [ ["date": "2022-01-01", "high": 100.0, "low": 90.0], ["date": "2022-01-02", "high": 110.0, "low": 95.0], ["date": "2022-01-03", "high": 105.0, "low": 98.0], // Add more daily price data here ]
// Calculate the Tenkan-sen line for each day for dailyPrice in dailyPrices { if let high = dailyPrice["high"] as? Double, let low = dailyPrice["low"] as? Double { let tenkanSen = (high + low) / 2 print("Tenkan-sen for \(dailyPrice["date"]!): \(tenkanSen)") } }
In the above code snippet, we iterate through the daily price data and calculate the Tenkan-sen line for each day using the formula provided. The calculated Tenkan-sen value is then printed to the console. You can modify the code to suit your specific requirements and incorporate it into your stock analysis or trading application.
What is the recommended timeframe for using the Ichimoku Cloud indicator in trading?
The recommended timeframe for using the Ichimoku Cloud indicator in trading is typically the daily timeframe. This allows traders to get a clear and comprehensive view of the market trends and make more informed trading decisions. However, some traders may also use the indicator on shorter timeframes such as the 4-hour or 1-hour charts for more frequent trading opportunities. Ultimately, the timeframe used will depend on the individual trader's trading style and preferences.
What is the formula for calculating the Kijun-sen line in the Ichimoku Cloud using Swift?
The formula for calculating the Kijun-sen line in the Ichimoku Cloud is:
Kijun-sen = (Highest High + Lowest Low) / 2
In Swift, you can calculate the Kijun-sen line using the following code snippet:
func calculateKijunSen(highs: [Double], lows: [Double]) -> [Double] { var kijunSen: [Double] = []
for i in 0..<highs.count {
    let highestHigh = highs\[i\]
    let lowestLow = lows\[i\]
    let kijunSenValue = (highestHigh + lowestLow) / 2

    kijunSen.append(kijunSenValue)
}

return kijunSen
}
In this code snippet, the calculateKijunSen function takes in two arrays of high and low prices as parameters and calculates the Kijun-sen line values for each data point. The function returns an array of Kijun-sen line values corresponding to the input data.
How to interpret the Kumo cloud to identify potential support and resistance levels in Swift programming?
In Swift programming, the Kumo cloud is a technical analysis tool used in the Ichimoku Cloud indicator to identify potential support and resistance levels. The Kumo cloud is formed by two lines: the Senkou Span A and Senkou Span B, which are drawn in the future.
To interpret the Kumo cloud and identify potential support and resistance levels in Swift programming, follow these steps:
- Look at the Kumo cloud: The Kumo cloud is formed by the area between Senkou Span A and Senkou Span B. If the cloud is thick, it indicates a strong support or resistance level. If the cloud is thin, it indicates a weak support or resistance level.
- Identify the direction of the cloud: If the cloud is moving upwards, it indicates a bullish trend and potential support levels. If the cloud is moving downwards, it indicates a bearish trend and potential resistance levels.
- Look for crossovers: When Senkou Span A crosses above Senkou Span B, it indicates a potential bullish signal and support level. When Senkou Span A crosses below Senkou Span B, it indicates a potential bearish signal and resistance level.
- Use the cloud as a reference point: Traders can use the Kumo cloud as a reference point to set stop-loss orders or take-profit targets. The cloud can also be used to gauge the strength of a trend and potential reversal points.
Overall, interpreting the Kumo cloud in Swift programming can help traders identify potential support and resistance levels and make informed trading decisions.