
Best Photo Scanners to Remove Scratches or Dust to Buy in July 2026
1 
Plustek Photo Scanner ePhoto Z300, Scans 4x6 inch Photos in 2 Seconds, Auto crop and deskew with CCD Sensor, Supports Mac and PC
- SCAN PHOTOS & DOCUMENTS IN JUST 2 TO 5 SECONDS-FAST & EFFICIENT!
- ENHANCE OLD IMAGES EFFORTLESSLY WITH POWERFUL RESTORATION TOOLS.
- COMPATIBLE WITH MAC & PC; VERSATILE SIZES UP TO 8X10 INCHES!
BUY & SAVE 

2 $219.99
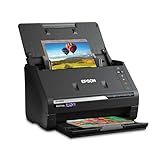
Epson FastFoto FF-680W Wireless High-Speed Photo and Document Scanning System, Black
- SCAN THOUSANDS OF PHOTOS AT 1 PER SECOND-SPEED UP YOUR MEMORIES!
- PRESERVE AND SHARE YOUR PHOTOS EASILY WITH POWERFUL EPSON FASTFOTO APP.
- FLEXIBLE SCANNING OPTIONS FOR ALL FORMATS; CAPTURE HANDWRITTEN NOTES TOO!
BUY & SAVE
3 $614.99
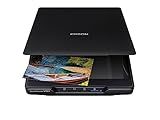
Epson Perfection V19 II Color Photo and Document Flatbed Scanner with 4800 dpi Optical Resolution, USB Power and High-Rise, Removable Lid
- STUNNING 4800 DPI CLARITY FOR PROFESSIONAL-QUALITY PHOTO ENLARGEMENTS.
- ONE-TOUCH SCANNING FOR QUICK AND EASY PHOTO AND DOCUMENT CAPTURE.
- TRANSFORM SCANS INTO EDITABLE DOCUMENTS AND SEARCHABLE PDFS EFFORTLESSLY.
BUY & SAVE
4 $89.99 $99.99
Save 10%
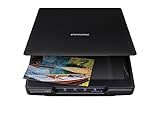
Epson - Perfection V39 II - Color Photo and Document Flatbed Scanner - 4800 dpi Optical Resolution - High-Rise, Removable Lid - Scan to Cloud - USB Power - Image Scanning - Black
- 4800 DPI CLARITY FOR STUNNING PHOTO ENLARGEMENTS AND DETAILS.
- COMPACT SCANNER FOR PHOTOS, DOCUMENTS, AND ARTWORK SCANNING.
- ONE-TOUCH SCANNING AND EASY RESTORATION FOR VIBRANT MEMORIES.
BUY & SAVE
5 $109.99 $129.99
Save 15%
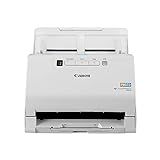
Canon imageFORMULA RS40 - Photo and Document Scanner, Auto Document Feeder, Windows and Mac, Scans Old and New Photos in Varying Sizes, USB Interface
- EFFORTLESSLY DIGITIZE PHOTOS FOR UNFORGETTABLE DIGITAL MEMORIES!
- FAST DUAL-SIDE SCANNING AT 40 ITEMS PER MINUTE – SAVE TIME!
- ENHANCE YOUR IMAGES WITH BUNDLED SOFTWARE FOR STUNNING RESULTS!
BUY & SAVE
6 $299.00
Canon Canoscan Lide 300 Scanner (PDF, AUTOSCAN, COPY, SEND)
- EFFORTLESS SCANNING WITH AUTO SCAN MODE FOR QUICK DETECTION.
- USB CONNECTIVITY FOR EASY SETUP AND FAST DATA TRANSFER.
- DIGITIZE DOCUMENTS AND IMAGES WITH HIGH CLARITY AND PRECISION.
BUY & SAVE
$75.20
+
ONE MORE?
A photo scanner cannot directly remove scratches or dust from photos. However, some advanced photo scanners have built-in features that can help improve the quality of scanned images, such as automatic dust and scratch removal. Additionally, editing software can be used to digitally remove scratches and dust from scanned photos.
How to properly store scanned photos to avoid scratches?
- Choose a storage option that is specifically designed for storing photos, such as photo albums, archival photo sleeves, or acid-free photo boxes.
- Handle the photos carefully when scanning them to avoid introducing scratches before they are even stored. Use clean hands or wear white cotton gloves to prevent oils and dirt from transferring to the photos.
- Ensure that the storage option you choose does not have any rough edges or abrasive materials that could scratch the photos.
- Store photos in a cool, dry place away from direct sunlight, as heat and humidity can cause photos to deteriorate and become more susceptible to scratches.
- Keep photos stored vertically to prevent them from bending or warping, which can also lead to scratches.
- Avoid stacking photos on top of each other, as this can lead to friction and scratching. If storing photos in a box, consider using archival tissue paper or acid-free dividers to separate individual photos.
- If you need to transport photos, place them in a protective sleeve or envelope to prevent them from rubbing against other items and getting scratched.
By following these tips, you can help ensure that your scanned photos remain in pristine condition and are protected from scratches.
How to scan photos in raw format for better scratch removal?
To scan photos in raw format for better scratch removal, follow these steps:
- Use a high-quality scanner: Make sure you are using a scanner that has a high resolution and good color accuracy to capture the details and colors of the photo accurately.
- Scan in raw format: When scanning the photo, select the raw format option if available. Raw format preserves more details and allows for better editing compared to JPEG or other compressed formats.
- Adjust the settings: Use the scanner settings to adjust the contrast, brightness, and sharpness of the scanned image. Make sure the image is well-lit and sharp to clearly see any scratches or imperfections.
- Use editing software: After scanning the photo, open it in photo editing software such as Adobe Photoshop or Lightroom. Use the spot healing brush tool or clone stamp tool to carefully remove scratches and imperfections from the scanned image.
- Save the edited image: Once you have removed all the scratches and imperfections, save the edited image in a high-quality format such as TIFF or PNG to preserve the details and colors of the photo.
By following these steps, you can scan photos in raw format and effectively remove scratches for better image quality.
What is the importance of scanning photos in high resolution?
Scanning photos in high resolution is important for several reasons:
- Preservation: Higher resolution scans capture more detail and can better preserve the quality of the original photo. This ensures that the image will remain clear and crisp over time, even if the physical photo degrades or is damaged.
- Printing: High resolution scans allow for larger print sizes without losing image quality. This is particularly important for making prints of photos to display or give as gifts.
- Editing: Higher resolution images provide more flexibility for editing, such as cropping, resizing, or enhancing the image without losing clarity or sharpness.
- Sharing: High resolution scans can be shared online or through digital devices without losing detail or resolution. This is important for sharing memories with others or for creating digital archives.
- Future-proofing: Scanning photos in high resolution future-proofs the images for advancements in technology, ensuring that they will remain usable and relevant as technology continues to evolve.