
Best Solar Flashlights to Buy in July 2026
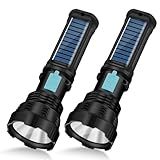
VOETIR Led Solar Flashlight, 1500 Lumens Led Solar Handheld Rechargeable Flashlights with IP65 Waterproof, 2000mAh Battery for Survival Emergencies Camping (2 Packs)
-
1500LM BRIGHTNESS: ILLUMINATE ANY SITUATION WITH POWERFUL 1500LM LIGHT.
-
POWER BANK FEATURE: RECHARGE YOUR DEVICES ON-THE-GO WITH USB OUTPUT.
-
DURABLE & WATERPROOF: IP65 RATED FOR RELIABLE USE IN HARSH CONDITIONS.


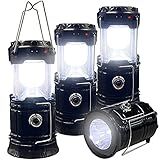
Collapsible Portable LED Camping Lantern XTAUTO Lightweight Waterproof Solar USB Rechargeable LED Flashlight Survival Kits for Indoor Outdoor Home Emergency Light Power Outages Hiking Hurricane 4-Pack
- 360° LIGHTING COVERAGE: ILLUMINATE ANY SPACE WITH ADJUSTABLE BRIGHTNESS.
- LIGHTWEIGHT & PORTABLE: COLLAPSIBLE DESIGN FOR EASY CARRYING EVERYWHERE.
- DURABLE & WATERPROOF: BUILT TO LAST OVER 25 HOURS, EVEN IN TOUGH CONDITIONS.
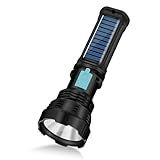
VOETIR Led Solar Flashlight, 1500 Lumens Led Solar Handheld Rechargeable Flashlights with IP65 Waterproof, 2000mAh Battery for Survival Emergencies Camping (1 Pack)
-
1500LM BRIGHTNESS: FOUR LIGHTING MODES FOR VERSATILE USE!
-
2000MAH BATTERY: UP TO 8 HOURS OF POWER + USB CHARGING FOR DEVICES!
-
DURABLE & WATERPROOF: BUILT TO LAST IN HARSH OUTDOOR CONDITIONS!
yeatem Solar Flashlight,Multifunctional Flashlight Solar Flashlight,led Flashlight Cell Phone Charger,USB Charging,Suitable for Home,Fishing,Outdoor Camping
- SOLAR & USB CHARGING: POWER UP ANYTIME, ANYWHERE WITH EASE!
- POWER INDICATOR: ALWAYS KNOW YOUR BATTERY STATUS WITH 4 LEVELS!
- IDEAL FOR OUTDOOR ADVENTURES: BRIGHT, COMPACT, AND EASY TO HOLD!
Simpeak 2-Pack Hand Crank Solar Powered Flashlight, Emergency Rechargeable LED Survival Flashlight, Quick Snap Carbiner Dynamo Flash Light Torch for Outdoor Sports, Green
-
CRANK FOR 10+ MINS OF LIGHT IN JUST 1 MINUTE, NO BATTERIES NEEDED!
-
SOLAR-POWERED BACKUP CHARGES FROM ANY LIGHT SOURCE FOR VERSATILITY.
-
RUGGED, ERGONOMIC GRIP AND PORTABLE DESIGN, PERFECT FOR OUTDOOR USE!
Ciwuzxs Solar/Rechargeable Flat Flashlights, 900 Lumens EDC Tactical Flashlight, Multi Function LED Small Flashlight, 7 Modes IP65 Waterproof for Home, Camping,and Emergency Use (Orange)
-
900 LUMENS & 7 MODES: BRIGHT LIGHT FOR ANY SITUATION, FROM STROBE TO LOW.
-
SOLAR & USB CHARGING: CHARGE FAST ON-THE-GO; PERFECT FOR OUTDOOR USE.
-
DURABLE & WATERPROOF: BUILT TOUGH WITH IP65 RATING FOR HARSH CONDITIONS.
2 Pack LED Rechargeable Flashlight - 20000 Lumens Super Bright Tactical Flash Light, Compact & Waterproof, Long-Lasting Battery, Solar Flashlights for Home, Camping,Hiking, Emergencies, Adventures
-
20,000 LUMENS: BRIGHTEST FLASHLIGHT FOR ANY ADVENTURE OR EMERGENCY.
-
4 VERSATILE MODES: ADAPT LIGHTING FOR ANY SCENARIO EFFORTLESSLY.
-
ECO-FRIENDLY CHARGING: SOLAR AND USB OPTIONS FOR HASSLE-FREE POWER.
Solar flashlights are designed to harness sunlight through photovoltaic cells to charge their internal batteries. However, they can sometimes be charged without direct sunlight using alternative light sources, though with varying efficiency. Indoor lighting, such as incandescent or LED bulbs, can provide some charge to the batteries, albeit much slower than direct sunlight. The charging effectiveness largely depends on the type and intensity of the artificial light. It's worth noting that prolonged exposure to artificial lighting may not fully charge the flashlight or could take significantly more time compared to natural sunlight. In some cases, solar flashlights may also include an alternative charging method, such as a USB port or a hand-crank mechanism, offering more reliable options when sunlight is unavailable.
How can you test the effectiveness of a solar flashlight?
Testing the effectiveness of a solar flashlight involves evaluating its performance in various conditions to ensure it meets your needs. Here’s a step-by-step guide:
- Initial Inspection: Check the build quality and overall design for durability. Inspect the solar panel for any visible defects or dirt.
- Charging Efficiency: Place the solar flashlight under direct sunlight for the recommended charging time as per the manufacturer's instructions. Note the time taken to reach a full charge.
- Battery Performance: Test if the flashlight can hold a charge when not in use. Leave it uncharged for a few days to simulate real-world storage conditions and then test its ability to turn on. Measure the duration the flashlight can stay lit on a full charge. Compare this to the manufacturer's specifications.
- Brightness and Light Quality: Assess the brightness using a lux meter or by comparing it to another flashlight with a known brightness level. Test the light quality for evenness and color temperature.
- Functionality Check: Test all available modes (e.g., full beam, half beam, strobe) to ensure they function correctly. Try out any additional features, such as emergency beacons or adjustable beams.
- Performance in Low Sunlight: Test charging efficiency under varying light conditions, such as cloudy days or partial shade, to see how it performs with less sunlight.
- Durability Test: If possible, subject the flashlight to different weather conditions or perform drop tests to evaluate its resilience.
- Ease of Use: Ensure that controls, like switches or modes, are easily accessible and intuitive. Evaluate the weight and design for ease of handling and portability.
- Comparison with Alternatives: Compare the solar flashlight with other similar products to determine its competitiveness in terms of price, features, and performance.
- User Feedback: Gather feedback from multiple users to understand their experiences and any unforeseen issues that might arise during typical use.
By conducting these tests, you can effectively evaluate the performance and reliability of a solar flashlight, ensuring it meets your expectations and requirements.
How do portable solar panels aid in charging flashlights?
Portable solar panels can be an efficient way to charge flashlights, especially when you're outdoors or in a situation where traditional power sources are unavailable. Here's how they facilitate the charging process:
- Harnessing Solar Energy: Portable solar panels convert sunlight into electrical energy using photovoltaic cells. This clean and renewable energy source is particularly useful in outdoor settings or during emergencies.
- Connection to Flashlights: Many modern flashlights come with rechargeable batteries and USB charging ports. Portable solar panels often include USB outputs, allowing you to connect your flashlight directly to the panel via a USB cable. Some flashlights may require an adapter depending on the connection type.
- Battery Packs: If your flashlight uses removable rechargeable batteries (like AA or 18650 lithium-ion batteries), you can use a solar charger with a built-in battery pack or a separate solar battery charger compatible with those battery types.
- Charge Controllers: Some portable solar panels come equipped with charge controllers to regulate the voltage and current, ensuring your flashlight or its batteries receive a consistent and safe charge. This helps prevent overcharging and potential damage.
- Portability and Efficiency: Portable panels are designed to be lightweight and compact, making them easy to carry during camping trips or outings. They provide a versatile and efficient method to recharge flashlights, ensuring you have light when you need it.
- Energy Storage: If direct charging isn't possible, some portable solar panels come with a built-in battery or can be used with an external battery pack. This allows you to store energy during sunny periods and use it to charge your flashlight later.
By leveraging these features, portable solar panels offer a practical and eco-friendly solution for keeping flashlights charged, enhancing convenience and preparedness in various situations.
What is the optimal angle for positioning a solar flashlight for charging?
To optimize the charging of a solar flashlight, the solar panel should be positioned at an angle that maximizes its exposure to direct sunlight. This angle can vary depending on your geographical location and the time of year, but here are some general guidelines:
- Latitude-Based Angle: A common rule of thumb is to set the solar panel at an angle equal to your latitude. For example, if you are at a latitude of 40 degrees, tilt the solar panel at a 40-degree angle from horizontal.
- Seasonal Adjustments: Summer: Decrease the tilt angle by about 10-15 degrees from your latitude to capture more of the higher sun angles. Winter: Increase the tilt angle by about 10-15 degrees to account for the lower sun angle.
- Direct Sunlight: Position the panel so it faces true south in the northern hemisphere and true north in the southern hemisphere to maximize sun exposure throughout the day.
- Avoiding Shadows: Ensure that the panel is not shaded by trees, buildings, or other obstructions during daylight hours.
By following these guidelines, you can ensure that your solar flashlight charges effectively throughout the year.
How long does it take to charge a solar flashlight without direct sunlight?
Charging a solar flashlight without direct sunlight can take significantly longer compared to charging it in direct sunlight. It depends on factors like the efficiency of the solar panel, the intensity and type of available ambient light, and the battery’s capacity.
In typical indoor lighting conditions, such as in a well-lit room, charging might be very slow or even negligible, potentially taking days or not charging at all, depending on the amount of light available.
For indirect outdoor light-such as on a cloudy day or in shaded areas-it might take several times longer than in direct sunlight, which typically requires about 6-12 hours for a full charge, depending on the specific device.
For the best results, it's advisable to place the solar flashlight in a location where it receives as much light as possible and to periodically check its charging status.