
Best Photo Scanners to Buy in July 2026
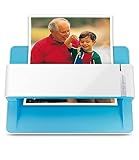
Plustek Photo Scanner ePhoto Z300, Scans 4x6 inch Photos in 2 Seconds, Auto crop and deskew with CCD Sensor, Supports Mac and PC
- FAST SCANNING: DIGITIZE PHOTOS IN JUST 2 SECONDS EACH AT 300 DPI!
- VERSATILE SUPPORT: SCANS VARIOUS PHOTO AND DOCUMENT SIZES WITH EASE.
- IMAGE ENHANCEMENT: RESTORE FADED IMAGES WITH POWERFUL ONE-CLICK TOOLS!


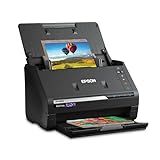
Epson FastFoto FF-680W Wireless High-Speed Photo and Document Scanning System, Black
- LIGHTNING-FAST SCANNING: SCAN THOUSANDS OF PHOTOS AT 1 PER SECOND!
- PRESERVE & SHARE MEMORIES: RESTORE AND ORGANIZE PRICELESS PHOTOS WITH EASE.
- SMART SHARING FEATURES: ADD VOICE/TEXT TO PHOTOS DIRECTLY VIA THE APP!

Digital Film & Photo Scanner – Converts 35mm/135 Slides, Negatives & 3.5x5, 4x6, 5x7 Photos to 22MP JPEG – Slide & Negative Scanner with 2.4" LCD, 4GB SD Card
-
CONVERT OLD MEMORIES TO 22MP JPGS-PRESERVE FAMILY ARCHIVES EASILY.
-
STANDALONE SCANNING IN JUST 3 SECONDS-FAST AND USER-FRIENDLY.
-
LIVE PREVIEW AND ADJUSTMENTS FOR PERFECT SCANS EVERY TIME.
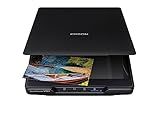
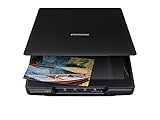
Epson Perfection V19 II Color Photo and Document Flatbed Scanner with 4800 dpi Optical Resolution, USB Power and High-Rise, Removable Lid
- 4800 DPI RESOLUTION FOR STUNNING PHOTO ENLARGEMENTS!
- EASY ONE-TOUCH SCANNING FOR QUICK, EFFICIENT USE!
- COMPACT, USB-POWERED DESIGN FOR ULTIMATE PORTABILITY!
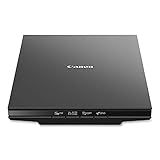
Canon Canoscan Lide 300 Scanner (PDF, AUTOSCAN, COPY, SEND)
- AUTO SCAN MODE: EFFORTLESSLY DETECTS AND SCANS DOCUMENTS.
- USB CONNECTIVITY: SIMPLE PLUG-AND-PLAY FOR INSTANT USE.
- DIGITIZE DOCUMENTS AND IMAGES FOR EASY STORAGE AND SHARING.
Epson - Perfection V39 II - Color Photo and Document Flatbed Scanner - 4800 dpi Optical Resolution - High-Rise, Removable Lid - Scan to Cloud - USB Power - Image Scanning - Black
- CAPTURE STUNNING CLARITY WITH 4800 DPI OPTICAL RESOLUTION FOR ENLARGEMENTS.
- VERSATILE SCANNING FOR PHOTOS, DOCUMENTS, AND ARTWORK IN ONE COMPACT DEVICE.
- RESTORE AND ENHANCE MEMORIES EFFORTLESSLY WITH ONE-CLICK PHOTO FIX TECHNOLOGY.
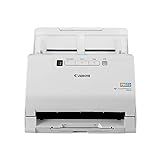
Canon imageFORMULA RS40 - Photo and Document Scanner, Auto Document Feeder, Windows and Mac, Scans Old and New Photos in Varying Sizes, USB Interface
- DIGITIZE AND SHARE MEMORIES EFFORTLESSLY WITH OUR FAST SCANNING TECHNOLOGY!
- BUNDLE SOFTWARE ENHANCES IMAGES AND SIMPLIFIES DOCUMENT MANAGEMENT.
- VERSATILE FORMATS AND COMPATIBILITY FOR ALL PHOTO AND DOCUMENT TYPES!

ScanSnap iX2500 Wireless or USB High-Speed Cloud Enabled Document, Photo & Receipt Scanner with Large 5" Touchscreen and 100 Page Auto Document Feeder for Mac or PC, Black
- FAST 45PPM SCANNING: EFFICIENTLY DIGITIZE WITH DOUBLE-SIDED SCANS.
- CUSTOM PROFILES & QUICK MENU: EASILY SHARE AND MANAGE SCANS.
- WI-FI 6 CONNECTIVITY: SECURELY CONNECT TO SMART DEVICES AND CLOUDS.
To ensure the best quality scans when using a photo scanner, there are a few key things to keep in mind. First, make sure that the scanner bed is clean and free of dust or debris that could impact the clarity of the scan. Next, adjust the settings on the scanner to ensure that the resolution is set to its highest possible setting for the best image quality. Additionally, make sure that the photo is placed flat on the scanner bed and that the scanner lid is closed completely to prevent any light leaks that could affect the scan. Finally, consider using editing software to touch up the scanned image and enhance its quality if necessary. Following these steps will help you achieve the best quality scans when using a photo scanner.
How do I properly handle delicate photos while scanning?
- Make sure your scanning surface is clean and free of any debris that could scratch or damage the photos.
- Use a scanner with a flatbed or photo scanning mode to ensure that the photos are safely and securely held in place during the scanning process.
- Handle the photos with clean hands to avoid transferring oils or dirt onto them.
- If the photos are particularly delicate, consider using a protective sleeve or paper when inserting them into the scanner.
- Adjust the scanning settings to ensure the best quality scan without damaging the original photos.
- If the photos are very old or fragile, consider consulting a professional scanning service that specializes in handling delicate documents and images.
- After scanning, carefully remove the photos from the scanner and store them in a safe place to prevent damage or loss.
What is the best file format for high-quality scans?
The best file format for high-quality scans is generally considered to be TIFF (Tagged Image File Format). TIFF files are uncompressed, allowing for the full detail and color depth of the scanned image to be preserved. Additionally, TIFF files are lossless, meaning that no information is lost during the scanning process. This makes TIFF an ideal choice for professionals and those who require the highest quality scans.
How do I optimize scanning settings for black and white photos?
Here are some tips to optimize scanning settings for black and white photos:
- Set the resolution: For most black and white photos, a resolution of 300-600 DPI (dots per inch) should be sufficient. Higher resolutions may be necessary for very detailed or large photos.
- Choose the appropriate color mode: Select the grayscale or black and white option in the scanning software to ensure accurate reproduction of the tones in the photo.
- Adjust the brightness and contrast: Use the scanning software to adjust the brightness and contrast settings to enhance the details and tones in the image.
- Remove dust and scratches: Use the dust and scratch removal feature in the scanning software to clean up any imperfections on the photo.
- Save as a TIFF or JPEG file: Save the scanned black and white photo as a TIFF or JPEG file to preserve the quality of the image.
By following these tips, you can optimize the scanning settings for black and white photos and ensure that you capture all the details and tones accurately.