Best Animation Integration Tools to Buy in July 2026
PRIMBEEKS Premium Blank Flip Book Paper, 4 pack(90 sheets, 180 pages per pack) No Bleed Flip Books Kit, 4.5" x 2.5" Animation Paper for Animation, Sketching, Cartoon Creation
- UNLEASH CREATIVITY: DRAW ANYTHING FROM SUPERHEROES TO MAGICAL SCENES!
- COMPATIBLE WITH ALL TOOLS: USE MARKERS, PENS, AND MORE WITHOUT BLEED.
- PERFECT GIFT: IDEAL FOR KIDS AND ADULTS, PORTABLE FOR ON-THE-GO FUN!


LitEnergy A4 LED Copy Board Light Tracing Box, Adjustable USB Power Artcraft LED Trace Light Pad for Tattoo Transferring, Drawing, Sketching, Animation, Stenciling, Diamond Art Painting Accessories
- LIGHTWEIGHT AND ULTRA-SLIM DESIGN FOR EASY PORTABILITY ANYWHERE!
- CUSTOMIZE BRIGHTNESS WITH A SIMPLE TOUCH FOR PERFECT VISIBILITY.
- FLICKER-FREE LED ENSURES EYE COMFORT DURING LONG CREATIVE SESSIONS.
Polymer Clay 50 Colors, Modeling Clay for Kids DIY Starter Kits, Oven Baked Model Clay, Non-Sticky Molding Clay with Sculpting Tools, Gift for Children and Artists (50 Colors)
-
50 VIBRANT COLORS FOR ENDLESS CREATIVITY AND ARTISTIC EXPRESSION!
-
SAFE, NON-TOXIC POLYMER CLAY MEETS ASTM D-4236 STANDARDS.
-
EASY-TO-USE METHODS FOR MOLDING: BAKE, HEAT, OR CREATE!
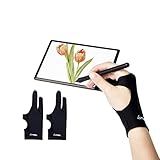
Digital Drawing Glove 2 Pack,Artist Glove for Drawing Tablet,ipad,Sketching,Art Glove with Two Finger for Right Hand and Left Hand (Smudge Guard, Medium,3.15x8.58inch
- ENHANCED COMFORT: FIXED DESIGN PREVENTS PALM STAINS FOR FOCUSED CREATING.
- VERSATILE USE: PERFECT FOR ALL ART STYLES-TABLETS, SKETCHING, PAINTING!
- SMOOTH GLIDE: REDUCES FRICTION FOR EFFORTLESS HAND MOVEMENT ON SCREENS.
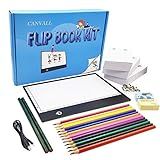
Canvall Flipbook Set for Drawing and Tracing Animation, Include: A5 LED Light Box, 540 Pages Animated Loose-Leaf Paper, 2 HB +12 Colored Drawing Pencils, Pencil Sharpener, Eraser and Screwdriver
-
COMPLETE KIT FOR ARTISTS: LIGHT PAD, 540 PAGES, AND COLORED PENCILS.
-
LIGHTWEIGHT, FLICKER-FREE LED LIGHT BOX PROTECTS YOUR EYES WHILE YOU CREATE.
-
UNLIMITED CREATIVITY WITH VERSATILE FLIPBOOK PAPER AND BINDING OPTIONS.
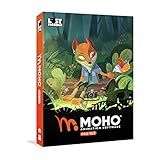
Moho Pro 13.5 | The all-in-one animation tool for professionals and digital artists | Software for PC and Mac OS
- SEAMLESS INTEGRATION WITH PHOTOSHOP PSD FOR EASY CHARACTER ANIMATION.
- ADVANCED RIGGING SYSTEM: SMART BONES, FK/IK, AND SHY BONES INCLUDED!
- CREATE 3D-LIKE EFFECTS IN 2D WITH MESH SIMULATIONS AND AUTOMATION TOOLS.
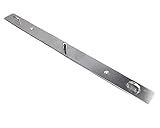
Honbay Comic Tool Stainless Steel Ruler Fixed Paper Feet for Fixing Animation Position Paper
- DURABLE STAINLESS STEEL FOR LONG-LASTING PERFORMANCE.
- THREE-HOLE DESIGN ENSURES STABLE PAPER POSITIONING.
- PERFECT FOR KEEPING ANIMATION REFERENCE PAPER FIXED.
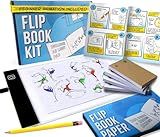
Flip Book Kit with LED Light Pad. Includes 240 Sheets Flip Book Paper with Screws for Drawing and Tracing. Animation Paper/Blank Flip Books for A5 Flipbook Kit for Kids 9-12 6-8. LED Light Box
- COMPLETE ANIMATION SET: LIGHTPAD, FLIPBOOK PAPER & BINDING INCLUDED!
- ADJUSTABLE LED LIGHT BOX: PERFECT FOR TRACING WITH HIGH QUALITY!
- ENDLESS FUN: EASY INSTRUCTIONS FOR KIDS’ CREATIVE FLIPBOOK PROJECTS!
To add wow.js/animate.css on Shopify, you will first need to download the wow.js and animate.css files from their official websites. Once you have downloaded these files, you can upload them to your Shopify theme's assets folder. Next, you will need to include the link to these files in your theme's liquid template files. This can be done by adding the necessary script and link tags to your theme's HTML file. Once you have added the necessary code, you should be able to use the wow.js/animate.css animations on your Shopify website.
What is the best way to include wow.js/animate.css in a Shopify theme?
To include wow.js and animate.css in a Shopify theme, follow these steps:
- Download the latest version of wow.js and animate.css from their respective GitHub repositories or CDN links.
- Upload the downloaded files to your theme's assets folder. You can do this by navigating to "Online Store" > "Themes" > "Actions" > "Edit code" and then uploading the files to the assets folder.
- Once you have uploaded the files, you will need to add the necessary code to your theme's layout file. Open the theme.liquid file in the "Layout" folder and add the following code before the closing tag:
- Next, add the following code before the closing tag to load wow.js and initialize it:
- You can now use wow.js and animate.css classes in your theme files to animate elements. For example, you can add the "wow" class to an element and one of the animate.css classes to trigger the animation.
That's it! You have successfully included wow.js and animate.css in your Shopify theme. Remember to customize the animations and styling as per your requirements.
What is the difference between wow.js/animate.css and other animation libraries for Shopify?
The main difference between wow.js/animate.css and other animation libraries for Shopify is their target audience and focus.
wow.js/animate.css are primarily front-end libraries specifically designed for adding animation effects to websites, allowing for smoother and more visually appealing user experiences. These libraries provide a range of pre-built animation effects that can easily be integrated into a Shopify website with minimal coding knowledge required.
On the other hand, other animation libraries for Shopify may have a broader focus and offer a wider range of features beyond just adding animations. They may also provide tools for creating custom animations, optimizing website performance, and managing animations across multiple pages or elements on a Shopify website. These libraries may require a deeper understanding of coding and web development to fully utilize their capabilities.
In summary, wow.js/animate.css are user-friendly animation libraries aimed at enhancing the visual appeal of Shopify websites, while other animation libraries may offer a wider range of features and require more technical expertise to implement.
What are the system requirements for running wow.js/animate.css on a Shopify store?
To run wow.js/animate.css on a Shopify store, the system requirements are as follows:
- The Shopify theme must allow for custom code editing and integration of external libraries.
- The theme must support JavaScript and CSS customization.
- The Shopify store must have access to the HTML/CSS/JavaScript files for the theme.
- The store must have a basic understanding of coding and integration of external libraries.
- The store must have a reliable internet connection to load the wow.js/animate.css files from the external source.
- The device used to access the store (such as a computer, tablet, or smartphone) must support JavaScript and CSS animations.
Overall, as long as the above requirements are met, wow.js/animate.css should be able to run smoothly on a Shopify store.
How to customize wow.js/animate.css effects on Shopify?
To customize wow.js/animate.css effects on Shopify, you can follow these steps:
- Add wow.js and animate.css to your Shopify theme:
- First, you need to include the wow.js and animate.css libraries in your theme files. You can add the necessary CDN links to the head section of your theme.liquid file or download the libraries and add them to your theme assets folder.
- Initialize wow.js in your theme:
- To initialize the wow.js library, you need to add a script tag with the initialization code to your theme files. You can add this script to your theme.liquid file or create a new JavaScript file and include it in your theme.
- Customize the animations:
- Once you have added wow.js and animate.css to your theme, you can customize the animations by adding custom classes or modifying the existing ones. You can adjust the animation duration, delay, easing function, and other properties by editing the CSS styles or JavaScript code.
- Apply animations to specific elements:
- To apply the animations to specific elements on your Shopify store, you can add the "wow" class to the elements you want to animate. You can also use data attributes such as data-wow-delay and data-wow-offset to further customize the animations.
- Test and refine:
- After customizing the wow.js/animate.css effects on your Shopify store, make sure to test the animations on different devices and screen sizes to ensure that they work properly. You may need to refine the animations further based on your testing results.
By following these steps, you can easily customize wow.js/animate.css effects on Shopify and create engaging and visually appealing animations for your store.