
Best Logitech Mouse Accessories to Buy in July 2026
![HOTLINEGAMES [Grip Upgrade] 2.0 Plus Mouse Anti Slip Grip Tape Compatible with Logitech G PRO Wireless Gaming Mouse Skins,Sweat Resistant,Cut to Fit,Easy Apply,Pro Performance Upgrade](https://cdn.blogweb.me/1/513f_Ik_A_Xgr_L_SL_160_e379bc8ad3.jpg)
HOTLINEGAMES [Grip Upgrade] 2.0 Plus Mouse Anti Slip Grip Tape Compatible with Logitech G PRO Wireless Gaming Mouse Skins,Sweat Resistant,Cut to Fit,Easy Apply,Pro Performance Upgrade
-
ENHANCES GRIP FOR IMPROVED CONTROL IN EVERY GAME SESSION.
-
SPECIALIZED DESIGN OFFERS PERFECT FIT FOR RAZER GAMING MICE.
-
SUPERIOR WATER ABSORPTION ENSURES CONSISTENT, SLIP-FREE PERFORMANCE.
![HOTLINEGAMES [Grip Upgrade] 2.0 Plus Mouse Anti Slip Grip Tape Compatible with Logitech G PRO Wireless Gaming Mouse Skins,Sweat Resistant,Cut to Fit,Easy Apply,Pro Performance Upgrade](https://cdn.flashpost.app/flashpost-banner/brands/amazon.png)
![HOTLINEGAMES [Grip Upgrade] 2.0 Plus Mouse Anti Slip Grip Tape Compatible with Logitech G PRO Wireless Gaming Mouse Skins,Sweat Resistant,Cut to Fit,Easy Apply,Pro Performance Upgrade](https://cdn.flashpost.app/flashpost-banner/brands/amazon_dark.png)

Superglide Glass Mouse Skates for Logitech G Pro X Superlight 2 (Type-C, Black) - Polished Smooth Glide, Durable Gaming Mouse Feet
-
EXPERIENCE UNMATCHED SPEED WITH OUR REVOLUTIONARY MICRO-SURFACED TEXTURE.
-
ENJOY LASTING DURABILITY; TEMPERED GLASS OUTLASTS TRADITIONAL MOUSE FEET.
-
ACHIEVE THE SMOOTHEST GLIDE WITH OUR PERFECTLY POLISHED ROUND EDGE DESIGN.
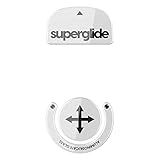
Superglide Glass Mouse Skates for Logitech G Pro X Superlight (Type-S, White) - Ultra Smooth Glide, Polished Round Edge, Compatible with G Pro Superlight 2, Superlight Mouse Skates
- ALUMINOSILICATE GLASS ENSURES PRECISE MICRO AIMING AND TRACKING.
- ULTRA-DURABLE DESIGN LASTS LONGER THAN TRADITIONAL MOUSE FEET.
- POLISHED ROUND EDGES DELIVER THE SMOOTHEST GLIDE FOR GAMERS.
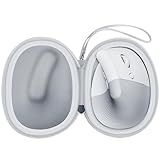
ANKHOH Case for Logitech Lift Vertical Ergonomic Mouse, Travel Carrying Holder Storage Box for Logi Wireless Bluetooth Cordless Upright Mouse - Bag Only (Grey)
- TAILORED FIT FOR LOGITECH LIFT VERTICAL MOUSE-PERFECT SIZE STORAGE!
- DURABLE, WATERPROOF CASE-PROTECTS YOUR MOUSE FROM SCRATCHES & DAMAGE.
- LIGHTWEIGHT DESIGN WITH DETACHABLE HANDLE-IDEAL FOR TRAVEL & DAILY USE.

Soarking Charging Dock for Logitech Computer Mouse G Pro X Superlight 2/1,G502/G502X/G502X Plus Lightspeed,G703,G903 Lightspeed and G PRO Computer Mice Powerplay Charging System
- UNIVERSAL COMPATIBILITY: FITS ALL LOGITECH LIGHTSPEED MICE MODELS.
- SPACE-SAVING DESIGN: COMPACT SIZE FOR EASY TRAVEL AND HOME USE.
- NON-SLIP FEATURE: STAYS SECURELY IN PLACE WITHOUT RESIDUE.
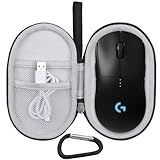
Mouse Case for Logitech G PRO X Superlight 2/2 DEX/ 2c for X Superlight for Pro 2 Lightspeed Wireless/Wired Gaming Mouse (Case Only) (Black-Grey)
- PERFECT FIT DESIGNED FOR LOGITECH G PRO X SUPERLIGHT & PRO 2 MODELS.
- HIGH-QUALITY BUILD OFFERS SHOCK AND WATER RESISTANCE FOR LASTING PROTECTION.
- CONVENIENT STORAGE POCKET AND EASY-ACCESS ZIPPER FOR ACCESSORIES.

IMMOENUC Mouse Grip Tape Sticker for Logitech G305/G304/G203/G102 Wireless Mouse Anti Slip Skin Self-Adhesive,Pre-Cut,Sweat-Resistant Game Mice Accessories(Earth Pattern)
-
ANTI-SLIP TEXTURE BOOSTS GRIP AND STABILIZES YOUR GAME!
-
RESIDUE-FREE ADHESIVE ENSURES NO MESS AFTER LONG-TERM USE.
-
PRECISION CUT FOR PERFECT FIT ON LOGITECH G305/G304/G203/G102!
![[Grip Upgrade] HOTLINEGAMES 2.0 Plus Mouse Anti Slip Grip Tape Compatible with Logitech MX Master 3 / 3S Gaming Mouse Skins, Sweat Resistant, Cut to Fit, Easy to Apply, Professional Mice Upgrade](https://cdn.blogweb.me/1/5175_H4_G_Whs_L_SL_160_c04abebcce.jpg)
[Grip Upgrade] HOTLINEGAMES 2.0 Plus Mouse Anti Slip Grip Tape Compatible with Logitech MX Master 3 / 3S Gaming Mouse Skins, Sweat Resistant, Cut to Fit, Easy to Apply, Professional Mice Upgrade
- ENHANCE GAMING PRECISION WITH ANTI-SLIP, SWEAT-ABSORBING TAPE.
- CUSTOM-FIT FOR LOGITECH MX MASTER 3/3S, PERFECT GRIP GUARANTEED.
- DURABLE, EASY TO INSTALL, AND RESIDUE-FREE FOR HASSLE-FREE USE.
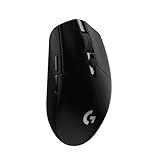
Logitech G305 LIGHTSPEED Wireless Gaming Mouse, Hero 12K Sensor, 12,000 DPI, Lightweight, 6 Programmable Buttons, 250h Battery Life, On-Board Memory, PC/Mac - Black
-
LIGHTWEIGHT DESIGN: MANEUVER EASILY WITH JUST 99 GRAMS FOR DYNAMIC GAMEPLAY.
-
LIGHTSPEED WIRELESS: ENJOY LAG-FREE PERFORMANCE WITH 1MS REPORT RATE.
-
ULTRA-LONG BATTERY LIFE: PLAY 250 HOURS NONSTOP WITH A SINGLE AA BATTERY.
kwmobile Mouse Grip Tape Compatible with Logitech MX Master 3S Grip Tape - Non-Slip Faux Leather - White
-
PERFECT FIT FOR LOGITECH MX MASTER 3S ENHANCES GAMEPLAY PERFORMANCE.
-
ANTI-SLIP GRIP ENSURES PRECISION FOR SERIOUS GAMERS' CONTROL.
-
EASY, TOOL-FREE INSTALLATION WITH STRONG ADHESIVE FOR LASTING USE.
To adjust the polling rate on a Logitech mouse, you can follow these steps:
- Start by installing Logitech's mouse software, known as Logitech G HUB or Logitech Gaming Software, on your computer. You can download this software from Logitech's official website.
- Once the software is installed, launch it and ensure that your Logitech mouse is connected to your computer.
- In the G HUB or Gaming Software interface, locate the mouse section or tab. This may vary slightly depending on the version of the software you are using.
- Look for the polling rate option. It is usually displayed as a slider or a drop-down menu. The polling rate determines how frequently the mouse updates its position to the computer. A higher polling rate means more frequent updates.
- Adjust the polling rate according to your preference. You may be able to choose from several options, such as 125Hz, 250Hz, 500Hz, or 1000Hz. The highest polling rate available will depend on your specific mouse model.
- Once you have selected the desired polling rate, click on the "Apply" or "OK" button to save the changes.
- You can test the new polling rate by moving the mouse around and observing the mouse cursor movement on your computer screen. If the response feels smoother or more sensitive, the new polling rate has been successfully applied.
Remember that not all Logitech mice support polling rate adjustments, especially those designed for general use rather than gaming. Additionally, bear in mind that higher polling rates can consume more system resources, so choose a rate that suits your needs while considering the potential impact on your computer's performance.
How to change the polling rate on a Logitech wireless mouse?
To change the polling rate on a Logitech wireless mouse, you can follow these steps:
- Open the Logitech G HUB software on your computer. If you don't have it, you can download and install it from the Logitech website.
- Once you open the software, you should see a list of connected Logitech devices. Find and click on your Logitech wireless mouse model.
- On the left-hand side of the software, you will find various options and settings for your mouse. Look for the "DPI & Polling Rate" or similar option and select it.
- In the DPI & Polling Rate settings, you will find an option to adjust the polling rate. The polling rate determines how frequently the mouse reports its position to the computer. The standard polling rate is usually set at 1000Hz (1ms). You can typically choose between different polling rate options such as 125Hz, 250Hz, 500Hz, and 1000Hz.
- Select the desired polling rate from the available options. Generally, higher polling rates provide more responsive and smoother mouse movement, but they may also consume more power.
- Once you've selected the polling rate, click on the "Apply" or "OK" button to save the changes.
Note: The steps mentioned above may vary slightly depending on the Logitech mouse model or software version you are using. However, most Logitech wireless mice can be configured using the Logitech G HUB software.
How to adjust the polling rate on an older Logitech mouse model?
To adjust the polling rate on an older Logitech mouse model, you can follow the steps outlined below:
- Download and install the Logitech Gaming Software (LGS) from the Logitech website. Make sure to select the version appropriate for your operating system.
- Connect your Logitech mouse to your computer using the USB cable.
- Launch the Logitech Gaming Software on your computer.
- In the LGS interface, locate and select your connected Logitech mouse model from the list of devices.
- Once your mouse is selected, click on the "Settings" tab or a similar option that allows you to access the mouse settings.
- Within the settings, locate the polling rate option, which may be named differently depending on your mouse model or software version.
- Adjust the polling rate to your preferred value. Older Logitech mouse models usually have limited options for polling rate adjustment. The available options are commonly 125Hz (8ms), 250Hz (4ms), 500Hz (2ms), and 1000Hz (1ms).
- Save the changes made to the polling rate settings.
- Close the Logitech Gaming Software.
Your mouse should now be set to your desired polling rate. Keep in mind that not all Logitech mouse models allow users to adjust the polling rate, especially the older models. It is advisable to refer to the product documentation or check Logitech's website for specific information on your mouse model's capabilities.
What is a polling rate on a Logitech mouse?
The polling rate refers to the frequency at which the mouse reports its position to the computer. It indicates the number of times the mouse's sensor updates and sends information to the computer per second. A higher polling rate means that the mouse's position is updated more frequently, resulting in smoother cursor movement and more responsive tracking. Logitech mice often include adjustable polling rates, typically ranging from 125Hz (8ms) to 1000Hz (1ms).