
Best Gradient Tools and Resources to Buy in July 2026
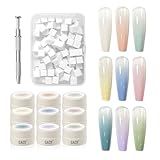
GAOY Ombre Gel Nail Polish Kit, 9 Colors UV LED Painting Gel with Sponges, Long-lasting Soak Off Pigmented Colors, Beginner Friendly Gradient & Aura Nail Art Set for Home & Salon Use, Melted Gelato
- EFFORTLESS COLOR BLENDING: PERFECT GEL CONSISTENCY FOR SMOOTH GRADIENTS!
- NO MESS, NO FUSS: SPONGE APPLICATION ELIMINATES CLEANUP AND BRUSHES!
- VERSATILE NAIL ART: CREATE STUNNING DESIGNS WITH MULTIPLE TECHNIQUES EASILY!


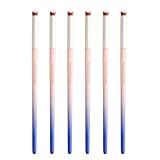
HYWWPFLAY 6pieces Ombre Nail Brush Wood Nail Pen Ombre Brush for Gel Nails Nail Gradient Brush Nail Design Brushes Nail Painting Kit Nail Art Tools Acrylic Nail Accessories
- COMPLETE SET: 6 OMBRE BRUSHES FOR STUNNING NAIL ART CREATIVITY.
- PREMIUM QUALITY: SOFT NYLON BRISTLES ENSURE FLAWLESS APPLICATION EVERY TIME.
- PERFECT FOR EVERYONE: IDEAL FOR SALONS OR DIY NAIL ART AT HOME.

GAOY Cushion Ombre Painting Gel Kit, 6 Colors Gradient Patting Gel Polish with Sponges and Grabber Tool, for Ombre Nails Aura Blush Blend Nail Art Home & Salon Use, Pigmented No Wipe, Blush Girl
-
ACHIEVE SEAMLESS OMBRE NAILS EFFORTLESSLY WITH OUR AIR CUSHION GEL.
-
2-IN-1 CAP DESIGN ENSURES EASY APPLICATION AND MESS-FREE STORAGE.
-
QUICK-DRYING FORMULA CURES IN JUST 30 SECONDS FOR LONG-LASTING RESULTS.

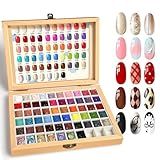
GZIXBDA Sponge Mini Paint Patting Gel Polish & Tools Kit, 57 Colors Ombre Nail Gradient Painting Gel Blush Blooming for Pigment Pat Aura Nails, French Manicure
- 57 TRENDY SHADES: CREATE ENDLESS NAIL ART WITH VIBRANT GEL COLORS.
- EFFORTLESS BLENDING: SMOOTH APPLICATION FOR PROS AND DIY ENTHUSIASTS ALIKE.
- PORTABLE PALETTE: MIX CUSTOM SHADES FOR UNIQUE DESIGNS ON THE GO!
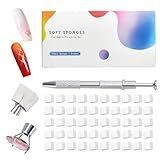
Karroy 100Pcs Soft Sponges for Ombre Painting Gel with Grabber, Professional Accessories for Ombre Gradient Painting Nail Gel Kit, Manicure DIY Tools (100PCS Sponges & Grabber)
-
PERFECT GIFT FOR NAIL ART LOVERS - INCLUDES 100 SPONGES & GRABBER PEN!
-
SMART GRABBER PEN - NON-SLIP, LONG-LASTING, AND EASY TO CLEAN!
-
SIMPLE USE FOR STUNNING NAILS - EFFORTLESSLY CREATE OMBRE DESIGNS!
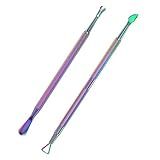
Cuticle Pusher Nail Polish Remover Stainless Steel Manicure Tool Set Gel Nail Polish Peeler Scraper Nail Care Stick Pedicure Kit for Fingernail and Toenail, opove P1, Color Gradient…
- HIGH-QUALITY STAINLESS STEEL FOR DURABILITY AND PRECISION CARE.
- ERGONOMIC DESIGN ENSURES COMFORT AND A SECURE, NON-SLIP GRIP.
- VERSATILE TOOL FOR CUTICLE CARE AND GEL POLISH REMOVAL; LIFETIME COVERAGE.
GZIXBDA Sponge Paint Patting Gel Polish & Tools Kit, 57 Colors Ombre Nail Gradient Painting Gel Blush Blooming for Pigment Pat Aura Nails, French Manicure
- 57 TRENDY SHADES: CREATE UNIQUE NAIL ART WITH VIBRANT GEL COLORS.
- BEGINNER TO PRO: PERFECT FOR ALL SKILL LEVELS; ENDLESS DESIGN POSSIBILITIES!
- LONG-LASTING FORMULA: NO-WIPE COLOR WITH SMOOTH APPLICATION FOR DURABILITY.

Beetles Blooming Gel and Nail Art Brushes Set - Ombre Nail Brush Gradient Stipple Clean Up Fingernail Art Pens and Silicone Dotting Tool for Gel Polish Marble Blush Chrome DIY Manicure Designs
-
ALL-IN-ONE SET: INCLUDES EVERYTHING FOR STUNNING AT-HOME NAIL ART!
-
DURABLE QUALITY: PREMIUM FIBERS AND STRONG ASSEMBLY PREVENT SHEDDING.
-
DIY FREEDOM: CREATE UNIQUE DESIGNS EASILY, SAVING TIME AND MONEY!
To manually apply gradients in Python, you can follow these steps:
- Import the necessary libraries: Begin by importing the required libraries like numpy, matplotlib, or any other library that provides gradient functionalities.
- Define the gradient: Decide on the type of gradient you want to apply. It can be a linear gradient, radial gradient, or any other desired type.
- Create a canvas: Set up a canvas or figure using the library you imported earlier. For example, if you are using matplotlib, use the plt.figure() method to create a canvas.
- Set up gradient parameters: Depending on the type of gradient, set up its parameters such as colors, positions, and other properties. For instance, if you are using matplotlib, you can use the LinearGradient or RadialGradient class and specify the necessary properties like start and end points, color stops, etc.
- Apply gradient to your plot or image: Once you have defined the gradient, apply it to your plot or image. The specific method for applying a gradient will vary depending on the library you are using. Generally, you'll need to call a specific method or function that allows you to set the gradient as a background or overlay on your plot or image.
- Display the plot or image: Finally, render the plot or image with the applied gradient using the appropriate method or function from the library you are working with. This will display the result with the gradient applied.
Remember, the implementation details may vary depending on the library and functionality you are using. It's advisable to refer to the documentation of the specific library or function you are working with for a more detailed and accurate approach.
What is the role of gradient stops in Python?
In Python, gradient stops are used in the context of creating and manipulating gradients using gradient functions or libraries such as Matplotlib or matplotlib.colors.
Gradient stops define the color transitions within a gradient. A gradient is a smooth transition between two or more colors. They are typically used in visualizations or graphics to create smooth color transitions or for highlighting specific data points.
The gradient stops are defined by specifying the position and color at each stop. The position represents where the color transition occurs within the gradient, ranging from 0 to 1. The color defines the specific color at that position.
By controlling the gradient stops, you can create different color combinations and transitions in your visualizations. This allows you to manipulate the color gradients to better represent your data or achieve specific visual effects.
For example, let's say you want to create a gradient that transitions from blue to red. You could define two gradient stops, one at position 0 with a blue color and another at position 1 with a red color. This will create a smooth transition from blue to red.
Overall, gradient stops play an essential role in defining the color transitions and creating visually appealing gradients in Python.
How to apply linear gradients in Python?
To apply linear gradients in Python, you can make use of the PIL (Python Imaging Library) package. Here's an example of how to achieve it:
First, install the Pillow library, which is a fork of PIL, by using the command pip install pillow.
Once installed, you can create an image and apply linear gradients as follows:
from PIL import Image, ImageDraw
def create_linear_gradient(width, height, color1, color2): image = Image.new('RGB', (width, height), color1) draw = ImageDraw.Draw(image)
for y in range(height):
    gradient\_color = \[
        (int(color1\[i\] + (color2\[i\] - color1\[i\]) \* (y / float(height - 1))))
        for i in range(3)
    \]
    draw.line(\[(0, y), (width - 1, y)\], tuple(gradient\_color))

return image
Example usage:
gradient_image = create_linear_gradient(400, 200, (255, 0, 0), (0, 0, 255)) gradient_image.show()
In the create_linear_gradient function, you specify the desired width, height, and the start and end colors (RGB tuples). The function then generates an image with the specified dimensions and iterates over each row, calculating the gradient color based on the start and end colors. It finally draws a line on each row with the corresponding gradient color.
In the example usage, a linear gradient image with a width of 400 pixels, height of 200 pixels, and a gradient from red (255, 0, 0) to blue (0, 0, 255) is created and displayed using the show method.
You can modify the parameters in the example to create different gradient effects.
How to combine multiple gradients in Python to achieve a desired effect?
To combine multiple gradients in Python, you can use a combination of blending techniques and mathematical operations. Here's a step-by-step guide to achieve a desired effect:
- Import the required libraries:
import numpy as np import matplotlib.pyplot as plt
- Create gradients using numpy's linspace or meshgrid functions. For example, to create a vertical gradient:
x = np.linspace(0, 1, 100) y = np.linspace(0, 1, 100) X, Y = np.meshgrid(x, y) gradient1 = np.sin(np.pi * X)
- Create additional gradients using different mathematical functions or tweaking the parameters. For example, a horizontal gradient or a diagonal gradient:
gradient2 = np.cos(np.pi * Y) gradient3 = np.sin(np.pi * (X + Y))
- Blend the gradients using mathematical operations such as addition, multiplication, or averaging. For example, to add two gradients together:
combined_gradient = gradient1 + gradient2
- Adjust the blending technique based on the desired effect. For example, to fade one gradient into another gradually, you can use multiplication or averaging:
combined_gradient = gradient1 * (1 - X) + gradient2 * X
or
combined_gradient = (gradient1 + gradient2) / 2
- Plot and visualize the combined gradient using matplotlib:
plt.imshow(combined_gradient, cmap='viridis') plt.colorbar() plt.show()
By experimenting with different mathematical operations, blending techniques, and gradient modifications, you can achieve various desired effects.
What is a gradient mapping in Python?
In Python, gradient mapping refers to a process of using a gradient image to apply color transformations to an input image. It is a technique used for color correction or stylizing images by mapping colors from one image to another based on their pixel intensity or value.
In gradient mapping, a gradient image is created with a smooth transition of colors. This gradient image typically represents a color palette or a lookup table. Then, the values from the input image are mapped to the corresponding colors in the gradient image.
The mapping can be done using various methods, such as linear interpolation or nearest neighbor method. The resulting image will have the colors from the gradient image based on the intensity values of the original image.
Here's an example of applying gradient mapping in Python using the OpenCV library:
import cv2 import numpy as np
Load input image
input_image = cv2.imread('input.jpg')
Create gradient image
gradient_image = np.zeros_like(input_image) gradient_image[:, :, 0] = np.linspace(0, 255, input_image.shape[1]) gradient_image[:, :, 1] = np.linspace(0, 255, input_image.shape[1]) gradient_image[:, :, 2] = np.linspace(0, 255, input_image.shape[1])
Apply gradient mapping
output_image = cv2.LUT(input_image, gradient_image.astype(np.uint8))
Display the output image
cv2.imshow('Output Image', output_image) cv2.waitKey(0) cv2.destroyAllWindows()
In this example, the input image is loaded, and a gradient image is created using a linear transition of colors for each channel (R, G, B). Then, the cv2.LUT() function is used to map the colors from the input image to the corresponding colors in the gradient image. The resulting image is displayed as the output.
How to apply a gradient to a specific shape in Python?
To apply a gradient to a specific shape in Python, you can use the matplotlib library. Here is an example code that demonstrates how to apply a gradient to a circle shape:
import matplotlib.pyplot as plt import matplotlib.patches as patches from matplotlib.collections import PatchCollection from matplotlib.colors import LinearSegmentedColormap
Create a figure and axis
fig, ax = plt.subplots()
Create a circle shape
circle = patches.Circle((0.5, 0.5), 0.25)
Create a gradient colormap
gradient = LinearSegmentedColormap.from_list('my_gradient', ['blue', 'red'])
Create a PatchCollection with the circle shape
collection = PatchCollection([circle], cmap=gradient, edgecolors='b')
Add the PatchCollection to the axis
ax.add_collection(collection)
Set the figure limits
ax.set_xlim(0, 1) ax.set_ylim(0, 1)
Show the plot
plt.show()
In the code above, a figure and an axis are created using plt.subplots(). Then, a circle shape is created using patches.Circle(). Next, a gradient colormap is defined using LinearSegmentedColormap.from_list().
A PatchCollection is created with the circle shape as the input and the gradient colormap is specified using the cmap parameter. The edgecolors parameter is used to specify the edge color of the shape (in this case, blue).
The PatchCollection is then added to the axis using ax.add_collection(). The limits of the figure are set using ax.set_xlim() and ax.set_ylim().
Finally, plt.show() is used to display the plot with the circle shape filled with the gradient.
How to create a diagonal gradient in Python?
To create a diagonal gradient in Python, you can use the PIL (Python Imaging Library) module. Here's an example of how to create a diagonal gradient:
from PIL import Image, ImageDraw
def create_diagonal_gradient(width, height, color1, color2): image = Image.new('RGB', (width, height)) draw = ImageDraw.Draw(image)
for i in range(width):
    for j in range(height):
        # Calculate the ratio of current position
        ratio = (i + j) / (width + height)

        # Interpolate between the two colors using the ratio
        r = int((color2\[0\] - color1\[0\]) \* ratio + color1\[0\])
        g = int((color2\[1\] - color1\[1\]) \* ratio + color1\[1\])
        b = int((color2\[2\] - color1\[2\]) \* ratio + color1\[2\])

        draw.point((i, j), (r, g, b))

return image
Example usage
gradient = create_diagonal_gradient(400, 400, (255, 0, 0), (0, 0, 255)) gradient.show()
In this example, the create_diagonal_gradient function takes the width and height of the image, as well as the start (color1) and end (color2) colors of the gradient as input. It creates a new image using Image.new, and then uses a nested loop to iterate over each pixel of the image.
For each pixel, the function calculates the ratio of the current position (sum of i and j) divided by the sum of the width and height. This ratio is then used to interpolate between color1 and color2 to get the RGB values of the current pixel. The function uses the point method of the ImageDraw object to set the color of each pixel.
Finally, the function returns the created image, and you can display it using the show method.