
Best Treadmill Assembly Tools to Buy in July 2026
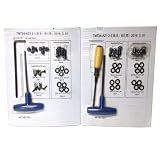
Hardware Kit Assembly 1000417965 Works with HZ Fitness TM734 TM486 Treadmill
- EASILY LOCATE YOUR MODEL NAME AND SERIAL NUMBER FOR PARTS.
- VERIFY COMPATIBILITY IN THE PRODUCT DESCRIPTION FOR BEST FIT.
- GET LOCAL TECHNICIAN RECOMMENDATIONS FOR HASSLE-FREE REPAIRS.


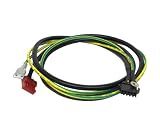
Hydra Fitness Exchange Bow-Flex MCB to Upright Wire Harness Replacement Part 1000513054 for BXT6, BXT8J and BXT8Ji Treadmills, Motor Control Board Connection Cable Kit
- EASY INSTALLATION FOR SEAMLESS TREADMILL MAINTENANCE.
- DIRECT REPLACEMENT FOR RELIABLE PERFORMANCE AND FUNCTIONALITY.
- U.S. SELLER SUPPORT ENSURES HASSLE-FREE CUSTOMER ASSISTANCE.
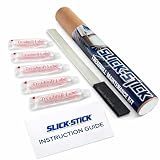
Slick-Stick Treadmill Maintenance Kit – 100% Silicone Treadmill Lubricant for Belt | 15” Applicator Wand, Treadmill Lubricant Kit, Treadmill Oil Belt Lube System, Treadmill Care Kit with Instructions
-
COMPLETE KIT FOR EASY TREADMILL MAINTENANCE IN ONE PACKAGE.
-
15 APPLICATOR ENSURES MESS-FREE LUBRICATION & FULL COVERAGE.
-
NON-TOXIC SILICONE FORMULA FOR SAFE INDOOR USE AROUND FAMILY.
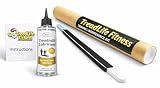
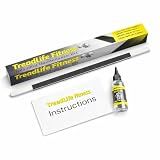
TreadLife Fitness Treadmill Maintenance Kit | 1 Year Supply of Treadmill Lubricant for Belt | 100% Silicone Lube | Extra Wide TruLube Applicator Wand | Directions Included
-
PROLONG EQUIPMENT LIFE: EASILY ENHANCE TREADMILL LONGEVITY WITH OUR KIT.
-
HASSLE-FREE MAINTENANCE: ENJOY EFFORTLESS LUBRICATION WITH TRULUBE APPLICATOR WAND.
-
SMOOTHER WORKOUTS: MINIMIZE FRICTION FOR QUIETER, MORE EFFICIENT TREADMILL USE.
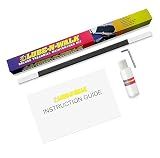
Lube-N-Walk Original Patented Treadmill Lubricating System Since 1998 and Official Partner for Major Manufacturers Made in USA (1 Year Supply)
-
EASY-TO-USE WAND FOR EFFORTLESS TREADMILL MAINTENANCE!
-
PREVENTS COSTLY REPAIRS WITH PRECISE LUBRICATION!
-
EXTENDS TREADMILL LIFE, SAVING YOU TIME AND MONEY!
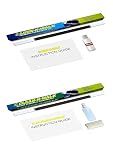
Lube-N-Walk (Home Combo Kit) Original Treadmill Cleaning and Lubrication Kit - Official Partner for Major Treadmill Manufacturers
-
TOP MANUFACTURER RECOMMENDED FOR TREADMILL MAINTENANCE SINCE 1998!
-
PATENTED WAND FOR EFFORTLESS CLEANING AND LUBRICATING YOUR TREADMILL!
-
PREVENTS COSTLY REPAIRS AND PROLONGS TREADMILL LIFESPAN WITH EASE!
TreadLife Fitness Treadmill Maintenance Kit | 1 Year Supply of Treadmill Lubricant for Belt | 100% Silicone Lube | Extra Wide TruLube Applicator Wand | Directions Included
- EFFORTLESS CARE: ENJOY MESS-FREE, EASY MAINTENANCE WITH OUR 22 WAND!
- BOOST PERFORMANCE: EXTEND BELT LIFE AND ENJOY SMOOTHER, QUIETER WORKOUTS!
- SIMPLE STEPS: EASY APPLICATION EVERY 3 MONTHS KEEPS YOUR TREADMILL RUNNING!
Upon delivery of a treadmill, it is essential to correctly assemble it before use. Here are the steps to guide you through the assembly process:
- Begin by unpacking all the components and ensuring that you have received all the necessary parts mentioned in the user manual.
- Select a suitable location for your treadmill. It should be a well-ventilated area with enough space for the treadmill and the user.
- Carefully read the user manual provided by the manufacturer. This will have detailed instructions specific to your particular treadmill model.
- Start by positioning the base of the treadmill on the floor. Make sure it is level and stable. Adjust the leveling feet as needed.
- Attach the upright posts to the base of the treadmill. Use the provided screws and a screwdriver or Allen wrench to secure them firmly in place.
- Connect the console and control panel to the upright posts. Make sure to align the connectors properly and attach them securely.
- Attach the handrails to the console or upright posts, depending on the design of your treadmill. Use the provided screws and tighten them properly.
- Locate the motor cover and attach it to the base. This cover will protect the motor and other internal components.
- Carefully connect the wires leading to the motor and console. Ensure that they are properly connected and secured as instructed in the user manual.
- Once all the major components are assembled, double-check all the screws, bolts, and connections. Make sure everything is tightened properly but avoid over-tightening.
- Finally, plug in the power cord to a suitable electrical outlet and switch on the treadmill to check if it functions correctly.
Remember, it is crucial to follow the specific instructions provided by the manufacturer for your treadmill model. If you encounter any difficulties during assembly, consult the user manual or contact the manufacturer for assistance.
How to adjust the treadmill's incline settings?
To adjust the treadmill's incline settings, follow these steps:
- Make sure the treadmill is switched on and that you are standing next to it.
- Look for the incline buttons on the treadmill's console. They are usually located near the display or in close proximity to the speed buttons.
- The incline buttons will have markings indicating incline up and incline down. Press the incline up button to increase the incline and press the incline down button to decrease the incline.
- Most treadmills allow you to change the incline level in small increments, such as 0.5 or 1 degree at a time. You can press and hold the incline buttons to continue increasing or decreasing the incline rapidly.
- As you adjust the incline, you will notice the treadmill's belt starting to elevate or lower, simulating an uphill or downhill terrain.
- Pay attention to the treadmill's display or console, as it may show the current incline level or a graphical representation of the incline.
- Experiment with different incline levels to find the setting that suits your workout goals or mimics the desired terrain.
- Remember to gradually increase the incline if you are new to using it. Start with a low incline and gradually increase it over time to avoid strain or injury.
- If the treadmill has preset workout programs, some of them may automatically adjust the incline settings based on the selected program. In such cases, you may need to choose the specific program to change the incline level.
- Once you have adjusted the incline to your desired level, you can start your workout on the treadmill.
Note: The exact procedure for adjusting the incline settings may vary slightly depending on the model and brand of your treadmill. It is always a good idea to consult the user manual that came with your treadmill for complete instructions specific to your machine.
How to safely unpack a treadmill upon delivery?
Unpacking a treadmill safely upon delivery is essential to avoid any potential damage to the machine or injury to yourself. Here are some steps to follow:
- Inspect the packaging: Start by examining the packaging for any signs of damage or punctures. If you notice any significant external damage, document it with photos or notes to report to the delivery company.
- Find a suitable unboxing area: Choose a spacious and clear area to unbox the treadmill. Make sure you have enough space to maneuver around the package without any obstacles.
- Clear a pathway: Remove any objects or furniture that may obstruct your path while moving the treadmill. Clearing a smooth pathway will help prevent accidental trip hazards.
- Gather necessary tools: You may need a utility knife or scissors to cut tape or plastic straps securing the packaging. Keep these tools nearby before starting the unboxing process.
- Follow the manufacturer's instructions: Read the manual or instructions provided by the manufacturer. Different treadmills may have varying unboxing procedures, so it's best to familiarize yourself with the specific guidelines for your model.
- Remove the packaging: Use a utility knife or scissors to carefully cut the tape or plastic straps securing the packaging. Avoid cutting through the box directly to prevent any damage to the treadmill inside.
- Lift with assistance: Treadmills are heavy, and it's best not to lift them alone to avoid strain or injury. Ask a friend or family member to help you lift the treadmill from the box.
- Locate and remove any additional protective materials: Some treadmills may have foam or cardboard inserts to protect delicate components during shipping. Remove any additional packaging materials, including foam, cardboard, or plastic pieces, that may be present.
- Assembly: If your treadmill requires assembly, carefully follow the manufacturer's instructions. Take your time and ensure all parts are properly connected and tightened. Avoid rushing or forcing any components into place.
- Test for proper functionality: Once assembled, check that all parts are securely attached and there are no loose or dangling cables. Plug in the treadmill and test its functions to ensure it is working correctly before use.
Remember, if you encounter any difficulties or are unsure about any specific step, consult the manufacturer's instructions or contact their customer support for assistance.
What is the right way to attach the treadmill's handrails?
The exact method of attaching handrails to a treadmill may vary depending on the specific model and manufacturer. However, here is a general guideline for attaching handrails to a treadmill:
- Make sure the treadmill is turned off and unplugged from the power source.
- Locate the handrails and the corresponding attachment points on the treadmill's console or frame.
- Align the handrail brackets with the attachment points on the treadmill.
- Insert the screws or bolts provided with the treadmill into the pre-drilled holes on the brackets and attach them to the treadmill frame/console.
- Use the appropriate tools, such as a screwdriver or adjustable wrench, to tighten the screws/bolts securely. Make sure not to overtighten as it may damage the handrail or the treadmill.
- Repeat the process for the other handrail, if applicable.
- Once both handrails are securely attached, double-check their alignment and stability.
- Plug the treadmill back into the power source and turn it on to ensure that the handrails are functioning properly.
It is crucial to consult the specific manufacturer's instructions provided with your treadmill for the accurate attachment process as different models may require different steps. If you are unsure or need additional assistance, it is recommended to contact the manufacturer or consult a professional.
How to properly secure the treadmill's foot pads?
To properly secure the treadmill's foot pads, follow these steps:
- Check the stability: Ensure that the treadmill is placed on a sturdy and level surface. If the floor is uneven, use leveling feet or mats to stabilize the treadmill.
- Tighten the screws: Look for any loose screws or bolts on the foot pads. Using the appropriate tools, tighten them securely. Pay close attention to the screws near the base or legs of the treadmill.
- Double-check the assembly: If you have recently assembled or disassembled the treadmill, make sure the foot pads are correctly aligned and attached to the frame. Refer to the manufacturer's instructions or user manual for proper assembly.
- Lubricate moving parts: Apply silicone or treadmill lubricant to any moving parts or joints, including the footpads. This helps reduce friction and wear, ensuring smooth operation and preventing unnecessary stress on the foot pads.
- Regularly inspect and maintain: Periodically check for any signs of wear or damage on the foot pads. Look for cracks, tears, or excessive wear. If any problems are detected, contact the manufacturer for replacement parts or professional repair.
Additionally, it is essential to follow the manufacturer's guidelines and user manual for proper maintenance, usage, and safety instructions specific to your treadmill model.
How to schedule professional maintenance for a treadmill?
Scheduling professional maintenance for your treadmill helps ensure its longevity and optimal performance. Here's how you can go about it:
- Determine the recommended maintenance schedule: Refer to your treadmill's manufacturer manual or website to find the recommended maintenance frequency and intervals. This information will give you an idea of when to schedule professional maintenance.
- Find a certified technician: Look for a certified technician or service center authorized by the treadmill manufacturer. Check their reputation, customer reviews, and ratings to ensure they provide quality service for treadmills.
- Contact the technician/service center: Reach out to the certified technician or service center you've selected. Contact them by phone, email, or through their website to discuss and schedule maintenance services. Provide necessary details about your treadmill, such as the brand, model, and any specific issues you're experiencing.
- Set up an appointment: Schedule a convenient date and time for the technician to visit your location or for you to take the treadmill to the service center, depending on their preferred method of service.
- Prepare the treadmill for maintenance: Before the scheduled appointment, make sure to clean the treadmill, remove any dust or debris, and clear the area around it for easy access.
- Keep a maintenance log: Create a log to track the maintenance schedule. Note down the date of the service, services provided, and any additional recommendations or information provided by the technician. This log will help you keep track of your treadmill's maintenance history and plan for future services.
- Follow the technician's recommendations: If the technician provides any recommendations or suggestions during the maintenance visit, follow them diligently. This may involve preventative measures, cleaning guidelines, or general tips to enhance the treadmill's performance.
Remember, regular maintenance is crucial to prevent breakdowns, extend the lifespan of your treadmill, and ensure your safety while using it.
What is the best way to transport a fully assembled treadmill?
Transporting a fully assembled treadmill can be a challenging task due to its size and weight. Here are some tips to help transport a fully assembled treadmill safely:
- Measure and plan: Measure the dimensions of the treadmill to ensure it can fit through doorways or hallways. Plan the best route to move the treadmill, avoiding any obstacles or tight spaces.
- Disassemble if possible: If the treadmill has removable parts, such as the handrails, console, or folding deck, disassemble them to lighten the load and make it easier to transport. Follow the manufacturer's instructions on how to disassemble and reassemble the treadmill correctly.
- Secure loose parts: If disassembling the treadmill is not possible, secure any loose parts, such as the handrails or console, using zip ties or rope. This will prevent them from moving around during transit and potentially causing damage.
- Use a dolly or hand truck: Depending on the weight of the treadmill, use a dolly or hand truck to move it. Position the dolly under the heaviest part of the treadmill and secure it tightly using straps and bungee cords.
- Get assistance: Treadmills are heavy and bulky, so it's best to have someone help you move it. This will make the process safer and easier, reducing the risk of injury or damage.
- Protect the treadmill: Use blankets, moving pads, or bubble wrap to protect the treadmill from scratches, dents, or other damages during transportation. Secure these protective materials with tape or straps.
- Rent a moving van or truck: If the treadmill needs to be transported over a longer distance or you have multiple heavy items to move, consider renting a moving van or truck. Make sure to secure the treadmill inside the vehicle using straps or ropes to prevent it from shifting during transit.
- Drive carefully: When transporting the treadmill, drive cautiously, especially when going over bumps or uneven roads. Slow down and take turns gently to avoid any sudden movement that could damage the treadmill.
Remember to consult the treadmill's user manual or contact the manufacturer for specific instructions on moving their particular model.