
Best BMI Calculator Tools to Buy in July 2026
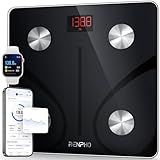
Etekcity Smart Scale for Body Weight, FSA&HSA Eligible, Bathroom Digital Weighing Scale with BMI, Body Fat, Muscle Mass, Accurate Bluetooth Home User Health Equipment Sync Apps, LED, Tempered glass
-
TAILORED FITNESS PLANS: FREE APP OFFERS PERSONALIZED DIET & EXERCISE GUIDES.
-
PRECISION WEIGHING: HIGH-PRECISION SENSORS MEASURE AS LOW AS 0.05 LB.
-
MULTIPLE MODES: EFFICIENT WEIGH-IN OPTIONS FOR ALL NEEDS: ADULTS, BABIES, PETS.


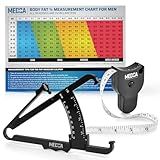
MEDca Body Fat Caliper and Measuring Tape for Body - Skinfold Calipers and Body Fat Tape Measure Tool for Accurately Measuring BMI Skin Fold Fitness and Weight-Loss, (Black)
-
ACCURATE BODY FAT MEASUREMENT: GET PRECISE RESULTS FOR EFFECTIVE DIETING!
-
USER-FRIENDLY DESIGN: EASY PINCH-AND-CLICK FOR AT-HOME BODY FAT TESTING!
-
DURABLE & PORTABLE: LIGHTWEIGHT DESIGN FITS EASILY IN YOUR GYM BAG!
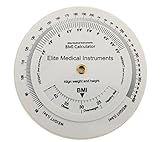
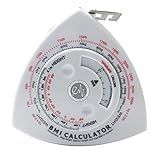
EMI BMI Body Mass Index Wheel Calculator 4.25 inch, Single Sided, Adult ECB-201
- QUICK AND EASY BMI MEASUREMENT FOR HASSLE-FREE CONSULTATIONS.
- DURABLE VINYL CONSTRUCTION ENSURES LONG-LASTING USE IN CLINICS.
- CLEAR WEIGHT CLASS DEFINITIONS GUIDE INFORMED HEALTH DECISIONS.
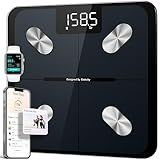
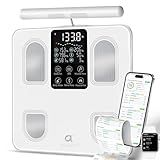
RENPHO Smart Scale for Body Weight, FSA&HSA Eligible, Digital Bathroom Scale BMI Weighing Bluetooth Body Fat Scale, Body Composition Monitor Health Analyzer with Smartphone App, 400 lbs - Elis 1
-
SEAMLESS INTEGRATION: SYNCS EASILY WITH SAMSUNG HEALTH, FITBIT, AND APPLE HEALTH.
-
COMPREHENSIVE TRACKING: MEASURES WEIGHT, BMI, BODY FAT, AND MORE IN ONE APP.
-
FAMILY-FRIENDLY: SUPPORTS UNLIMITED USERS AND A BABY WEIGHING MODE.
EMI Triangle BMI Body Mass Index Calculator and Body Tape Measure - 60" / 1.5 m ECB-301
- EASY BMI & WAIST MEASUREMENT: TRACK HEALTH GOALS EFFORTLESSLY.
- PORTABLE DESIGN: ASSESS YOUR HEALTH ANYWHERE, ANYTIME!
- COMPREHENSIVE INSIGHTS: GET A FULLER PICTURE OF YOUR HEALTH.
arboleaf Scale for Body Weight, Smart Scale with BMI, Body Fat, Muscle Mass, Upgrade 50+ Metrics Full Body Composition Analyzer, 8-Electrode High Precision Digital Bathroom Scale, Bluetooth Sync
- COMPREHENSIVE METRICS: ANALYZE 50+ HEALTH METRICS FOR FULL-BODY INSIGHTS.
- SEGMENTAL PRECISION: ACCURATE READINGS FROM ARMS, LEGS, AND TORSO.
- SMART SYNC FEATURES: TRACK PROGRESS WITH MULTI-USER SUPPORT VIA APP.
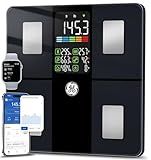
GE Scale for Body Weight, Body Fat, BMI, Muscle Mass, Smart Bathroom Scales with 14 Body Composition Metrics with Large Display, Accurate Bluetooth Weighing Machine with Fitness App, 400 lbs, Black
-
TRACK 14 HEALTH METRICS: COMPREHENSIVE INSIGHTS FOR PERSONALIZED FITNESS PLANS.
-
PRECISION AT ITS BEST: 0.1 LB ACCURACY WITH A SAFE, STURDY PLATFORM.
-
MULTI-USER SUPPORT: UNLIMITED PROFILES AND EASY APP INTEGRATION FOR EVERYONE.
To create a BMI calculator in Shopify, you will need to first consider the functionality you want the calculator to have. You will then need to insert custom code or use a third-party app that allows you to add a BMI calculator to your Shopify store. This may involve creating a form where customers can input their weight and height, and then the calculator will display their BMI based on the formula weight (kg) / (height (m) * height (m)). You can also customize the design and layout of the calculator to match the look and feel of your Shopify store.
What is the level of complexity in creating a BMI calculator for Shopify?
Creating a BMI calculator for Shopify would not be extremely complex as it involves basic mathematical calculations and simple user interface design. It would require programming skills in languages such as JavaScript, HTML, and CSS to build the calculator and integrate it into a Shopify store.
The complexity would depend on the specific features and functionalities you want to include in the BMI calculator. For a basic calculator that calculates BMI based on user-entered height and weight, the complexity would be relatively low. However, if you want to include additional features such as personalized recommendations based on the calculated BMI, personalized user profiles, or integration with user accounts on the Shopify store, the complexity would be higher.
Overall, creating a basic BMI calculator for Shopify would be of moderate complexity, while adding more advanced features would increase the complexity level.
What are the steps to develop a custom BMI calculator in Shopify?
- First, you will need to create a new section within your theme in Shopify's theme editor. This will allow you to add custom code to create the BMI calculator on your website.
- Next, you will need to write the HTML and CSS code for the BMI calculator. This code will create the form for users to input their height and weight, as well as the button to calculate their BMI.
- After that, you will need to write the JavaScript code for the BMI calculator. This code will take the user's input from the form, calculate their BMI, and display the result on the page.
- You can also add additional functionality to the BMI calculator, such as providing information about what the user's BMI means and recommendations for maintaining a healthy weight.
- Finally, you will need to test the BMI calculator to make sure it is working correctly and looks good on your website. You may need to make adjustments to the code or styling to improve the user experience.
Overall, developing a custom BMI calculator in Shopify involves creating a new section in your theme, writing HTML, CSS, and JavaScript code for the calculator, and testing it to ensure it works properly.
How to display the BMI results in a clear format on Shopify?
One way to display BMI results in a clear format on Shopify is to create a custom product option for customers to input their height and weight. You can then use a simple formula to calculate the BMI based on the customer's input and display the result on the product page.
Here are the steps to set up this feature:
- Create a new product in your Shopify admin and add a custom product option for "Height" and "Weight".
- In the product description, mention that customers can input their height and weight to calculate their BMI.
- Use JavaScript to calculate the BMI based on the height and weight input by the customer. You can use the formula BMI = weight (kg) / height (m) squared.
- Display the calculated BMI result on the product page next to the height and weight input fields.
- You can also provide a chart or explanation of what the BMI result means in terms of health and provide recommendations or products that can help customers improve their BMI if needed.
By following these steps, you can provide a clear and interactive way for customers to calculate and understand their BMI results on Shopify.
How to code a BMI calculator for Shopify using HTML/CSS?
To create a BMI calculator for Shopify using HTML/CSS, you can follow these steps:
- Create a new section in your Shopify theme where the BMI calculator will be placed.
- In the new section, add HTML elements for the input fields (height and weight) and a button to calculate the BMI.
<label for="weight">Weight (in kg):</label>
<input type="number" id="weight">

<button onclick="calculateBMI()">Calculate BMI</button>

<p id="result"></p>
- Add a
- Style the BMI calculator using CSS in the same section.
.bmi-calculator { width: 300px; margin: 0 auto; padding: 10px; border: 1px solid #ccc; border-radius: 5px; }
label { display: block; margin-bottom: 5px; }
input { width: 100%; padding: 5px; margin-bottom: 10px; }
button { background-color: #007bff; color: #fff; padding: 5px 10px; border: none; border-radius: 3px; cursor: pointer; }
button:hover { background-color: #0056b3; }
p { margin-top: 10px; }
- Save the changes to the Shopify theme and preview the BMI calculator on your website.
With these steps, you should have a fully functional BMI calculator on your Shopify website using HTML and CSS.