Best Desktop Tablet Kiosk Interface Customization Tools to Buy in July 2026
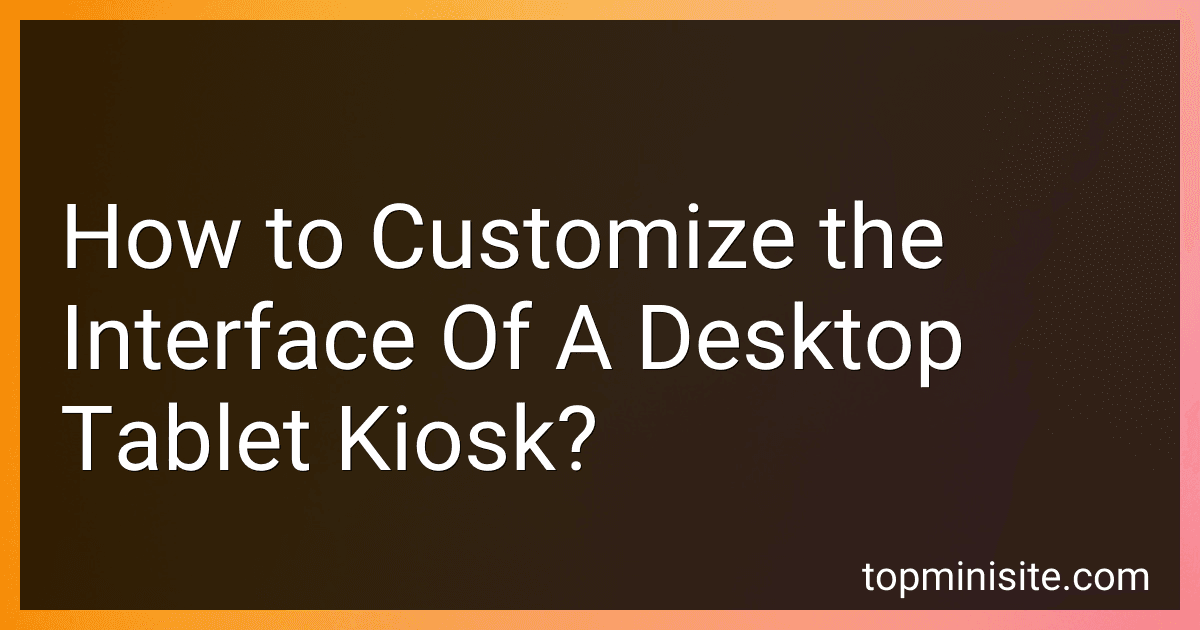
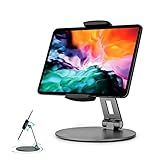
AboveTEK Business Kiosk Aluminum Tablet iPad Stand, 360° Swivel Tablet & Phone Holders for Any 4"-15.6" Display Tablets/Cell Phones/Portable Monitor, Sturdy for Store POS Office (Grey)
-
VERSATILE FIT: SUPPORTS DEVICES 4-15.6, IDEAL FOR ANY BUSINESS SETTING.
-
STABLE & SECURE: STURDY BASE ELIMINATES WOBBLING FOR RELIABLE USE.
-
FLEXIBLE VIEWING: 360° ROTATION AND 220° TILT FOR OPTIMAL PRESENTATIONS.


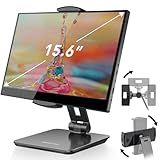
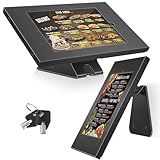
Mount-It! Universal Tablet Stand with Tilt, Anti-Theft Retail iPad POS Kiosk Stand, Fits Tablets from 9.7" to 13" Screen Size, 90° Rotation for Portrait and Horizontal Viewing, Durable Steel, Black
- UNIVERSAL FIT: SUPPORTS VARIOUS TABLETS, INCLUDING LATEST IPADS & GALAXY TABS.
- ANTI-THEFT SECURITY: DESIGNED TO PROTECT AGAINST THEFT AND TAMPERING.
- VERSATILE VIEWING: ROTATES & TILTS FOR OPTIMAL USER EXPERIENCE IN ANY SETTING.
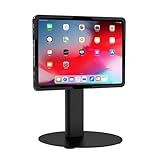
AboveTEK Business Kiosk Aluminum Tablet iPad Stand, 360° Swivel Tablet & Phone Holders for Any 4"-15.6" Display Tablets/Cell Phones/Portable Monitor, Sturdy for Store POS Office (Silver)
-
FITS ANY 4-15.6 DEVICE - PERFECT FOR POS IN RESTAURANTS AND OFFICES.
-
360° ROTATION & 220° FOLDING - ADJUST FOR OPTIMAL VIEWING ANGLES INSTANTLY.
-
STURDY BASE WITH RUBBER PADDING - ENSURES STABILITY AND DEVICE PROTECTION.
Stouchi 12.9 iPad Stand, 360 Swivel Base Tablet Holder for iPad Pro & Surface Pro, Adjustable Desk Mount Holder for POS Kiosk, Fits 4-14' Tablets - Grey
-
EFFORTLESS SHARING: SWIVEL BASE ENABLES QUICK SCREEN SHARING WITH EASE.
-
UNIVERSAL FIT: SUPPORTS ANY 4-14 TABLET FOR VERSATILE USE AT HOME OR WORK.
-
STABLE & STURDY: DURABLE DESIGN ENSURES A STABLE VIEWING EXPERIENCE ANYWHERE.
AboveTEK Anti-Theft Tablet Stand – iPad Locking & Security Stand, Countertop & Wall Mount POS Stand, 360° Swivel Kiosk Stand for iPad/iPad Air/iPad Pro – Ideal for Retail Business (Black)
-
FITS VARIOUS IPAD MODELS: SECURELY HOLD MULTIPLE IPAD SIZES UP TO 10.5.
-
HEAVY-DUTY SECURITY: ROBUST METAL FRAME AND ANTI-THEFT LOCK ENSURE SAFETY.
-
EASY INSTALLATION & CABLE MANAGEMENT: KEEPS WORKSPACE TIDY AND PROFESSIONAL.
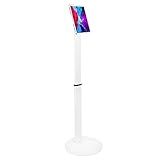
Mount-It! Universal Tablet Floor Kiosk | Theft-Deterrent Tablet Stand | Adjustable Kiosk Floor Mount for iPad, Galaxy & Surface Tablets (White)
- STYLISH SECURITY: SLEEK DESIGN SECURES TABLETS WHILE ATTRACTING USERS.
- UNIVERSAL FIT: COMPATIBLE WITH ALL POPULAR TABLET MODELS FOR VERSATILITY.
- ADJUSTABLE & PORTABLE: HEIGHT AND TILT ADJUSTMENTS FOR OPTIMAL USER EXPERIENCE.
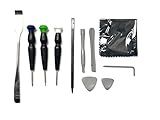
Silverhill Tools ATKTAB2 Tool Kit for Tablets and eReaders
- ESSENTIAL TOOL KIT FOR EREADERS AND TABLETS INCLUDED!
- VERSATILE SPUDGERS AND PRY TOOLS FOR SAFE DEVICE HANDLING.
- MICROFIBER CLOTH PROTECTS AND POLISHES YOUR SCREEN EFFECTIVELY.
Customizing the interface of a desktop tablet kiosk involves making specific changes to the way the user interacts with the device. Here are some aspects to consider:
- Background and theme: Customize the background image or wallpaper to reflect your brand or aesthetic preferences. Choose a theme that matches the overall look and feel you desire for the kiosk.
- App selection: Determine which applications or functions you want to make available on the kiosk. Select apps that are relevant to the intended use of the kiosk and remove unnecessary or distracting ones.
- App arrangement: Organize the app icons on the home screen in a logical and user-friendly manner. Group similar apps and position frequently used ones for easy access.
- Interface layout: Adjust the layout of the interface according to your requirements. This includes the position of elements like buttons, text, and navigation bars. Ensure a clean and intuitive layout that guides users through the kiosk smoothly.
- Branding and logo: Customize the interface with your brand's logo and colors to maintain consistency and reinforce brand identity.
- Font and typography: Choose fonts that are easy to read and convey the appropriate tone. Adjust the font size and style to enhance readability on the kiosk's display.
- Access restrictions: Implement restrictions to limit user access to certain features or applications. This is useful if the kiosk is intended for specific purposes or to prevent misuse.
- Home button behavior: Configure the behavior of the home button to control what happens when it's pressed. You can assign it to return to the home screen, activate a specific function, or control other aspects of the kiosk.
- Notifications and alerts: Customize how notifications and alerts appear to avoid interrupting the user experience. Adapt the visuals and sounds to match the overall interface design.
- Testing and feedback: Prioritize user testing to gather feedback on the customized interface. Make adjustments based on user input to further improve the kiosk experience.
Remember to consider the specific hardware and software capabilities of the desktop tablet kiosk when customizing the interface, as these may impact the available customization options.
How to change the display language on a desktop tablet kiosk?
To change the display language on a desktop tablet kiosk, you will typically need to follow these steps:
- Go to the Settings menu on the tablet.
- Look for the "Language" or "Language & Input" option and tap on it.
- Find the "Display Language" or "System Language" option and select it.
- A list of available languages should appear. Choose the desired language from the list.
- Confirm your selection and wait for the tablet to apply the changes. This may take a few moments.
- The tablet should now display in the newly selected language.
Note: The exact steps may vary slightly depending on the tablet's operating system and interface.
How to customize the status bar on a desktop tablet kiosk?
To customize the status bar on a desktop tablet kiosk, you can follow these steps:
- Determine the operating system of the tablet kiosk. The process may vary depending on whether it runs on Windows, macOS, Android, or another OS.
- For Windows: Right-click on the taskbar and select "Taskbar settings" from the menu. In the settings window, you can make changes to the taskbar, such as toggling the system icons, selecting which buttons appear on the taskbar, and choosing to auto-hide the taskbar. You can also go to "Settings" > "Personalization" > "Taskbar" to access additional customization options.
- For macOS: Click on the Apple menu in the top-left corner and choose "System Preferences." Select "Dock & Menu Bar" to access customization options for the status bar. From here, you can choose which icons appear on the status bar, rearrange them, and adjust settings like the clock format and appearance.
- For Android: Access the device's settings by swiping down from the top of the screen (once or twice, depending on the implementation) and tapping the settings gear icon. Look for "Display" or "Notifications & Status Bar" settings, as these may vary across Android versions and manufacturer skins. Explore the options available, including toggling system icons or rearranging the order of icons.
- For other operating systems: The customization options may vary. Refer to the user manual or online resources specific to the tablet's OS for instructions on customizing the status bar.
Remember to consider user experience and the purpose of the tablet kiosk when customizing the status bar.
What is the purpose of the system settings menu on a desktop tablet kiosk?
The purpose of the system settings menu on a desktop tablet kiosk is to provide the user with control and customization options for the device. It allows the user to configure various settings and preferences that affect the overall functioning and behavior of the kiosk. Some common features found in the system settings menu include:
- Display settings: Adjusting screen brightness, resolution, or orientation.
- Network settings: Configuring Wi-Fi, Ethernet, or cellular data connections.
- Sound settings: Controlling volume levels and selecting audio output options.
- Security settings: Managing user accounts, passwords, or permissions.
- Accessibility settings: Enabling features such as text-to-speech, large fonts, or color contrast options for users with disabilities.
- Power settings: Customizing power-saving options, sleep mode settings, or battery management.
- App management: Installing, updating, or uninstalling apps or managing app permissions.
- Date and time settings: Adjusting time zone, automatic time synchronization, or format preferences.
- Language and input settings: Configuring the display language and keyboard input settings.
- Privacy settings: Controlling data sharing with apps or managing app-specific data permissions.
Overall, the system settings menu aims to provide users with a streamlined way to personalize and manage their experience on the desktop tablet kiosk.
What is the recommended resolution for wallpapers on a desktop tablet kiosk?
The recommended resolution for wallpapers on a desktop tablet kiosk may vary depending on the specific tablet model and screen size, but a common resolution is 1920x1080 pixels (Full HD). However, it is always advisable to check the device's specifications or consult the manufacturer for the exact recommended resolution.
How to customize the home screen of a desktop tablet kiosk?
The process for customizing the home screen of a desktop tablet kiosk can vary depending on the operating system and software used. However, here are some general steps that you can follow:
- Determine the kiosk software: Identify the software or operating system running on the tablet kiosk. This could be Windows, Android, iOS, or a customized kiosk software.
- Access the settings: Locate the settings menu on the tablet kiosk and access it. This is usually represented by a gear or cog-shaped icon.
- Find the home screen settings: Within the settings menu, look for options related to the home screen or launcher. Depending on the system, it may be labeled as "Home Screen," "Launcher," or "Display."
- Customize app placement: In the home screen settings, you should be able to rearrange the position of apps. This will allow you to move, add, or remove apps from the home screen. Simply tap and hold an app icon, then drag it to the desired location.
- Set a background image: Look for options to customize the wallpaper or background image of the home screen. Select a pre-installed image or upload your own for a personalized touch.
- Configure additional settings: Depending on your requirements, you may have options to adjust settings such as screen timeout, screen orientation, brightness, or enabling a screen saver. Explore the settings available to configure the kiosk's behavior according to your needs.
- Lock the home screen: If you want to limit user interactions or prevent access to certain settings, consider enabling a screen pinning or app lock feature. This ensures that users cannot exit the home screen or access specific apps without a passcode.
- Test the customization: Once you have made the desired changes, exit the settings menu and test the customization by navigating the home screen to ensure everything is as intended.
Note: The exact steps and options may differ depending on the tablet kiosk model and software. It's important to consult the user manual or any specific guides provided by the manufacturer for accurate instructions.