Best Graphing Tools to Buy in July 2026
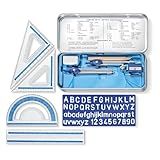
Mr. Pen Geometry Set with 6 Inch Swing Arm Protractor, Divider, Set Squares, Ruler, Compasses and Protractor, 15 Piece Set
- COMPLETE 15-PIECE SET: ALL ESSENTIAL TOOLS FOR LEARNERS AND TEACHERS.
- PORTABLE DESIGN: REUSABLE POUCH FOR EASY STORAGE AND TRANSPORT.
- EXPERTLY CRAFTED: DESIGNED BY MATH PROFESSIONALS FOR ALL SKILL LEVELS.


Mr. Pen- Professional Geometry Set, 15 pcs, Geometry Kit for Artists and Students, Geometry Set, Metal Rulers and Compasses, Drawing Tools, Drafting Supplies, Drafting Set, Drafting Tools and Kits
- COMPLETE SET: INCLUDES EVERYTHING NEEDED FOR PRECISE MEASUREMENTS.
- DURABLE CASE: PROTECTS TOOLS, MAKING THEM EASY TO CARRY AND STORE.
- VERSATILE USE: IDEAL FOR STUDENTS, TEACHERS, AND CREATIVE PROFESSIONALS.
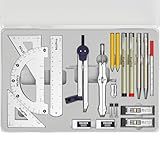
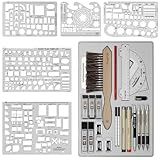
Nicpro 21PCS Professional Drafting Tools & Geometry Set with Case, Architect Compass & Protractor Set, Metal Pencils, Pens, Scale Ruler Metal Ruler, 5 Drawing Templates for Interior House Plan Design
-
COMPREHENSIVE SET: 21 ESSENTIAL TOOLS FOR ARCHITECTS & DESIGNERS.
-
DURABLE TEMPLATES: 5 FLEXIBLE TEMPLATES FOR PRECISE, EFFICIENT DESIGNS.
-
PORTABLE & ORGANIZED: NEATLY STORED CASE WITH BUILT-IN STAND INCLUDED.

Nicpro 16PCS Drafting Tools with 12‘’ Aluminum Architect Scale Ruler, Mechanical Pencils 0.5, 0.7, 0.9 & 2mm, Lead Refills, 2 Pack Graph Paper Pad, Geometry Drawing Kit for Engineers Students Design
-
ALL-IN-ONE DRAFTING KIT: 16 PIECES FOR ARCHITECTS, ENGINEERS & STUDENTS.
-
PRO-GRADE SCALE RULER: HIGH-IMPACT ALUMINUM WITH PRECISION LASER-ETCHED SCALES.
-
SMOOTH MECHANICAL PENCILS: VARIETY IN WIDTHS, BUILT-IN SHARPENER, AND REFILLS INCLUDED.
STAEDTLER 10-Piece Math Set with Metal Compass, 6" Ruler & Triangle Squares, 45° & 30/60° Set Squares, Alphabet Stencil - Measuring Tools
- ALL-IN-ONE DRAWING KIT FOR PRECISION IN GEOMETRY AND DRAFTING.
- DURABLE MATERIALS ENSURE LONG-LASTING RELIABILITY AND ACCURACY.
- COMPACT CASE KEEPS TOOLS ORGANIZED FOR EASY ACCESS AND USE.
Nicpro 20PCS Professional Geometry Set with Case, Drafting Tools with Protractor and Compass, Metal Rulers, Triangles, Pens, Pencils, Drawing Supplies, Drafting Kit for Architect Engineer Students
-
DURABLE COMPASSES FOR PRECISION: STAINLESS STEEL COMPASSES ENSURE ACCURATE RESULTS.
-
COMPLETE MATH TOOLKIT: ALL ESSENTIAL TOOLS FOR STUDENTS AND PROFESSIONALS INCLUDED.
-
PORTABLE STORAGE INCLUDED: ORGANIZED BOX FOR EASY TRANSPORT AND CONVENIENCE.
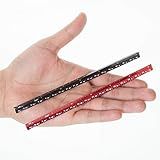
Mr. Pen- 6 Inch, 2 Pack, Pocket Size Ruler, Small Architectural Scale
- COMPACT & PORTABLE: IDEAL FOR ON-THE-GO ARCHITECTS AND DESIGNERS.
- DURABLE ALUMINUM: LASER-CUT PRINTS PROMISE LASTING ACCURACY.
- VERSATILE MEASUREMENTS: PERFECT FOR ALL YOUR ARCHITECTURAL DRAFTING NEEDS.
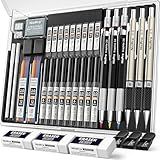
Nicpro 35PCS Art Mechanical Pencil Set, 3 PCS Metal Drafting Pencil 0.5 mm & 0.7 mm & 0.9 mm & 3 PCS 2mm Lead Holder (6B 4B 2B HB 2H 4H Colors) For Sketching Drawing With 20 Tube Lead Refills Case
-
VERSATILE LEAD SIZES & HARDNESS FOR PRECISION IN EVERY STROKE!
-
ERGONOMIC DESIGN FOR COMFORT: WRITE & DRAW WITHOUT FATIGUE!
-
IDEAL FOR SCHOOL & PROFESSIONALS: PERFECT GIFT FOR ALL CREATIVES!
Nicpro 30PCS Professional Drafting Tools & Geometry Set with Case, Architect Protractor Set, Metal Mechanical Pencils, Pen, Scale Ruler Metal Ruler, 5 Drawing Templates for Interior Design House Plan
- VERSATILE TEMPLATES: 5 DURABLE TEMPLATES FOR EFFICIENT DESIGN PROJECTS.
- UPGRADED PENCILS: FOUR MECHANICAL PENCILS FOR ALL DRAFTING NEEDS INCLUDED.
- PORTABLE & GIFT-READY: STURDY CASE MAKES IT PERFECT FOR EASY TRANSPORT.

Nicpro Carpenter Pencil with Sharpener, Mechanical Pencils Set with 26 Refills, Deep Hole Marker for Construction, Heavy Duty Woodworking Tools for Architect (Black, Red) - With Case
-
COMPLETE SET: 2 PENCILS, 26 REFILLS, SHARPENER, AND STORAGE BOX INCLUDED!
-
DEEP HOLE DESIGN: REACH TIGHT SPOTS EASILY WITH ELONGATED 45MM TIPS.
-
DURABLE LEAD: THICK 2.8MM LEAD RESISTS BREAKAGE FOR RELIABLE CONSTRUCTION WORK.
To fill the area under a curve in Matplotlib, you can follow these steps:
- Import the necessary libraries:
import numpy as np import matplotlib.pyplot as plt
- Create the x and y data points for the curve:
x = np.linspace(0, 2*np.pi, 100) y = np.sin(x)
- Plot the curve using plt.plot():
plt.plot(x, y)
- Fill the area under the curve using plt.fill_between():
plt.fill_between(x, y, color='skyblue', alpha=0.4)
The color parameter specifies the color of the filled area, and the alpha parameter controls the opacity.
- Customize other aspects of the plot such as labels, title, etc.:
plt.xlabel('x') plt.ylabel('y') plt.title('Area under a curve')
- Display the plot:
plt.show()
Following these steps will allow you to create a plot with the area under the curve filled.
What is the significance of the alpha parameter in fill_between?
The alpha parameter in the fill_between function in Python is used to control the transparency of the filled area between two lines or curves.
Setting the alpha parameter allows you to adjust the visibility or opacity of the filled area. This can be useful when you want to highlight certain areas or overlap multiple filled areas without completely obscuring the underlying lines or curves.
The alpha value ranges from 0 to 1, where 0 represents complete transparency (i.e., the filled area becomes invisible) and 1 represents complete opacity (i.e., the filled area is fully visible). Setting values between 0 and 1 allows you to control the level of transparency and find the desired balance between visibility and clarity.
By adjusting the alpha parameter, you can enhance the visual presentation of data and create more visually appealing and informative plots.
What is the syntax to import the Matplotlib library?
The syntax to import the Matplotlib library in Python is as follows:
import matplotlib.pyplot as plt
Here, matplotlib is the library name, pyplot is a sub-library used for creating plots, and plt is an alias or nickname assigned to the pyplot module for convenience.
What is the purpose of the interpolate parameter in fill_between?
The interpolate parameter in the fill_between function is used to specify whether to interpolate the data between given points to create a smooth polygon for filling or to use straight lines to connect the points.
When interpolate is set to True (default), the function will interpolate the data to create a smooth curve between the given points. This is useful when the data points are not evenly spaced or if the desired fill area is not well-defined by the given points.
On the other hand, when interpolate is set to False, the function will use straight lines to connect the given points. This can be useful when the given points already form a well-defined polygon for filling or if a more angular fill area is desired.
In summary, the interpolate parameter allows the user to control the interpolation method used to create the fill area in the fill_between function.
How to fill the area between two curves using fill_between?
To fill the area between two curves using the fill_between function in Python, you can follow these steps:
- Import the necessary libraries:
import matplotlib.pyplot as plt import numpy as np
- Define the x-values for your data points along with the corresponding y-values for each curve. You can use the np.linspace() function to generate evenly spaced x-values and create corresponding y-values for each curve using some mathematical functions. For example:
x = np.linspace(0, 10, 100) y1 = np.sin(x) y2 = np.cos(x)
- Create a new figure and axis using the plt.subplots() function:
fig, ax = plt.subplots()
- Plot the two curves using the ax.plot() function:
ax.plot(x, y1, label='Curve 1') ax.plot(x, y2, label='Curve 2')
- Use the ax.fill_between() function to fill the area between the two curves:
ax.fill_between(x, y1, y2, color='gray', alpha=0.5)
Here, x is the common x-axis values, y1 and y2 are the corresponding y-axis values for the two curves. color specifies the color of the fill, and alpha determines the transparency of the fill.
- Finally, add a legend and show the plot:
ax.legend() plt.show()
With these steps, you should be able to fill the area between two curves using fill_between.
How to create a stacked area plot using fill_between?
To create a stacked area plot using fill_between in Python, you can follow these steps:
- Import the required libraries:
import matplotlib.pyplot as plt import numpy as np
- Define the data for the X-axis (common for all stacked areas) and the Y-axis values for each stacked area:
x = np.arange(0, 10, 0.1) # X-axis values y1 = np.sin(x) # Y-axis values for stacked area 1 y2 = np.cos(x) # Y-axis values for stacked area 2 y3 = np.exp(-x / 2) # Y-axis values for stacked area 3
- Calculate the cumulative sum of each Y-axis array to create the stacked area plot:
y1_stack = np.cumsum(y1) y2_stack = np.cumsum(y2) y3_stack = np.cumsum(y3)
- Create the stacked area plot using fill_between:
plt.fill_between(x, 0, y1_stack, alpha=0.5, label='Area 1') plt.fill_between(x, y1_stack, y2_stack, alpha=0.5, label='Area 2') plt.fill_between(x, y2_stack, y3_stack, alpha=0.5, label='Area 3')
- Add labels, title, and legend to the plot:
plt.xlabel('X-axis') plt.ylabel('Y-axis') plt.title('Stacked Area Plot') plt.legend()
- Show the plot:
plt.show()
Putting it all together, here's the complete code to create a stacked area plot using fill_between:
import matplotlib.pyplot as plt import numpy as np
x = np.arange(0, 10, 0.1) # X-axis values y1 = np.sin(x) # Y-axis values for stacked area 1 y2 = np.cos(x) # Y-axis values for stacked area 2 y3 = np.exp(-x / 2) # Y-axis values for stacked area 3
y1_stack = np.cumsum(y1) y2_stack = np.cumsum(y2) y3_stack = np.cumsum(y3)
plt.fill_between(x, 0, y1_stack, alpha=0.5, label='Area 1') plt.fill_between(x, y1_stack, y2_stack, alpha=0.5, label='Area 2') plt.fill_between(x, y2_stack, y3_stack, alpha=0.5, label='Area 3')
plt.xlabel('X-axis') plt.ylabel('Y-axis') plt.title('Stacked Area Plot') plt.legend() plt.show()
This code will produce a stacked area plot showing different areas in different colors, with the X-axis representing the independent variable and the Y-axis representing the cumulative sum of the values.