
Best File Upload Tools in PHP to Buy in July 2026

REXBETI 25Pcs Metal File Set, Premium Grade T12 Drop Forged Alloy Steel, Flat/Triangle/Half-round/Round Large File and 12pcs Needle Files with Carry Case, 6pcs Sandpaper, Brush, A Pair Working Gloves
- DURABLE T12 DROP FORGED ALLOY STEEL FOR LASTING PERFORMANCE.
- COMPLETE 25-PIECE SET INCLUDES ESSENTIAL FILES AND GLOVES.
- COMPACT CASE ENSURES EASY STORAGE AND PORTABILITY.


Tsubosan Hand tool Workmanship file set of 5 ST-06 from Japan
- PRECISION-CRAFTED FOR OPTIMAL FILING ACCURACY AND PERFORMANCE.
- ERGONOMIC HANDLE DESIGN FOR COMFORTABLE, FATIGUE-FREE USE.
- VERSATILE FOR VARIOUS MATERIALS: WOOD, METAL, AND PLASTIC.

KALIM Needle File Set (10Pcs High Carbon Steel Files) and 1 Wire Cutter in A Carry Bag, File Tools for Soft Metal, Wood, Jewelry, Model, DIY, Hobby, etc.
-
VERSATILE 10-PC FILE SET: PERFECT FOR PRECISE LIGHT WORK ON METAL PARTS.
-
EFFICIENT WIRE CUTTER: ERGONOMIC DESIGN FOR EASY CUTTING IN TIGHT SPACES.
-
IDEAL GIFT: COMES WITH A STORAGE CASE, GREAT FOR ANY DIY ENTHUSIAST.

Hi-Spec 17 Piece Metal Hand & Needle File Tool Kit Set. Large & Small Mini T12 Carbon Steel Flat, Half-Round, Round & Triangle Files. Complete in a Zipper Case with a Brush
- VERSATILE FILING SET FOR METAL, WOOD, AND PLASTICS PRECISION
- DURABLE T12 CARBON STEEL FOR LONG-LASTING PERFORMANCE
- INCLUDES ORGANIZED STORAGE CASE FOR EASY TRANSPORT

KALIM 10PCS Needle File Set High Carbon Steel File Set with Plastic Non-Slip Handle, Hand Metal Tools for Wood, Plastic, Model, Jewelry, Musical Instrument and DIY (6 Inch Total Length)

17Pcs File Tool Set with Carry Case,Premium Grade T12 Drop Forged Alloy Steel, Precision Flat/Triangle/Half-round/Round Large File and 12pcs Needle Files/1 brush
-
DURABLE FORGED STEEL: HIGH-STRENGTH FILES RESIST WEAR & TEAR FOR LONGEVITY.
-
COMPREHENSIVE 17-PIECE SET: VERSATILE SHAPES FOR ALL YOUR FILING NEEDS INCLUDED.
-
ERGONOMIC DESIGN: SOFT RUBBER HANDLES ENSURE COMFORT DURING EXTENDED USE.
Cal-Van Tools 693 Ignition Point File
- ULTRA-DURABLE STEEL WITH ROCKWELL HARDNESS 65 FOR UNMATCHED STRENGTH!
- BUILT TO LAST: EXTREME TOUGHNESS FOR DEMANDING APPLICATIONS.
- PRECISION-ENGINEERED FOR SUPERIOR PERFORMANCE AND RELIABILITY!
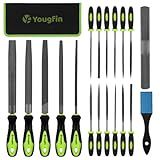
Yougfin 19 pcs File Set, Includes 5 pcs Large Steel Files, 12 pcs Jewelers File Set and Wire Brushes Ideal Hand File Tools for Woodwork, Metal, Model Applications
- COMPREHENSIVE 19PCS SET: COVERS ALL YOUR FILING NEEDS IN ONE KIT!
- DURABLE T12 & GCR15 STEEL: BUILT TO LAST FOR PROFESSIONAL AND DIY USE.
- VERSATILE APPLICATION: PERFECT FOR METAL, WOOD, GLASS, AND MORE!

SETTECH 31PCS Metal & Wood File Rasp Set, Half-Round/Round/Triangle/Flat 4pcs Large Tools, 14pcs Needle Files and a Pair of Electric Files, 1PC Brush, 1PC Working Gloves and 10PCS Emery Papers
-
ALL-IN-ONE SET: 31 TOOLS FOR WOOD, METAL, AND MORE IN ONE PACKAGE!
-
ERGONOMIC DESIGN: COMFORTABLE NON-SLIP HANDLES WITH MATCHING GLOVES INCLUDED.
-
DURABLE CONSTRUCTION: PREMIUM FORGED STEEL ENSURES LONG-LASTING PERFORMANCE.
In PHP, handling file uploads involves receiving files from client-side (usually through an HTML form) and processing or storing them on the server. Here's a walkthrough of how to handle file uploads in PHP:
- Create an HTML form: Design an HTML form with the necessary fields to allow users to select and upload files. Ensure you set the enctype attribute of the form to "multipart/form-data" to handle file uploads.
- Server-side PHP script: Create a PHP script that will receive the uploaded file and handle its processing. In this script, you can include the following steps:
- Validate the file: Perform basic file validation checks to ensure it meets your requirements, such as file type, size, or any specific criteria you define. Use PHP's $_FILES superglobal array to access details about the uploaded file.
- Handle errors: Check for any error codes associated with the file upload process. These could include issues like exceeding file size limits, no file selected, or any other errors that may occur during the upload. Handle these errors appropriately and provide meaningful feedback to the user.
- Move or store the file: Once the file passes validation and error checking, move it to a desired location on the server's file system using the move_uploaded_file() function. This function takes two parameters: the temporary location of the uploaded file and the destination path to move it to.
- Additional processing: If required, you can perform further processing on the uploaded file, such as resizing images, extracting data, or saving relevant information to a database.
- Provide user feedback: After successfully handling the file upload and any additional processing, provide feedback to the user indicating the success of the operation or any relevant information about the file that was uploaded.
Note: It's essential to consider security best practices while handling file uploads. Validate the file type, enforce size limits, sanitize user input, and consider using server-side antivirus scanning to minimize potential security risks associated with file uploads.
By following these steps, you can successfully handle file uploads in PHP.
What is the maximum file size limit for PHP uploads?
The maximum file size limit for PHP uploads is determined by the server's configuration settings. By default, PHP sets a limit of 2 megabytes (MB) for file uploads. However, this limit can be modified by changing the values of the following PHP directives in the php.ini configuration file:
- upload_max_filesize: This directive specifies the maximum size of an individual file upload.
- post_max_size: This directive sets the maximum size of the entire HTTP POST request, which includes all the uploaded files.
Both directives accept values in bytes, kilobytes (KB), megabytes (MB), or gigabytes (GB). For example, to allow a maximum file size of 10 MB, you can set the values as follows in the php.ini file:
upload_max_filesize = 10M post_max_size = 10M
After modifying these settings, you may need to restart your server for the changes to take effect.
How to check the MIME type of an uploaded file in PHP?
To check the MIME type of an uploaded file in PHP, you can use the $_FILES superglobal array. Here's an example of how to do it:
$file = $_FILES['file_name']['tmp_name']; // The temporary filename of the uploaded file $fileType = $_FILES['file_name']['type']; // The MIME type of the uploaded file
// Check if the uploaded file is of the desired MIME type if ($fileType == 'image/jpeg' || $fileType == 'image/png') { echo "File is an image"; } else { echo "File is not an image"; }
Replace 'file_name' with the name of the file input field in your HTML form. The [['tmp_name']](https://phparea.com/blog/how-to-secure-the-html-input-string-in-php) key is used to access the temporary filename of the uploaded file, and the ['type'] key is used to access the MIME type of the uploaded file.
Note that the MIME type can be easily manipulated by the user, so it is recommended to not rely solely on the client-provided MIME type. It is also a good practice to verify the file extension and perform additional server-side validation to ensure the uploaded file is safe and secure.
How to handle file uploads in PHP?
To handle file uploads in PHP, you need to perform the following steps:
- Create a HTML form with the enctype attribute set to "multipart/form-data" and an input field of type "file". This form will allow users to select and submit files.
- In the PHP script (upload.php in this example) that receives the form submission, you can access the uploaded file through the $_FILES superglobal array. This array provides information about the uploaded file, such as its name, type, size, and temporary location. $file = $_FILES["file"]; $fileName = $file["name"]; $fileType = $file["type"]; $fileSize = $file["size"]; $fileTmpPath = $file["tmp_name"];
- Validate the uploaded file. You can check the file type, size, or perform any other custom validation based on your requirements. $allowedExtensions = ["jpg", "jpeg", "png"]; $maxFileSize = 5 * 1024 * 1024; // 5MB $fileExtension = strtolower(pathinfo($fileName, PATHINFO_EXTENSION)); if (!in_array($fileExtension, $allowedExtensions)) { echo "Invalid file type. Only JPG, JPEG, and PNG files are allowed."; } else if ($fileSize > $maxFileSize) { echo "File size exceeds the limit."; } else { // File is valid, proceed with further processing or move it to a permanent location }
- If the file passes validation, you can move it to a permanent location using the move_uploaded_file() function. $destination = "uploads/" . $fileName; if (move_uploaded_file($fileTmpPath, $destination)) { echo "File uploaded successfully."; } else { echo "Failed to move the uploaded file."; }
- Make sure the uploads directory (or the directory you choose for storing files) has the necessary write permissions so that PHP can move the uploaded file into it.
By following these steps, you can handle file uploads in PHP and perform necessary validation and processing on the uploaded files.
How to handle multiple file uploads in PHP?
To handle multiple file uploads in PHP, you can follow these steps:
- Include a HTML form with an input field set to accept multiple files:
Note that you must set the enctype attribute to multipart/form-data in order to handle file uploads.
- In the PHP code, retrieve the uploaded files using the $_FILES superglobal.
$files = $_FILES['files'];
- Iterate over the files using a loop, as multiple files are uploaded as an array. Here's an example of how that can be done:
foreach ($files['tmp_name'] as $key => $tmp_name) { $file_name = $files['name'][$key]; $file_tmp = $files['tmp_name'][$key]; $file_size = $files['size'][$key]; $file_error = $files['error'][$key];
// Handle each file individually // ... }
- Within the loop, you can perform individual file handling. For example, you can move the uploaded file to a specific directory and perform validation checks on each file.
$target_dir = 'uploads/'; $target_file = $target_dir . basename($file_name);
if (move_uploaded_file($file_tmp, $target_file)) { echo "File uploaded successfully."; } else { echo "Error uploading file."; }
- You may also want to check the file size and file type to ensure they meet your requirements.
$max_file_size = 2097152; // 2MB (in bytes) $allowed_file_types = array('jpg', 'png', 'gif');
if ($file_size > $max_file_size) { echo "File exceeds maximum size limit."; }
$file_ext = strtolower(pathinfo($file_name, PATHINFO_EXTENSION)); if (!in_array($file_ext, $allowed_file_types)) { echo "Invalid file type."; }
By following these steps, you should be able to handle multiple file uploads in PHP.
How to handle large file uploads efficiently in PHP?
Handling large file uploads efficiently in PHP can be achieved by following these best practices:
- Increase PHP configuration settings: Update the upload_max_filesize and post_max_size settings in php.ini to accommodate larger file sizes. Adjust the max_execution_time value to allow more time for the upload process.
- Use streaming uploads: Avoid using $_FILES as it buffers the entire file in memory. Instead, read the file directly from the input stream using php://input. Split the file into smaller chunks and process them individually to minimize memory usage.
- Validate file size and type: Validate the file size and ensure it does not exceed the desired limit before saving. Verify the file type using appropriate mechanisms such as finfo or file extensions to prevent malicious file uploads.
- Set appropriate temporary upload directory: Set the upload_tmp_dir directive in php.ini to a directory with sufficient disk space and fast I/O access.
- Use multipart file upload: Implement multipart file upload to split the file into smaller chunks and upload them sequentially. Handle each chunk individually, storing them temporarily until all chunks are received, then merge them back into the original file.
- Implement file chunking and resumable uploads: Allow the user to upload files in smaller chunks and support resumable uploads by saving the state of upload progress. Resume the upload process from the last saved state in case of interruptions or failures.
- Utilize content delivery networks (CDNs): Offload the file upload process to a CDN that specializes in handling high volume and large file transfers. CDNs can distribute the processing and storage load, resulting in improved performance.
- Optimize server infrastructure: Use a server environment with enough processing power, memory, and disk space to handle large file uploads. Consider load balancing or using a distributed file system to distribute the processing load across multiple servers.
- Implement progress bar and feedback: Provide users with real-time feedback about the upload progress using AJAX or WebSockets. Display a progress bar indicating the percentage of data uploaded to keep the users informed.
- Implement file compression and optimization: Compress uploaded files to reduce their size and improve upload speed. Optimize file formats and resolutions where applicable to minimize storage and processing requirements.
Remember to also consider security measures such as validating file extensions, scanning for viruses, and sanitizing user input to prevent potential vulnerabilities like file inclusion attacks.