Best Swift Development Guides to Buy in February 2026
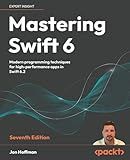
Mastering Swift 6: Modern programming techniques for high-performance apps in Swift 6.2


iOS 18 Programming for Beginners: Learn iOS development with Swift 6, Xcode 16, and iOS 18 - your path to App Store success


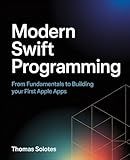
Modern Swift Programming: From Fundamentals to Building Your First Apple Apps


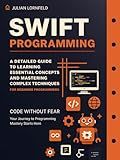
Swift Programming: A Detailed Guide to Learning Essential Concepts and Mastering Complex Techniques


Coding iPhone Apps for Kids: A Playful Introduction to Swift


SwiftUI Cookbook: A guide for building beautiful and interactive SwiftUI apps


Mastering iOS 18 Development: Take your iOS development experience to the next level with iOS, Xcode, Swift, and SwiftUI


Swift Programming in easy steps: Develop iOS apps - covers iOS 12 and Swift 5


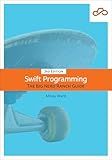
Swift Programming: The Big Nerd Ranch Guide


Learning Swift: Building Apps for macOS, iOS, and Beyond


To implement a protocol in Swift, you first need to define the protocol using the protocol keyword followed by the name of the protocol. Inside the curly braces, you can declare the required properties, methods, and other requirements that the conforming types must implement.
Next, you create a new class, struct, or enum that conforms to the protocol by adding a colon after the type's name followed by the name of the protocol. In the conforming type, you must provide implementations for all the requirements specified in the protocol.
You can also extend existing types to conform to a protocol by using the extension keyword followed by the type name and the name of the protocol. Inside the extension, you can provide implementations for the required methods and properties.
Implementing a protocol allows you to define a blueprint for a set of behaviors that different types can conform to, promoting code reusability and modularity in your Swift applications.
How to define protocol inheritance in Swift?
Protocol inheritance in Swift allows a protocol to inherit the requirements of another protocol. This means that a protocol can inherit the properties, methods, and other requirements of another protocol, and any types that conform to the inheriting protocol must also conform to the inherited protocol.
To define protocol inheritance in Swift, you can use the following syntax:
protocol ProtocolA { // protocol requirements }
protocol ProtocolB: ProtocolA { // protocol requirements }
In this example, ProtocolB inherits the requirements of ProtocolA. Any type that conforms to ProtocolB must also conform to ProtocolA, and implement all of the requirements specified in both protocols.
You can also have multiple levels of protocol inheritance, where a protocol inherits from another protocol that itself inherits from another protocol, and so on:
protocol ProtocolA { // protocol requirements }
protocol ProtocolB: ProtocolA { // protocol requirements }
protocol ProtocolC: ProtocolB { // protocol requirements }
In this case, any type that conforms to ProtocolC must also conform to ProtocolB and ProtocolA, and implement all of the requirements specified in all three protocols.
Protocol inheritance in Swift can be a powerful tool for organizing and structuring your code, and for creating relationships between different types and protocols in your application.
How to handle protocol inheritance in Swift?
In Swift, protocol inheritance can be achieved by using the protocol declaration syntax with a colon followed by the name of the protocol from which you want to inherit. Here is an example to illustrate how to handle protocol inheritance in Swift:
protocol Animal { var name: String { get set } func makeSound() }
protocol Pet: Animal { var owner: String { get set } func play() }
struct Dog: Pet { var name: String var owner: String
func makeSound() {
    print("Woof!")
}

func play() {
    print("\\(name) is playing fetch with \\(owner)")
}
}
let myDog = Dog(name: "Buddy", owner: "Alice") myDog.makeSound() // Output: Woof! myDog.play() // Output: Buddy is playing fetch with Alice
In this example, we have two protocols: Animal and Pet. The Pet protocol inherits from the Animal protocol, which means that any type that conforms to the Pet protocol must also conform to the requirements of the Animal protocol.
When creating a struct or class that conforms to the Pet protocol, we need to implement all the required properties and methods from both the Animal and Pet protocols.
By using protocol inheritance, we can achieve code reusability and create more modular and organized code in Swift.
How to use a protocol as a type in Swift?
In Swift, protocols can be used as types by declaring variables, constants, and function parameters to conform to a specific protocol. Here is an example demonstrating how to use a protocol as a type in Swift:
// Define a protocol protocol Vehicle { var numberOfWheels: Int { get set } func start() func stop() }
// Create a struct conforming to the Vehicle protocol struct Car: Vehicle { var numberOfWheels: Int = 4
func start() {
    print("Car is starting")
}

func stop() {
    print("Car is stopping")
}
}
// Declare a variable of type Vehicle var myVehicle: Vehicle
// Assign an instance of Car to the variable myVehicle = Car()
// Call methods on the vehicle myVehicle.start() myVehicle.stop()
In this example, we define a protocol Vehicle with properties and methods that a vehicle should have. We then create a struct Car that conforms to the Vehicle protocol. We declare a variable myVehicle of type Vehicle and assign an instance of Car to it. Finally, we call methods on the myVehicle variable, which are implemented in the Car struct. This demonstrates how we can use a protocol as a type in Swift to define a common interface for different types of objects.
