
Best Electric Bike Accessories to Buy in July 2026
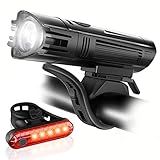
Ascher Ultra Bright USB Rechargeable Bike Light Set, Powerful Bicycle Front Headlight and Back Taillight, 4 Light Modes, Easy to Install for Men Women Road Mountain Cycling Black
-
USB RECHARGEABLE: ECO-FRIENDLY, LONG-LASTING BATTERIES FOR CONVENIENCE.
-
FOUR LIGHTING MODES: CUSTOMIZE BRIGHTNESS WITH FAST/SLOW FLASHING OPTIONS.
-
EASY INSTALLATION: TOOL-FREE SETUP FOR HASSLE-FREE USE ON ANY BIKE.


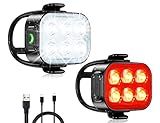
Zewdov Bike Lights for Night Riding, USB Rechargeable Bike Lights Front and Back, Waterproof IP65 Bicycle Light, 4+6 Modes Bike Headlight and Tail Light Set,1.5 Hrs Fast Charging, Easy to Install
-
ULTRA SLIM DESIGN: LIGHTWEIGHT AND COMPACT, FITS IN POCKETS EASILY!
-
FAST USB CHARGING: FULLY RECHARGE IN 1-1.5 HOURS FOR ULTIMATE CONVENIENCE.
-
MULTIPLE LIGHTING MODES: 4 HEADLIGHT & 6 TAILLIGHT MODES FOR SAFETY IN ANY RIDE!
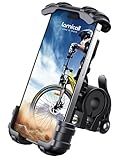
Lamicall Bike Phone Holder, Motorcycle Mount - Motorcycle Phone Holder, Handlebar Cell Phone Clamp, Scooter Phone Clip for iPhone Air 17 Pro Max, 16 15 Pro Max Plus, S20, More 4.7 to 6.8" Smartphones
-
STURDY GRIP FOR SAFETY: SECURE PHONE DURING RIDES ON BUMPY ROADS.
-
SHOCKPROOF PROTECTION: SILICONE PADS PREVENT SCRATCHES AND VIBRATIONS.
-
UNIVERSAL COMPATIBILITY: FITS 4.7-6.8 PHONES AND VARIOUS HANDLEBAR SIZES.
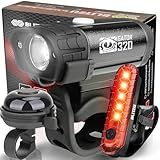
BLITZU Bike Lights, Super Bright Bicycle USB-C Rechargeable Headlight, Taillight & Bell Set, Waterproof Safety Front & Rear Back light for Night Riding, Easy to Install for Men Women Kids Road Cycling
- SUPERIOR VISIBILITY WITH LONG-LASTING USB-C RECHARGEABLE LED LIGHTS.
- DURABLE WATERPROOF DESIGN ENSURES SAFETY IN ALL WEATHER CONDITIONS.
- IDEAL GIFT FOR CYCLISTS OF ALL AGES, ENSURING SAFER RIDES EVERY TIME.
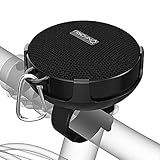
Onforu Portable Bluetooth Speaker for Bike, IP65 Waterproof Mini Outdoor Shower Travel Speakers, Bike Accessories Wireless Bicycle Speaker with Loud Sound for Riding, Ideal Gift
- SECURE BIKE HOLDER: ENJOY MUSIC SAFELY ON BUMPY RIDES.
- IP65 WATERPROOF: RIDE IN ANY WEATHER; YOUR SPEAKER STAYS DRY!
- 10-HOUR PLAYTIME: UP TO 10 HOURS OF UNINTERRUPTED HIGH-QUALITY SOUND!
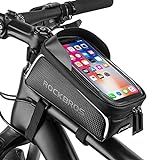
ROCK BROS Bike/Bicycle Phone Front Frame Bag, Waterproof, Tube Bag,Cycling Pouch, Bike Accessories for Men Compatible Phone Under 7”
-
SPACIOUS DESIGN: FITS PHONES UNDER 7, AMPLE STORAGE FOR ESSENTIALS.
-
TOUCH-SENSITIVE SCREEN: EASY ACCESS TO MAPS AND APPS WHILE RIDING.
-
DURABLE & SAFE: WATER-RESISTANT WITH REFLECTIVE FEATURES FOR NIGHT RIDES.
To install accessories on an electric mountain bike, start by deciding which accessories you want to add. Common accessories include racks, fenders, lights, phone mounts, and water bottle holders. Next, gather the necessary tools such as screwdrivers, Allen wrenches, and cable ties. Remove any existing accessories that may be in the way of the new ones. Follow the manufacturer's instructions for each accessory, making sure to securely fasten them to the bike. For accessories that require wiring, such as lights, make sure to connect them properly and securely. Test each accessory to ensure it is working correctly before riding the bike. Once everything is installed and tested, enjoy your new and improved electric mountain bike with your added accessories.
What is the recommended method for adding pedal toe clips to an electric mountain bike?
The recommended method for adding pedal toe clips to an electric mountain bike is as follows:
- Choose the right pedal toe clips that are compatible with your bike's pedals. Make sure they have a secure strap and fit securely on your foot.
- Remove the existing pedals from your electric mountain bike using a pedal wrench.
- Install the pedal toe clips onto the pedals by screwing them in securely. Make sure they are tightened properly to prevent them from coming loose while riding.
- Adjust the straps on the toe clips to fit your feet comfortably. Make sure they are not too tight or too loose.
- Re-attach the pedals onto your electric mountain bike using the pedal wrench.
- Test the toe clips before riding to ensure they are secure and comfortable.
It is important to follow the manufacturer's instructions when installing pedal toe clips as improper installation can cause accidents and injuries while riding.
What is the best way to install a phone mount on an electric mountain bike?
- Choose the right phone mount: Look for a sturdy and waterproof phone mount that is specifically designed for bikes. Make sure it is compatible with the size of your phone.
- Identify the best placement: Find a suitable location on your electric mountain bike where you can easily access your phone while riding, but make sure it does not interfere with your handlebars, brakes, or any other bike components.
- Clean the mounting surface: Use a clean cloth to wipe down the designated area on your bike where you plan to install the phone mount. This will ensure a secure attachment.
- Attach the mount: Most phone mounts come with adjustable straps or screws that can be used to securely attach it to the bike frame or handlebars. Follow the manufacturer's instructions for the specific mount you have chosen.
- Test for stability: Once the phone mount is securely installed, give it a gentle tug to ensure that it is properly attached and will not come loose while riding. Adjust the mount if needed.
- Mount your phone: Place your phone securely in the mount and adjust it to the desired angle for optimal visibility while riding.
- Secure your phone: To avoid any accidents or damage to your phone, make sure it is firmly secured in the mount before you start riding. You may also want to consider using a lanyard or a phone case with additional protection for extra security.
By following these steps, you can safely and securely install a phone mount on your electric mountain bike, allowing you to easily access your phone for navigation or other purposes while riding.
How to mount a spoke reflector on an electric mountain bike?
Mounting a spoke reflector on an electric mountain bike is a simple process that can be done in a few easy steps. Here's how to do it:
- Start by locating the spokes on your bike's wheels where you want to mount the reflector. Choose a location that will provide good visibility from all angles.
- Slide the reflector onto the spoke, making sure that the curved side of the reflector faces outward. The reflector should snap easily onto the spoke, but you may need to gently press it into place if it's a tight fit.
- Once the reflector is securely attached to the spoke, give it a quick spin to make sure it stays in place and doesn't rub against the wheel or tire.
- Repeat this process for each spoke that you want to attach a reflector to. You can add as many reflectors as you like, but be sure not to overcrowd the spokes as this can affect the balance and performance of the wheel.
- After you have attached all the reflectors, take your bike for a test ride to ensure that they are securely in place and provide good visibility in low light conditions.
By following these simple steps, you can easily mount spoke reflectors on your electric mountain bike and increase your visibility and safety on the road.
How to properly mount a GoPro or other action camera on an electric mountain bike?
There are a few different ways you can mount a GoPro or other action camera on an electric mountain bike:
- Handlebar mount: One of the most common ways to mount a camera on an electric mountain bike is to use a handlebar mount. This is a simple and convenient option that allows you to easily capture footage while riding. Make sure the mount is securely attached to the handlebars and that the camera is tightly secured to the mount.
- Helmet mount: Another popular option is to mount the camera on your helmet. This gives you a first-person perspective and allows you to capture footage of exactly what you are seeing while riding. Make sure the mount is securely attached to your helmet and that the camera is positioned in a way that provides a clear view.
- Chest mount: Some riders prefer to use a chest mount to capture footage while riding. This can provide a more stable view than a helmet mount and allows you to capture footage of your arms and handlebars as well. Make sure the mount is securely attached to your chest and that the camera is positioned in a way that provides a clear view.
- Frame mount: If you prefer a more stationary view, you can mount the camera directly to the frame of the electric mountain bike. This can provide a unique perspective of the ride and allows you to capture footage of the bike in action. Make sure the mount is securely attached to the frame and that the camera is positioned in a way that provides a clear view.
Before mounting the camera, make sure to test out different angles and positions to find the one that works best for your needs. Additionally, use quality mounting equipment to ensure the camera is securely attached and won't come loose while riding. Make sure to also check local laws and regulations regarding the use of cameras while riding.
How to install front and rear lights on an electric mountain bike?
To install front and rear lights on an electric mountain bike, follow these steps:
- Purchase front and rear lights specifically designed for bikes. Look for lights that are bright, durable, and easy to mount.
- For the front light, find a suitable mounting location on the handlebars. Most lights come with a mounting bracket that can be easily attached to the handlebars using a screwdriver or allen wrench.
- Attach the front light to the mounting bracket securely. Make sure the light is facing forward and is positioned in a way that it won't interfere with your handlebar grips or brake levers.
- For the rear light, there are a few different mounting options. You can attach it to the seat post, rear stay, or rack on your bike. Most lights come with a flexible mounting bracket that can be adjusted to fit different sizes and shapes of tubing.
- Attach the rear light to the mounting bracket securely. Make sure the light is facing backward and is positioned in a way that it will be visible to vehicles approaching from behind.
- Once the lights are attached, secure any loose wires or cables to prevent them from getting caught in the wheels or other moving parts of the bike.
- Test the lights to make sure they are working properly. Turn them on and off to check the brightness and functionality.
- Make sure to regularly check the batteries or rechargeable power source for your lights to ensure they are fully charged before each ride.
- Enjoy your new front and rear lights on your electric mountain bike, which will not only improve visibility and safety but also make you more visible to other road users.