Best Python Graphing Tools to Buy in July 2026
Python for the TI-84: Powerful Python programs and games for the TI-84 Plus CE Graphing Calculator (Python Programming for Calculators - Practical and ... for students and adults alike! Book 2)


Python on the Numworks Graphing Calculator
TI-84 Plus CE Python Enhanced Graphing plus Software, Iris/Purple
- VIBRANT BACKLIT DISPLAY FOR STUNNING VISUALS ANYWHERE, ANYTIME.
- LONG-LASTING RECHARGEABLE BATTERY FOR UNINTERRUPTED USE ON THE GO.
- SLEEK DESIGN ADDS STYLE WHILE ENSURING PORTABILITY AND CONVENIENCE.
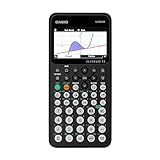
Casio fx-CG100 ClassWiz® Color Graphing Calculator with 3D Graph & Python | Large High-Res Display, Basic & Advanced Functions | Ideal for Exams, STEM, Programming & Advanced
- VIVID 3D GRAPHING: HIGH-RES COLOR DISPLAY FOR CLEAR VISUALIZATIONS.
- EXAM-APPROVED: SECURE TOOL FOR AP, SAT, AND ACT TESTING USE.
- LEARN CODING: INTEGRATED MICROPYTHON FOR A HANDS-ON PROGRAMMING START.
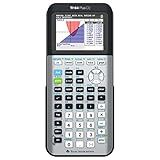
Texas Instruments TI-84 Plus CE Python Color Graphing Calculator, Galaxy Gray (Metallic)
- VIVID FULL-COLOR DISPLAY ENHANCES USER EXPERIENCE AND ENGAGEMENT.
- LONG-LASTING RECHARGEABLE BATTERY FOR UNINTERRUPTED USAGE.
- FUN COLOR OPTIONS WITH PRELOADED APPS AND IMAGES ATTRACT BUYERS.
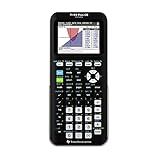
Scientific Python Graphic Calculator, Folima TI-84 Plus CE Color Graphing Instruments, Black 7.5 Inch
- VIBRANT DISPLAY: FULL-COLOR VISUALS FOR CLEAR, ENGAGING EQUATIONS AND GRAPHS.
- VERSATILE FUNCTIONALITY: PRELOADED APPS ENHANCE MATH LEARNING AND INTERACTION.
- LONG-LASTING BATTERY: RECHARGEABLE DESIGN ENSURES WEEKS OF RELIABLE USE.
To limit the border size on a Matplotlib graph, you can modify different properties of the matplotlib.pyplot.figure object. Here are a few methods you can use:
- Adjusting the figure's subplot parameters: Use the plt.subplots_adjust() function to modify the spacing between subplots and the figure edge. For example, plt.subplots_adjust(left=0.1, right=0.9, top=0.9, bottom=0.1) will reduce the border size by setting the left, right, top, and bottom margins accordingly.
- Customizing the figure size and margins: Set the figure size when creating the plot using fig = plt.figure(figsize=(width, height)), where width and height are the desired dimensions in inches. Adjust the figure's margins using the fig.subplots_adjust() function. For instance, fig.subplots_adjust(left=0.1, right=0.9, top=0.9, bottom=0.1).
- Modifying the axes boundaries: Manually set the limits of the x-axis and y-axis using plt.xlim() and plt.ylim() functions, respectively. Limiting the axis range can effectively reduce the visible borders.
- Removing spines: Each axis in Matplotlib has spines (borders) that can be removed individually. Use ax.spines['position'].set_visible(False) to remove specific spines. For example, ax.spines['top'].set_visible(False) will hide the top border.
- Turn off the axis frame: Call ax.axis('off') to hide the entire border frame, including the spines.
These are various techniques to limit the border size in Matplotlib. Remember to import the matplotlib.pyplot module as plt before implementing any of these methods.
What is the impact of a borderless graph on the visualization of data in Matplotlib?
A borderless graph in Matplotlib refers to a graph that is displayed without any surrounding axes or borders. The impact of using a borderless graph on the visualization of data in Matplotlib can vary depending on the context and the specific requirements of the visualization.
Pros of using a borderless graph:
- Enhanced focus: Removing the borders and axes can draw more attention to the actual data being presented, allowing the viewer to focus solely on the plot itself.
- Aesthetics: A borderless graph can often create a cleaner and more visually appealing representation of the data, especially when combined with other design elements.
Cons of using a borderless graph:
- Lack of context: Without the axes and borders, it can be difficult for the viewer to quickly interpret the values or understand the scale of the data being presented. This is particularly true when there are multiple plots or subplots involved.
- Limited interactivity: Removing the axes can make it challenging to interactively explore the data with built-in Matplotlib features like zooming, panning, or adding annotations.
Overall, the impact of a borderless graph on data visualization depends on the specific use case and target audience. While it can offer a more streamlined and aesthetically pleasing representation, it may also sacrifice some interpretability and interactivity.
How to customize the border appearance for a specific line plot in a Matplotlib graph?
To customize the border appearance for a specific line plot in a Matplotlib graph, you can use the plt.plot function's linestyle and linewidth parameters.
Here's an example of how to customize the border appearance for a specific line plot:
import matplotlib.pyplot as plt
Generate data
x = range(1, 6) y = [1, 4, 3, 5, 2]
Create a plot
plt.plot(x, y, linestyle='-', linewidth=2, color='blue', marker='o', markersize=5)
Customize the border appearance for the line plot
ax = plt.gca() # get current axes ax.spines['left'].set_linewidth(2) # Customize left border ax.spines['bottom'].set_linewidth(2) # Customize bottom border ax.spines['right'].set_visible(False) # Remove right border ax.spines['top'].set_visible(False) # Remove top border
Show the plot
plt.show()
In this example, the linestyle parameter is set to a solid line ('-') and the linewidth parameter is set to 2 for the line plot. The color parameter sets the color of the line. Additionally, marker and markersize parameters are set to add circular markers on the data points.
To customize the border appearance, we access the current axes using plt.gca() and then modify the properties of the individual spines (i.e., borders) using ax.spines. In this case, the left and bottom borders are customized by setting their linewidth to 2. The set_visible method is used to remove the right and top borders by setting them as not visible.
Finally, we display the plot using plt.show().
What is the relationship between border size and visual aesthetics on a Matplotlib graph?
The relationship between border size and visual aesthetics on a Matplotlib graph can vary depending on the specific use case and personal preferences. In general, the border size can impact the overall appearance and readability of the graph.
A thicker border can create a more pronounced visual separation between the plot area and the surrounding elements, such as axes and labels. This can enhance the clarity and focus on the actual data being presented. However, a very large border size may also dominate the graph and draw unnecessary attention away from the content.
On the other hand, a thinner border can provide a more seamless integration of the plot into the overall figure, giving a cleaner and more minimalist look. This can be preferred in certain design contexts where a sleek and modern appearance is desired. However, it is important to balance the border size with other visual elements to ensure sufficient distinction and clarity.
Ultimately, the choice of border size should be made considering the specific graph content, the desired visual style, and the intended audience. It is often a matter of personal aesthetic preferences and the overall design goals of the graph.
How to add a border to a specific plot area inside a Matplotlib graph?
To add a border to a specific plot area inside a matplotlib graph, you can make use of the spines feature of the Axes object. Here's a step-by-step guide:
- Import the necessary libraries:
import matplotlib.pyplot as plt
- Create a figure and axis object:
fig, ax = plt.subplots()
- Plot your data:
ax.plot(x, y)
- Set the border configuration for the specific plot area: a. Hide the top and right spines by setting their visibility to False:
ax.spines['top'].set_visible(False) ax.spines['right'].set_visible(False)
b. Set the desired color and linewidth for the remaining spines (left and bottom) using the set_color and set_linewidth methods:
ax.spines['left'].set_color('black') ax.spines['left'].set_linewidth(1.5) ax.spines['bottom'].set_color('black') ax.spines['bottom'].set_linewidth(1.5)
- Adjust the plot limits and labels if necessary:
ax.set_xlim(x_min, x_max) ax.set_ylim(y_min, y_max) ax.set_xlabel('X Label') ax.set_ylabel('Y Label')
- Finally, display the plot:
plt.show()
This will create a matplotlib graph with a border around the specific plot area defined by the x and y axes. You can customize the color, linewidth, and other properties of the border according to your preferences.
How to customize the border size only on the x-axis of a Matplotlib graph?
To only customize the border size on the x-axis of a Matplotlib graph, you can use the set_linewidth() method of the matplotlib.spines.Spine object associated with the x-axis spine.
Here's an example of how to do this:
import matplotlib.pyplot as plt
Create some sample data
x = [1, 2, 3, 4, 5] y = [2, 4, 6, 8, 10]
Create the plot
fig, ax = plt.subplots()
Plot the data
ax.plot(x, y)
Customize the border size on the x-axis
ax.spines['left'].set_linewidth(0.5) ax.spines['bottom'].set_linewidth(2) # Customize the border size here
Show the plot
plt.show()
In this example, the set_linewidth() method is called on the ax.spines['bottom'] object to customize the border size on the x-axis only. The default border size is 0.8, but you can set it to your desired value.