Best Tools for Helm Image Tag Management to Buy in July 2026
BOSU Helm Push Up Bar, Portable Pushup Exercise Equipment for Home Gym Training, Core, Abs and Upper Body Strength Workouts, Black
- VERSATILE FITNESS TOOL FOR BOSU OR ANY STABILITY BALL WORKOUTS!
- STRENGTHEN MUSCLES AND CORE WITH 3 ERGONOMIC GRIP OPTIONS.
- LIGHTWEIGHT DESIGN LETS YOU TRAIN ANYWHERE-SUPPORTS 700+ LBS!


Marine Tech Tools Fill Tube, Seastar Hydraulic Steering Bleed Kit, Fits all Outboard, Sterndrive & Inboard Seastar Hydraulic Helms, Seastar Hydraulic Steering Fluid Bleeder Kit
- SIMPLIFY FLUID CHANGES WITH OUR EASY-TO-USE FILL TUBE!
- SAVE TIME AND MONEY ON DIY BOAT MAINTENANCE WITH OUR KIT.
- DURABLE, RELIABLE TOOLS DESIGNED FOR PASSIONATE BOAT OWNERS.
Marine Tech Tools Seastar Hydraulic Steering Filler Kit with Swivel, Outboard Power Steering Bleed Kit for Boat, Fits Seastar Hydraulic Steering & All Outboard, Sterndrive & Inboard
- 💧 QUICK DISCONNECT FITTING FOR HASSLE-FREE FLUID FILLING.
- ⚓ SAVE TIME AND MONEY WITH EASY DIY HYDRAULIC SYSTEM REFILLS.
- 🛠️ DURABLE DESIGN CRAFTED FOR LONG-LASTING MARINE PERFORMANCE.
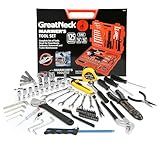
Great Neck MS125 125 Piece Marine Tool Set, Gifts for Men, Dad Gifts, High Visibility, Water-Resistant Boat Tool Box Case, Anti-Rust Chrome-Plated Boat Supplies And Accessories
- DURABLE TOOLS: HEAVY-DUTY, RUST-RESISTANT STEEL FOR LONG-LASTING USE.
- EMERGENCY READY: WATER-RESISTANT CASE FLOATS FOR EASY RECOVERY AT SEA.
- COMPLETE SET: 125 ESSENTIAL TOOLS FOR ALL YOUR MARINE REPAIR NEEDS.
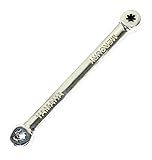
Marine Tech Tools Shift Shaft Wrench, Fits Mercury, Suzuki, and Yamaha 100HP+ Outboards, Precision Outboard Shift Shaft Tool for Mercury & Yamaha Engines
-
UNIVERSAL FIT: WORKS WITH MERCURY, SUZUKI, YAMAHA 100HP AND ABOVE!
-
DOUBLE HEADED DESIGN: SIMPLIFY GEAR SHIFTING ON ALL MAJOR BRANDS!
-
LIFETIME WARRANTY: DURABLE TOOLS CRAFTED WITH PRIDE IN CHARLESTON, SC!

Marine Tech Tools Bleed Tube, Seastar Hydraulic Steering Bleed Kit, Fits Seastar Hydraulic Cylinders, Seastar Hydraulic Steering Bleed Kit, Seastar Bleeding System
-
SIMPLIFIES BLEEDING PROCESS FOR ALL SEASTAR STEERING SYSTEMS.
-
CLEAR HOSE DESIGN HELPS YOU EASILY SPOT AIR BUBBLES.
-
DIY TOOL SAVES TIME AND MONEY ON HYDRAULIC MAINTENANCE.
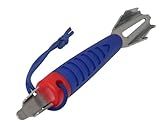
DeckMate 6-in-1 Boat Tool, Includes 2 Deck Keys, Shackle Key, Zipper Pull, Screwdriver, and Hex Tool
- SIX-IN-ONE TOOL: ULTIMATE VERSATILITY FOR ALL YOUR NEEDS!
- LIFETIME WARRANTY: BUY WITH CONFIDENCE AND PEACE OF MIND.
- ZIPPER PULLER & BOTTLE OPENER: PERFECT FOR OUTDOOR ADVENTURES!
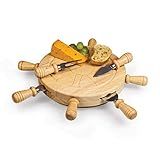
PICNIC TIME Mariner Cheese Board and Knife Set, Novelty Charcuterie Board Set with Stainless Steel Tools Housed in Helm Case Under the Lid, Swivel-Open Serving Platter, and Charcuterie Set, (Parawood)
-
NAUTICAL DESIGN ENHANCES GATHERINGS, PERFECT FOR COCKTAIL PARTIES.
-
REVOLVING TOOL ACCESS ENSURES EASY SHARING AND USER-FRIENDLY ENJOYMENT.
-
DURABLE WOOD AND STAINLESS STEEL BUILD, BACKED BY A LIFETIME GUARANTEE.
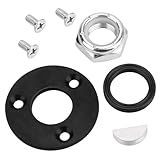
Hydraulic Helm Seal Service Kit HP6032 for Seastar HH5271, HH5272, HH5273, HH5261,HH5262, Compatible with Baystar HH4514, HH4314 and HH4513
- COMPREHENSIVE KIT: 7 ESSENTIAL PARTS FOR SEAMLESS HELM MAINTENANCE.
- WIDE COMPATIBILITY: WORKS WITH NUMEROUS SEASTAR & BAYSTAR HELMS.
- DURABLE QUALITY: MADE FROM HIGH-QUALITY MATERIALS FOR LONG-LASTING USE.
Managing Helm image tag deployments can be done effectively through various practices. Here are some steps to follow:
- Understand Helm charts: Helm is a package manager for Kubernetes that helps in deploying applications. Familiarize yourself with how Helm charts are structured and what components they contain.
- Customize chart values: Modify the default values provided in the chart to suit your deployment needs. This includes specifying the container image used and its tag.
- Use version control: Maintain your Helm chart and values file(s) within a version control system like Git. This allows you to track changes, revert to previous versions, and collaborate with other team members easily.
- Separate configuration from code: Keep your Helm values file(s) separate from your actual Helm chart. This way, you can manage different configurations without modifying the chart directly.
- Define image tags declaratively: Instead of manually updating image tags in your Helm values file(s), use variables or templating to define them declaratively. This can be done using tools like Helm's built-in templating engine, Helmfile, or Kustomize.
- Leverage release environments: Set up different environments for each stage of your deployment pipeline, such as development, staging, and production. This allows you to have separate values files for each environment and better manage image tag deployments specific to those environments.
- Enable automated deployments: Integrate Helm with your CI/CD pipeline to automate image tag deployments. This ensures that each time a new image tag is available, the deployment process is triggered automatically, minimizing manual errors and improving efficiency.
- Monitor image repositories: Keep track of your container image repositories to get notified when new image tags are pushed. This helps you stay up-to-date and ensure that the latest version of your container images are used in deployments.
- Perform thorough testing: Always test your image tag deployments in a non-production environment before applying them to critical systems. This helps identify any issues or incompatibilities early on.
- Regularly update and audit: Review and update your Helm charts and values files regularly to ensure they reflect the latest requirements and best practices. Perform audits to identify any vulnerabilities or outdated dependencies in your container images.
By following these steps, you can effectively manage Helm image tag deployments and ensure smooth application deployments on Kubernetes.
How to monitor and track image tag deployments with helm using Prometheus?
To monitor and track image tag deployments with Helm using Prometheus, you can follow the steps below:
- Install Prometheus:
- Create a Prometheus Helm values file (e.g., prometheus-values.yaml) and configure it with necessary settings.
- Install Prometheus using the Helm command: helm install prometheus prometheus-community/prometheus -f prometheus-values.yaml.
- Set up cluster-level monitoring:
- Configure Kubernetes API monitoring in Prometheus by editing a Prometheus configuration file. For example, prometheus-values.yaml.
- Add the Kubernetes service discovery configuration within the file.
- Update the Prometheus installation using the command: helm upgrade prometheus prometheus-community/prometheus -f prometheus-values.yaml.
- Set up metrics endpoint in your application:
- Add Prometheus metrics to your application codebase and expose an endpoint for Prometheus to scrape.
- Prometheus-compatible client libraries are available for various programming languages, such as prom-client for Node.js.
- Follow the documentation specific to your programming language and framework to instrument your application with Prometheus metrics.
- Configure Prometheus to scrape your application's metrics endpoint:
- Edit the Prometheus configuration file (prometheus-values.yaml) and add a scrape_configs section.
- Configure Prometheus to scrape metrics from your application's endpoint by specifying its URL and other necessary details.
- Deploy your updated Helm chart:
- Use the Helm command to upgrade your application chart and apply the changes: helm upgrade my-app ..
- Access Prometheus dashboard:
- Run kubectl port-forward service/prometheus-server 9090:80 to forward the Prometheus service port to your local machine.
- Open a web browser and navigate to http://localhost:9090 to access the Prometheus dashboard.
- Monitor and track image tag deployments:
- Use Prometheus query language (PromQL) to write queries for monitoring and tracking image tag deployments.
- Customize your queries based on the metrics exposed by your application and the specific deployment information you want to monitor.
- You can visualize your queries on the Prometheus dashboard or integrate with other visualization tools like Grafana.
By following these steps, you can monitor and track image tag deployments of your application using Helm and Prometheus.
How to define pre and post hooks for image tag deployments with helm?
To define pre and post hooks for image tag deployments with helm, you can follow these steps:
- Create a values.yaml file: Start by creating a values.yaml file or modifying an existing one to include the hook definitions. This file contains the configuration values for your Helm chart.
- Define pre and post hooks: Add the following blocks to your values.yaml file: preInstallHooks: - name: pre-manifest: | - name: pre-manifest: | postInstallHooks: - name: post-manifest: | - name: post-manifest: | Replace , , , , , and with your desired values. represents the name of the hook, and represent the YAML manifest for pre and post hooks, respectively.
- Create template files for pre and post hooks: Create separate template files for pre and post hook manifest definitions. These template files should have the .yaml extension. For example, pre-hook.yaml and post-hook.yaml.
- Define hook manifests in template files: In the pre-hook.yaml and post-hook.yaml files, define the Kubernetes manifest for pre and post hooks, respectively. You can use standard Kubernetes manifest syntax, including Deployment, Job, or any other Kubernetes resources. Make sure to include the metadata and spec sections. Example pre-hook.yaml: apiVersion: batch/v1 kind: Job metadata: name: pre-hook-job spec: template: spec: containers: - name: pre-hook-container image: pre-hook-image:1.0 command: ["/bin/pre-hook"] backoffLimit: 2 Example post-hook.yaml: apiVersion: batch/v1 kind: Job metadata: name: post-hook-job spec: template: spec: containers: - name: post-hook-container image: post-hook-image:1.0 command: ["/bin/post-hook"] backoffLimit: 2
- Reference template files in the values.yaml file: In your values.yaml file, replace and with the content of the pre-hook.yaml and post-hook.yaml files, respectively.
- Deploy helm chart: Deploy your Helm chart by running the helm install command, referencing the values.yaml file: helm install -f values.yaml Replace with the desired name for your deployment and with the path to your Helm chart directory.
Note: The pre and post hooks will run before and after the main chart's resources are deployed, respectively.
How to customize resource limits for image tag deployments using helm values?
To customize resource limits for image tag deployments using Helm values, you need to follow these steps:
- Open the Helm values file associated with your deployment. This file is usually named values.yaml and is located in the root of your Helm chart.
- Find the section related to your specific deployment or container. This section is typically named after the deployment or container.
- Within this section, you can define resource limits by setting the resources.limits and resources.requests values. The limits value determines the maximum amount of resources that a container can use, while the requests value states the minimum amount of resources needed by a container.
For example, to set the CPU and memory limits to a specific deployment, you can use the following syntax:
deploymentName: resources: limits: cpu: "200m" memory: "512Mi" requests: cpu: "100m" memory: "256Mi"
In this example, the CPU limit is set to 200 milliCPU units (m) and memory limit is set to 512 megabytes (Mi). The CPU request is set to 100 milliCPU units (m) and memory request is set to 256 megabytes (Mi).
- Save the changes to the Helm values file.
- Deploy or upgrade your Helm chart using the updated values file:
helm upgrade --install
Replace <release> with the name of your release and <chart> with the name of your Helm chart.
By customizing the resource limits in the Helm values file, you can control the allocation of CPU and memory resources to specific deployments or containers within your Kubernetes cluster.
What is helm in the context of managing image tag deployments?
In the context of managing image tag deployments, Helm is a package manager for Kubernetes that helps in managing and deploying applications on a Kubernetes cluster. It provides a templating engine to manage configuration files and allows for defining complex deployments and application flows using charts.
Helm uses charts, which are packages containing all the resources required to run an application on a Kubernetes cluster. These charts can be customized using values files, which specify the configuration parameters. One such parameter can be the image tag, allowing for easy management and deployment of different versions of the application.
By using Helm, you can easily deploy, upgrade, and rollback applications by managing the image tags within the charts. It provides a higher level of abstraction over managing deployments, making it more efficient and error-free.