Best Plotting Tools for Error Bars in Julia to Buy in July 2026
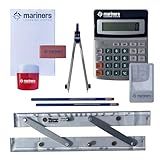
Dunzoom 3 Pcs Marine Navigation Kit, Basic Navigation Set Include 18" Marine Parallel Ruler with Clear Scales, 8" Diameter Nautical Plotter Protractor, 6" Fixed Point Divider for Boat Accessories
- ALL-IN-ONE KIT WITH DURABLE TOOLS FOR ACCURATE MARINE NAVIGATION.
- STURDY DESIGNS ENSURE CONVENIENCE AND PRECISION IN EVERY JOURNEY.
- PERFECT FOR BOTH NOVICE AND EXPERIENCED NAVIGATORS ANYTIME, ANYWHERE.


3 Pcs Marine Navigation Kit, Nautical Chart Plotting Tool Set with Single Hand Divider, Navigation Ruler and Protractor, Drafting Supplies for Boating, Sailing, Seafaring
- COMPLETE KIT FOR SAFER NAVIGATION ON ALL SEA VOYAGES.
- CLEAR SCALES AND HIGH-TRANSPARENCY ENSURE PRECISE MEASUREMENTS.
- STREAMLINED DESIGN SIMPLIFIES PLOTTING FOR QUICK COURSE ADJUSTMENTS.
Nicpro 22 PCS Compass Geometry Tools with Case, Drafting Tools Geometry Set with Swing Arm Protractor, Rulers, Metal Compass, Square Set, Mechanical Pencil, Back to School Supplies for Students
-
ALL-IN-ONE SET: INCLUDES EVERYTHING NEEDED FOR MATH AND DRAWING TASKS.
-
PRECISION COMPASSES: HIGH-QUALITY TOOLS FOR ACCURATE CIRCLES AND ARCS.
-
PORTABLE CASE: LIGHTWEIGHT DESIGN FOR EASY STORAGE AND ON-THE-GO USE.
Liquidraw Solid Brass Navigation Divider 8" (20cm) | Single Handed Marine Nautical Plotting Tool | Professional Navigational Instrument for Drafting, Maritime Measurement & Technical Drawing
- SOLID BRASS CONSTRUCTION ENSURES DURABILITY & PRECISION FOR ALL USERS.
- ACHIEVE ACCURATE NAVIGATIONAL PLOTTING WITH A PROFESSIONAL-GRADE TOOL.
- VINTAGE BRASS FINISH MAKES IT A PERFECT GIFT FOR MARITIME ENTHUSIASTS.
Weems & Plath #176 Marine Navigation Ultralight Divider
- DURABLE MARINE ALLOY RESISTS CORROSION FOR LASTING PERFORMANCE.
- COMPLETE SET WITH SPARE POINTS, KNOB, WHEEL, AND LEAD INCLUDED.
- TRUSTED GERMAN CRAFTSMANSHIP BACKED BY A LIMITED LIFETIME WARRANTY.
Calyron Architect Triangular Set Boat Architectural Stationery Navigation Compasses Course Triangle & Positioning Triangle (33cm Each) Pencil Brass Nautical Divider Bag Set for Training Purposes
- COMPLETE SET FOR STUDENTS & PROFESSIONALS: EVERYTHING YOU NEED!
- PRECISION TOOLS: ACHIEVE ACCURACY IN EVERY MEASUREMENT & DRAWING
- PORTABLE CARRY BAG: EASY ORGANIZATION FOR ON-THE-GO USE!
Weems & Plath Marine Navigation Parallel Plotter
- ROBUST ACRYLIC WITH MARINE-GRADE ALUMINUM FOR LASTING PERFORMANCE.
- VERSATILE SCALES FIT ALL U.S. COAST AND HARBOR CHARTS EASILY.
- INCLUDES PROTRACTORS FOR PRECISE COURSE AND BEARING MEASUREMENTS.
Mariners Chart Plotting Tool Kit - Marine Navigation Equipment, Weems and Plath Parallel Rulers, Dividers & Accessories for Nautical Charts, Sailing and Boating Exam Preparation
-
MASTER TRADITIONAL NAVIGATION WITHOUT GPS; PLOT YOUR COURSES ACCURATELY.
-
COMPLETE KIT INCLUDES PREMIUM TOOLS FOR PRECISE NAUTICAL PLOTTING.
-
IDEAL FOR MARITIME STUDENTS; ACE YOUR SAILING CERTIFICATION EXAMS!
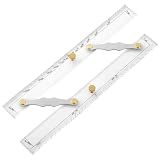
Parallel Ruler with Clear Markings, 12 in Navigation Plotting Tool, Quality Plastic, Precision Marine Chart Divider, Nautical Map Measuring Ruler for Sailing, Boating, Navigation Training
- SEAMLESS CHART WORK: ACCURATE PLOTTING FOR SAILORS & NAVIGATION STUDENTS.
- DURABLE & LIGHTWEIGHT: STURDY PLASTIC BUILD RESISTS WARPING FOR LONGEVITY.
- ERROR-FREE NAVIGATION: SMOOTH MOTION ENSURES PRECISE BEARINGS ON CHARTS.
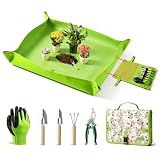
Grenebo 7-Piece Gardening Tools Set, Gift for Women, Beginners, Tools Kit with Plant Repotting Mat & Tool Bag, Stainless Steel Gardening Hand Tools for Indoor Transplanting, Succulent Bonsai Plants
-
ALL-IN-ONE KIT: EVERYTHING YOU NEED FOR INDOOR GARDENING IN ONE SET!
-
MESS-FREE MAGIC: WATERPROOF MAT KEEPS SOIL CONTAINED FOR EASY CLEANUP.
-
PERFECT GIFT: STYLISH GARDEN TOOLS MAKE A GREAT PRESENT FOR PLANT LOVERS!
To plot a function with error bars in Julia, you can use the Plots package. First, you need to define the function you want to plot and the error bars associated with it. Then, create a plot using the plot() function from the Plots package, passing in the function data along with the error data using the yerror keyword argument. This will create a plot with error bars displaying the uncertainty in your data points. You can also customize the plot further by adding labels, titles, and adjusting the appearance of the error bars. Overall, plotting a function with error bars in Julia is straightforward and can be done with a few lines of code using the Plots package.
How to create a line plot with error bars in Julia?
To create a line plot with error bars in Julia, you can use the Plots package. Here is an example code snippet that demonstrates how to create a simple line plot with error bars:
using Plots
Generate some sample data
x = 1:10 y = rand(10) y_err = 0.1 * ones(10) # Assume a constant error for simplicity
Create the line plot with error bars
plot(x, y, yerror = y_err, label = "Data", ribbon = true) xlabel!("X") ylabel!("Y") title!("Line plot with error bars")
In this code snippet, we first generate some sample data x, y, and y_err. We then use the plot function from the Plots package to create the line plot with error bars. The yerror argument specifies the error bars for the y-values, and ribbon = true indicates that we want to display the error bars as ribbons around the line plot. Finally, we add labels and a title to the plot.
You can customize the plot further by adjusting the plot settings or using different plotting styles. The Plots package provides a wide range of customization options, so you can create visually appealing line plots with error bars in Julia.
What is the use of error bars in data visualization in Julia?
Error bars are used in data visualization in Julia to visually represent the uncertainty or variability in the data. They show the range of possible values for each data point, helping to convey the reliability and precision of the data. Error bars can be used in various types of plots, such as bar charts, line charts, and scatter plots, to provide additional information about the data and its associated uncertainties. They are particularly useful when comparing multiple datasets or when analyzing the results of statistical tests.
How to change the color of a plot in Julia?
In Julia, you can change the color of a plot by specifying the color attribute when you create the plot.
Here is an example of how you can change the color of a plot in Julia:
using Plots
x = 1:10 y = rand(10)
Plot the data with a specific color
plot(x, y, color="red", linewidth=2, title="My Plot")
In this example, the color="red" argument specifies that the plot should be displayed in red color. You can use any valid color name or code (e.g., "blue", "green", "#FFA500") to change the color of the plot.
How to dynamically update a plot in Julia?
To dynamically update a plot in Julia, you can use the Plots.jl package. Here's a simple example:
- Install the Plots.jl package if you haven't already:
using Pkg Pkg.add("Plots")
- Create a plot and hold it using the plot function:
using Plots
Create a data array
x = 1:10 y = rand(10)
Create a plot and store it in a variable
plt = plot(x, y, xlabel="X", ylabel="Y", title="Dynamic Plot", legend=false)
- Update the plot dynamically by modifying the y data array and redrawing the plot using the gui() function:
for i in 1:10 # Update the y values y = rand(10)
# Update the plot with the new y values
plt\[1\]\[:y\] = y

# Redraw the plot
gui(plt)

# Pause for a short time to see the update
sleep(0.5)
end
This code will update the y values randomly and redraw the plot every 0.5 seconds, creating a dynamic plot. You can customize the updating process based on your specific needs.