
Best Logitech Mouse Accessories to Buy in July 2026
![HOTLINEGAMES [Grip Upgrade] 2.0 Plus Mouse Anti Slip Grip Tape Compatible with Logitech G PRO Wireless Gaming Mouse Skins,Sweat Resistant,Cut to Fit,Easy Apply,Pro Performance Upgrade](https://cdn.blogweb.me/1/513f_Ik_A_Xgr_L_SL_160_7d06744d3f.jpg)
HOTLINEGAMES [Grip Upgrade] 2.0 Plus Mouse Anti Slip Grip Tape Compatible with Logitech G PRO Wireless Gaming Mouse Skins,Sweat Resistant,Cut to Fit,Easy Apply,Pro Performance Upgrade
- ENHANCED GRIP FOR ALL, EVEN WITH DRY SKIN OR NON-SWEATY HANDS!
- DIAMOND TEXTURE BOOSTS FRICTION AND PREVENTS SLIPS DURING INTENSE GAMING.
- CUSTOMIZED FOR RAZER MICE; EASY APPLICATION WITH NO RESIDUE LEFT BEHIND.
![HOTLINEGAMES [Grip Upgrade] 2.0 Plus Mouse Anti Slip Grip Tape Compatible with Logitech G PRO Wireless Gaming Mouse Skins,Sweat Resistant,Cut to Fit,Easy Apply,Pro Performance Upgrade](https://cdn.flashpost.app/flashpost-banner/brands/amazon.png)
![HOTLINEGAMES [Grip Upgrade] 2.0 Plus Mouse Anti Slip Grip Tape Compatible with Logitech G PRO Wireless Gaming Mouse Skins,Sweat Resistant,Cut to Fit,Easy Apply,Pro Performance Upgrade](https://cdn.flashpost.app/flashpost-banner/brands/amazon_dark.png)

Superglide Glass Mouse Skates for Logitech G Pro X Superlight 2 (Type-C, Black) - Polished Smooth Glide, Durable Gaming Mouse Feet
- REVOLUTIONIZE YOUR GAME WITH A SMOOTH, FAST, AND RESPONSIVE SURFACE.
- ENJOY LONG-LASTING DURABILITY WITH SUPER STRONG TEMPERED GLASS DESIGN.
- EXPERIENCE UNPARALLELED GLIDE WITH PERFECTLY POLISHED ROUND EDGES.
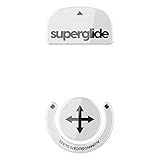
Superglide Glass Mouse Skates for Logitech G Pro X Superlight (Type-S, White) - Ultra Smooth Glide, Polished Round Edge, Compatible with G Pro Superlight 2, Superlight Mouse Skates
- ACHIEVE PRECISION AIMING WITH SUPER SMOOTH ALUMINOSILICATE GLASS.
- ENJOY LONG-LASTING DURABILITY-ALMOST PERMANENT USE WITHOUT WEAR!
- EXPERIENCE THE ULTIMATE GLIDE WITH FLAWLESSLY POLISHED ROUND EDGES.
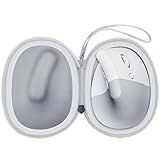
ANKHOH Case for Logitech Lift Vertical Ergonomic Mouse, Travel Carrying Holder Storage Box for Logi Wireless Bluetooth Cordless Upright Mouse - Bag Only (Grey)
-
PERFECT FIT FOR LOGITECH LIFT MOUSE: TAILOR-MADE FOR LOGITECH ERGONOMIC DEVICES.
-
SUPERIOR PROTECTION: WATERPROOF, DUSTPROOF EVA MATERIAL ENSURES SAFETY.
-
TRAVEL-FRIENDLY DESIGN: LIGHTWEIGHT WITH A DETACHABLE HANDLE FOR CONVENIENCE.
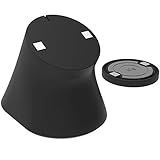
Soarking Charging Dock for Logitech Computer Mouse G Pro X Superlight 2/1,G502/G502X/G502X Plus Lightspeed,G703,G903 Lightspeed and G PRO Computer Mice Powerplay Charging System
-
COMPACT SIZE: SPACE-SAVING DESIGN FITS ANYWHERE, IDEAL FOR TRAVEL.
-
NON-SLIP FEATURE: SECURELY STAYS IN PLACE ON ANY SURFACE, NO RESIDUE LEFT.
-
EFFORTLESS CHARGING: CONTINUOUS POWER KEEPS YOUR MOUSE READY FOR ACTION.
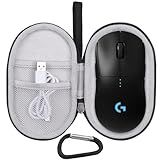
Mouse Case for Logitech G PRO X Superlight 2/2 DEX/ 2c for X Superlight for Pro 2 Lightspeed Wireless/Wired Gaming Mouse (Case Only) (Black-Grey)
-
PERFECT FIT FOR LOGITECH G PRO SERIES MICE - ENSURE OPTIMAL PROTECTION!
-
PREMIUM SHOCK & WATER RESISTANCE - PROLONG YOUR MOUSE'S LIFESPAN EFFECTIVELY.
-
CONVENIENT STORAGE WITH MESH POCKET - KEEP ALL ACCESSORIES ORGANIZED EASILY.
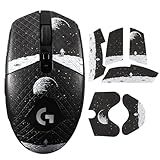
IMMOENUC Mouse Grip Tape Sticker for Logitech G305/G304/G203/G102 Wireless Mouse Anti Slip Skin Self-Adhesive,Pre-Cut,Sweat-Resistant Game Mice Accessories(Earth Pattern)
- ANTI-SLIP TEXTURE BOOSTS GRIP AND STABILIZES YOUR MOUSE MOVEMENTS.
- RESIDUE-FREE, SWEAT-WICKING MATERIAL ENSURES LASTING PERFORMANCE.
- PRECISION-CUT FOR A PERFECT FIT ON LOGITECH G305/G204/G203 MODELS.
To set up Logitech mouse gestures for specific applications, you can follow these steps:
- Install Logitech Options software: Download and install the Logitech Options software from the official Logitech website. This software enables you to customize your Logitech mouse settings, including gestures.
- Launch Logitech Options: Once the software is installed, launch Logitech Options.
- Locate 'Mouse' settings: Within Logitech Options, find the section related to the mouse settings. It may be labeled as 'Mouse,' 'Gesture settings,' or something similar.
- Identify your mouse model: The options and features available may differ slightly depending on the specific Logitech mouse model you are using. Ensure that the software recognizes your mouse correctly.
- Select 'Application-specific settings': Look for an option that allows you to configure gestures based on specific applications. It could be called 'Application-specific settings,' 'Per-app settings,' or similar.
- Find the desired application: Locate the application for which you want to set up custom gestures. This could be any software, such as a web browser, image editor, or video player.
- Choose the desired gesture: Once you have selected the application, you will typically see a list of available gestures or predefined options. Choose the gesture you want to assign to that application.
- Configure the gesture: Click on the chosen gesture option to configure it further. You may be able to define the movement, direction, or button combination associated with the gesture.
- Save the settings: After configuring the gesture, save the settings for the specific application.
- Repeat for other applications: If you want to set up gestures for multiple applications, repeat the process from step 6 for each application.
- Test the gestures: Launch the applications you have configured gestures for and test if the assigned gestures are functioning as expected. If not, you may need to revisit the settings and make any necessary adjustments.
Remember, the steps mentioned above are a general guide, and the exact process may vary slightly based on the Logitech Options software version and your specific mouse model.
How to set up Logitech mouse gestures for Google Chrome?
To set up Logitech mouse gestures for Google Chrome, follow these steps:
- Install the Logitech Options software: Go to the Logitech website and download the Logitech Options software specific to your Logitech mouse model. Install the software on your computer.
- Launch Logitech Options: Open the Logitech Options software on your computer.
- Customize mouse gestures: In the Logitech Options interface, locate the section dedicated to mouse gestures or custom button commands. The exact location and wording may vary depending on the Logitech software version. Look for customizable settings related to mouse buttons or gestures.
- Add a new gesture: Find the option to add a new gesture or assign a gesture to a specific command. Click on it to create a new gesture.
- Record the gesture: When prompted, start recording the gesture by moving your mouse or swiping in the desired pattern or motion. This will serve as the trigger for the specific action or command in Google Chrome.
- Assign the command/action: Once you have recorded the gesture, you will be asked to choose the action or command you want to associate with it. Select the option to control Google Chrome or browser-specific actions.
- Save and test: Save the gesture and test it out in Google Chrome to ensure it performs the desired action. Repeat the process to set up additional gestures if needed.
Note: The specific steps and options may vary based on the Logitech mouse model and Logitech Options software version you are using. Please refer to the software documentation or support resources for more specific instructions.
How to set up Logitech mouse gestures for Spotify?
Unfortunately, Logitech mouse gestures are not specifically designed to work with Spotify. However, you may be able to use third-party software such as Logitech Options or third-party mouse gesture software to achieve this. Here is a general guide on how you can set up mouse gestures for Spotify using Logitech Options:
- Download and install Logitech Options software from the official Logitech website.
- Launch Logitech Options and ensure that your Logitech mouse is connected.
- In the Logitech Options interface, look for customization options for your mouse. This may vary depending on your specific Logitech mouse model.
- Find the option to program mouse gestures or customize mouse buttons.
- Depending on your mouse and software, you may find options to assign predefined actions or custom keystrokes to specific mouse gestures or buttons.
- Assign the appropriate keystrokes that correspond to the Spotify playback controls. Typically, these are media control hotkeys such as play/pause (space bar), next track (Ctrl+Right Arrow), and previous track (Ctrl+Left Arrow). You can also use media control shortcuts from your PC's media keyboard.
- Save the settings, and the mouse gestures should now work with Spotify.
Keep in mind that not all Logitech mouse models or Logitech Options software versions may support mouse gestures or allow customization of specific keystrokes. Additionally, Spotify does not have native support for mouse gestures, so these options may vary in terms of functionality and compatibility.
How to set up Logitech mouse gestures for Adobe Photoshop?
To set up Logitech mouse gestures for Adobe Photoshop, you can use Logitech's own software called Logitech Options. Follow the steps below:
- Download and install Logitech Options software from the official Logitech website.
- Launch the Logitech Options software and connect your Logitech mouse.
- In the Logitech Options window, select your mouse from the list of connected devices.
- Click on the "Point and Scroll" tab on the left side of the window.
- Under "Point and Scroll Gestures," enable the gestures by checking the box next to "Enable Gestures."
- Click on the "Add Application" button.
- In the application selection window, navigate and select Adobe Photoshop.
- Once Photoshop is added, click on it in the list of applications.
- Now you can assign gestures to different actions in Photoshop.
- Click on the gesture you want to customize, and select the corresponding action from the drop-down menu.
- Repeat the above step for each gesture you want to customize.
- Click on the "OK" button to save your changes.
The Logitech Options software allows you to customize various gestures for different applications, including Adobe Photoshop. The process may vary slightly depending on your specific Logitech mouse model and software version, but these general steps should help you set up mouse gestures for Photoshop.
How to set up Logitech mouse gestures for Safari?
To set up Logitech mouse gestures for Safari, you will need to use Logitech Options software. Here's how you can do it:
- Download and install Logitech Options software on your computer. You can find the software on the Logitech website.
- Once installed, open Logitech Options from your Applications folder (macOS) or the Start menu (Windows).
- Connect your Logitech mouse to your computer using the USB receiver or Bluetooth connection.
- In the Logitech Options software, select your mouse from the list of connected devices.
- Look for the section or tab called "Gestures" or "Mouse Gestures." The exact wording may vary depending on your Logitech mouse model or the version of Logitech Options.
- Within the Gestures settings, you should see a list of pre-defined gestures that you can enable or customize. Look for options related to Safari or web browsing.
- Enable the gestures you want to use by checking the corresponding box or toggle switch.
- If there are customizable gestures, you can click on them to select a specific action or assign your own custom action.
- Make sure to save your settings after configuring the gestures.
- Open Safari and start using the Logitech mouse gestures according to your configuration. The exact gestures and actions will depend on your settings and the capabilities of your Logitech mouse.
Note: Logitech Options software may have different options and features depending on your Logitech mouse model. Always refer to the Logitech support page or user manual for specific instructions related to your mouse model.
How to set up Logitech mouse gestures for Microsoft Word?
To set up Logitech mouse gestures for Microsoft Word, you can follow these steps:
- Install Logitech Options software: Firstly, ensure that you have the Logitech Options software installed on your computer. If not, go to the Logitech website, download and install the latest version of the Logitech Options software compatible with your mouse model.
- Launch Logitech Options: Open the Logitech Options software on your computer.
- Mouse Button Customization: In the Logitech Options software, go to the "Mouse" tab. Here you will find options to customize your mouse buttons.
- Add customized gesture: Select the mouse button that you want to assign a gesture to. Click on the button, and a dropdown menu will appear.
- Assign a gesture: In the dropdown menu, select the "Gesture Button" option. This will enable you to assign a gesture to that particular mouse button.
- Configure the gesture: Once you have selected the "Gesture Button" option, you can now configure the gesture by selecting the "Customize Gestures" button.
- Gestures settings: In the gestures settings, you will see a range of pre-defined gestures and the option to create your own custom gesture. To create a custom gesture, select the "Add New Gesture" button.
- Draw the gesture: A window will appear, allowing you to draw the custom gesture using your mouse. Use the mouse to draw a shape or pattern that you want to associate with a specific action in Microsoft Word.
- Associate with Microsoft Word action: After drawing the gesture, you can associate it with a specific action in Microsoft Word. To do this, click on the "+" button next to "Function Assignment." A list of applications will appear.
- Select Microsoft Word: Find "Microsoft Word" in the list, select it, and then choose the action you want to associate with the gesture. For example, you can choose "Copy" or "Paste" as the action.
- Save the gesture: Once you have selected the Microsoft Word action, click on the "OK" or "Save" button to save the gesture and associate it with Microsoft Word.
- Repeat for other gestures: Repeat the process for any additional gestures you want to create.
After setting up the gestures, you should be able to use them in Microsoft Word. Simply perform the gesture you assigned to a specific action to execute it in Word, enhancing your productivity and workflow.
How to set up Logitech mouse gestures for WhatsApp?
Unfortunately, Logitech does not provide built-in functionality for setting up specific gestures for individual applications like WhatsApp. However, you can use third-party software to create custom gestures for different applications.
One popular option is using the Logitech Options software along with GestureSign, a separate application that allows you to create custom mouse gestures. Here's how you can set it up:
- Download and install the Logitech Options software from the Logitech website. Make sure your Logitech mouse is connected to your computer.
- Visit the GestureSign website (gesture-sign.com) and download and install the software.
- Open GestureSign, and you will find a window with sections to add gestures and associated actions.
- Click on the "+" button to create a new gesture.
- In the new gesture window, draw the desired gesture using your Logitech mouse.
- In the "Action" section, choose "Keyboard" as the action type.
- In the "Keyboard" field, type the necessary shortcuts for WhatsApp actions. For example, to send a new message, you can use the Ctrl + N shortcut.
- Once you've finished setting up the gesture, click on "Save."
- The new gesture will now be added to the GestureSign interface.
- Open WhatsApp and try using the mouse gesture you created to see if it performs the desired action.
Repeat the above steps to create additional gestures for other actions in WhatsApp. Keep in mind that GestureSign allows you to create gestures across various applications, so you can also set up custom gestures for other programs or websites if needed.