Best Printer Accessories to Buy in July 2026
HP Printer Cable 6ft, Square USB A to USB B Cable for Printer/Scanner Epson, HP, Canon, Brother, Ethernet Print Smoothly Connect to Computer/Laptop/Pc - USB 2.0 Type B Impresora Midi Long Cord, 6 Foot
- HIGH-SPEED DATA TRANSFER FOR RELIABLE CONNECTIVITY
- DURABLE DESIGN WITH GOLD-PLATED CONNECTORS
- UNIVERSAL COMPATIBILITY WITH VARIOUS DEVICES


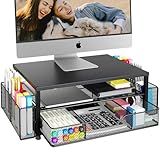
ECOLOVI Desk Organizers and Accessories, 2-Tier Metal Computer Monitor Stand Riser, Desk Organizer for Monitor, Printer & Laptop Stand, Desktop Workspace Organizers for Office Supplies(Black)
- OPTIMIZE COMFORT AND POSTURE FOR PROLONGED PRODUCTIVITY AND FOCUS.
- STURDY STEEL CONSTRUCTION ENSURES LASTING DURABILITY AND STABILITY.
- 2-TIER DESIGN MAXIMIZES SPACE, REDUCING CLUTTER FOR A TIDY WORKSPACE.
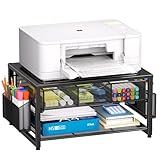
HOOBRO Industrial Printer Stand, 3-Tier Mobile Printer Table, Rolling Cart with Power Outlets and USB Ports, Home Printer Stand with 2 Hooks, for Office, Living Room, Rustic Brown BF22UPS01
- CHARGE WITH EASE: 2 USB PORTS & OUTLET FOR ALL YOUR DEVICES!
- VERSATILE STORAGE: WOODEN TOP & MESH RACKS FOR ALL OFFICE SUPPLIES.
- STABLE DESIGN: SUPPORTS UP TO 44 LBS, IDEAL FOR HEAVY PRINTERS.
Marbrasse Metal Printer Stand for Desk with Storage Drawer and 2 Pen Holders, 2-Tier Desktop Organizer Printer Table for Home Office, Multi-Purpose Desk Organizer for Fax Machine Scanner Files(Black)
- MAXIMIZE DESK SPACE: ORGANIZES PRINTER & ESSENTIALS EFFICIENTLY.
- STURDY CONSTRUCTION: DURABLE METAL FRAME ENSURES LONG-LASTING USE.
- QUICK ASSEMBLY: SET UP IN JUST 12 MINUTES-EASY AND HASSLE-FREE!
OPNICE Desk Organizer and Accessories, 2-Tier Computer Monitor Stand Riser with Drawer and 2 Pen Holders, Laptop Stand, Office Desk Accessories for Office Supplies, Black
-
ELEVATE COMFORT: ERGONOMIC DESIGN RELIEVES NECK AND SHOULDER STRAIN.
-
SPACE SAVER: 2-TIER DESIGN WITH DRAWER KEEPS YOUR DESK ORGANIZED.
-
DURABLE BUILD: STURDY METAL CONSTRUCTION ENSURES LONG-LASTING STABILITY.
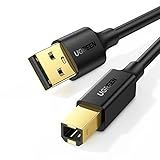
UGREEN USB A to USB B Printer Cable 5ft - High-Speed for HP, Canon, Brother, Samsung, Dell, Epson, Lexmark, Xerox, and More
-
VERSATILE CONNECTION: LINKS PRINTERS, SCANNERS, AND MORE EFFORTLESSLY.
-
HIGH-SPEED DATA TRANSFER: ACHIEVE 480 MBPS FOR RELIABLE, STABLE CONNECTIONS.
-
UNIVERSAL COMPATIBILITY: WORKS WITH TOP BRANDS LIKE HP, CANON, AND EPSON.
When dealing with paper jam issues on a wireless printer, there are a few troubleshooting steps you can follow to resolve the problem. Here's a guide on how to troubleshoot paper jam issues with a wireless printer:
- Start by turning off the printer and unplugging it from the power source. This will prevent any potential damage and allow you to access the paper jam more safely.
- Open all the access panels and trays of the printer. Look for any visible jammed paper or torn pieces that may be obstructing the paper path. Gently remove any loose paper fragments that you find.
- Locate the paper path lever or knob inside the printer. This lever/knob helps guide the paper through the printer during the printing process. Ensure it is in the correct position and not stuck in an unusual place.
- If you spot any stuck or jammed paper, try to remove it by pulling it out gently and evenly. Avoid tearing the paper, as it may leave behind small fragments that can cause further jams. Be cautious not to touch any internal or moving parts of the printer while doing this.
- Inspect the print carriage or ink cartridges. Sometimes, paper jams can occur if the carriage gets stuck or obstructed. Check if there are any obstacles preventing the carriage from moving freely. If so, gently remove them or reposition the carriage back to its original position.
- Once you've cleared the jammed paper, close all the access panels securely. Double-check that no foreign objects are left inside the printer.
- Now, plug the printer back into the power source and turn it on. Allow the printer to go through its startup process and check if the paper jam error message has cleared.
- If the error persists, consult the printer's user manual or the manufacturer's website for specific troubleshooting guidance. They may have additional steps or suggestions to resolve persistent paper jam issues.
Remember, it's crucial to follow the instructions provided by the printer manufacturer as different printer models may have slightly different troubleshooting procedures.
What is the appropriate way to load paper into the tray of a wireless printer to avoid paper jams?
To load paper into the tray of a wireless printer and avoid paper jams, follow these steps:
- Start by removing any paper currently in the tray. Make sure the tray is clean and free from any debris.
- Check the type and size of paper recommended for your printer. It is advisable to use the recommended paper to ensure smooth printing and prevent jams.
- Take a stack of paper and fan the edges to separate the sheets. This process helps prevent the sheets from sticking together due to static electricity.
- Adjust the paper guides in the tray to match the width and length of the paper you're using. Most trays have adjustable guides to accommodate different paper sizes: slide them until they align with the paper.
- Place the paper stack into the tray, ensuring it is aligned with the guides and rests flat. Sometimes, there is an indicator or marking on the tray to indicate the maximum paper fill line - do not exceed this limit.
- Gently push the paper stack further into the tray, but avoid forcing it. Make sure there is still some space between the paper and the paper guides.
- If the tray has a tension lever, gently adjust it to apply slight pressure on the paper stack. This helps prevent multiple sheets from feeding into the printer at once.
- Once the paper is properly placed, close the tray securely. Ensure it is completely inserted, and there are no loose papers sticking out.
- If your printer has a display or control panel, check its settings to make sure the correct paper size and type are selected.
With these steps, you should be able to properly load paper into the tray of a wireless printer and minimize the risk of paper jams.
How to open the top cover of a wireless printer to access paper jammed inside?
To open the top cover of a wireless printer and access paper jammed inside, follow these steps:
- Make sure the printer is turned off to prevent any accidental damage or injury.
- Locate the top cover of the printer. This can vary depending on the make and model of the printer, but it is usually the part where the printed paper comes out.
- Look for any release buttons or latches on the sides or at the front of the top cover. Some printers may have a simple release button that you need to press, while others might have latches that need to be slid or pushed to release the cover.
- Once you've located the release mechanism, gently press or slide it to unlock the top cover.
- Slowly lift the top cover and support it with your hand or any built-in support mechanism, if available. Be cautious not to force or jerk it, as some components inside the printer may be delicate.
- Inspect the inside of the printer for any pieces of paper or debris that may have caused the jam. If you can easily access the jammed paper, carefully remove it by pulling it in the same direction it would normally feed through the printer. Avoid tearing the paper, as any remnants could cause further issues.
- Once you have removed the jammed paper or debris, close the top cover by gently lowering it until it clicks or snaps into place.
- Turn on the printer and check if the paper jam issue has been resolved.
If the above steps do not solve the paper jam issue, consult the printer's user manual or the manufacturer's support website for further troubleshooting instructions or consider seeking professional assistance.
How to identify if a paper jam has occurred in a wireless printer?
To identify if a paper jam has occurred in a wireless printer, follow these steps:
- Look for error messages: Check the printer’s display panel or any error messages displayed on your computer or mobile device connected to the printer. Many printers will specifically indicate if a paper jam has occurred.
- Check status indicators: Look for any blinking lights or specific indicators on the printer itself. Some printers have LED lights that signal different types of errors, including paper jams.
- Open printer cover: Carefully open the printer's cover or access panel. Make sure you follow any instructions specific to your printer model to avoid any damage or accidental injury.
- Examine paper path: Closely examine the paper path within the printer to check for any visible paper jams. Look for crumpled or partially fed paper, as well as any foreign objects that may be obstructing the paper.
- Remove paper trays: If the paper jam is not visible from the outside, remove any paper trays or input trays. Check underneath or inside these compartments for jammed paper.
- Refer to user manual: If you are unable to find the paper jam, refer to your printer's user manual. It will provide specific instructions on how to locate and clear paper jams for your particular printer model.
- Gently remove jammed paper: If a paper jam is detected, gently pull out the jammed paper in the direction of paper path. Avoid tugging forcefully to prevent any potential damage.
- Clear all paper remnants: After removing the jammed paper, check for any remaining paper fragments or torn pieces. Clear them out to ensure smooth printing operation.
- Close printer cover: Once the paper jam is cleared, close the printer cover or access panel securely.
- Test and resume printing: Turn on the printer, initiate a test print or run a print job to ensure that the paper jam has been completely resolved.
What is the process of cleaning the paper pickup roller to prevent paper jam issues with a wireless printer?
Cleaning the paper pickup roller can help prevent paper jam issues with wireless printers. Here is the process to clean the paper pickup roller:
- Turn off the printer and unplug it from the power source.
- Open the printer's paper input tray or access panel to expose the paper pickup roller.
- Locate the paper pickup roller, which is a cylindrical rubber roller responsible for picking up the paper.
- Moisten a lint-free cloth or paper towel with water. It's important not to use any solvents or alcohol as they can damage the roller.
- Gently wipe the paper pickup roller in a rolling motion. Roll the roller towards you while applying light pressure to remove any dirt, dust, or debris that may have accumulated on the surface.
- Continue cleaning until the roller appears clean and free from any residue.
- Close the paper input tray or access panel.
- Plug the printer back into the power source and turn it on.
- Test the printer by printing a document to check if paper jams are resolved.
Note: It's advisable to consult the printer's user manual or the manufacturer's website for specific instructions on how to clean the paper pickup roller as different printer models may have slight variations in their design.