
Best Touchscreen Troubleshooting Tools to Buy in July 2026
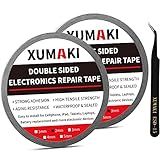
XUMAKI 2mm / 3mm x 50M LCD Repair Tape Phone Screen Adhesive Tape LCD Touch Screen Repair Tape with 1 Tweezers for Cell Phone, iPad, Tablets, Laptops, LCD Screen
-
SUPERIOR STRENGTH: WATERPROOF, HIGH ADHESION FOR RELIABLE PHONE REPAIRS.
-
EASY APPLICATION: HIGH INITIAL ADHESION; REMOVES CLEANLY WITHOUT RESIDUE.
-
VERSATILE USE: IDEAL FOR PHONES, TABLETS, CAMERAS, AND MORE DEVICES.


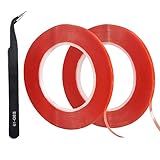
QDiShi 2 Rolls (2mm/3mm x 25m) LCD Repair Tape Phone Repair Tape LCD Touch Screen Repair Tape Phone Screen Adhesive Tape with and 1 Tweezers for Cell Phone, iPad, Tablets, Laptops, Camera
-
STRONG PERFORMANCE: RELIABLE ADHESION FROM -25°C TO 150°C.
-
INVISIBLE MOUNTING: CRYSTAL CLEAR TAPE KEEPS SURFACES SMOOTH AND DISCREET.
-
VERSATILE USE: IDEAL FOR PHONES, TABLETS, AND VARIOUS REPAIR TASKS.
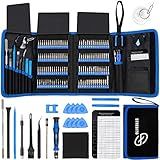
STREBITO Electronics Precision Screwdriver Sets 142-Piece with 120 Bits Magnetic Repair Tool Kit for iPhone, MacBook, Computer, Laptop, PC, Tablet, PS4, Xbox, Nintendo, Game Console
- ALL-IN-ONE KIT: 120 BITS AND 22 ACCESSORIES FOR ULTIMATE VERSATILITY.
- ERGONOMIC COMFORT: DESIGNED FOR EASY HANDLING AND TIGHT SPOT ACCESS.
- ORGANIZED STORAGE: PORTABLE BAG FOR HASSLE-FREE CARRYING AND TOOL PROTECTION.
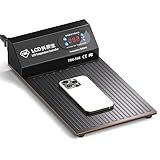
Phone Heating Separator, Heating Pad for Phone Repair, Touch Screen Remover, Cell Phone Repair Tools, LCD Tablet Repair Kit, Professional LCD Replacement
- MAX 120℃ HEAT ENSURES EFFICIENT ADHESIVE REMOVAL FOR REPAIRS.
- PORTABLE DESIGN FITS EASILY IN HOMES AND SMALL REPAIR SHOPS.
- REAL-TIME TEMP MONITOR GUARANTEES PRECISION DURING DISASSEMBLY.
Secopad 14 Sheets Window Screen Patches Repair Kit, Black 3 Sizes Window Screen Repair Kit for Mesh Screen Door, Strong Adhesive Fiberglass Quick Screen Repair Tape
-
QUICK REPAIRS: FIX SCREENS IN SECONDS-NO TOOLS REQUIRED!
-
DURABLE ADHESIVE: STRONG FIBERGLASS TAPE STICKS TO ANY SURFACE EFFORTLESSLY.
-
VERSATILE USAGE: IDEAL FOR INDOOR/OUTDOOR REPAIRS ACROSS VARIOUS MESH TYPES.
Secopad Black Window Screen Repair Tape, 2 in X 30 FT (360IN) Screen Repair Kit for Windows or Doors, Strong Adhesive Fiberglass Mesh Patch Tape
-
QUICK REPAIRS IN SECONDS: EFFORTLESSLY FIX SCREEN HOLES WITHOUT TOOLS!
-
ULTRA STRONG ADHESIVE: DURABLE FIBERGLASS TAPE STICKS SECURELY TO SURFACES.
-
VERSATILE & WEATHERPROOF: IDEAL FOR BOTH INDOOR AND OUTDOOR SCREEN REPAIRS.
Secopad Grey Window Screen Repair Tape, 2IN X 30FT (360IN) Screen Repair Kit for Windows or Doors, Strong Adhesive Patch Kit Fiberglass Mesh Tape
-
QUICK DIY REPAIRS: NO TOOLS NEEDED; FIX SCREENS IN SECONDS!
-
DURABLE ADHESION: ULTRA STRONG TAPE STICKS TO ANY SCREEN SURFACE.
-
VERSATILE USE: PERFECT FOR INDOOR/OUTDOOR REPAIRS IN EXTREME TEMPS!
EFAITHFIX for iPhone 11 LCD Screen Replacement 6.1 Inch Frame Assembly LCD Display and 3D Touch Screen Digitizer with Repair Tools Kit for A2111, A2223, A2221 with Waterproof Adhesive Tempered Glass
- HIGH QUALITY & DURABLE: ANTI-OIL, ANTI-FINGERPRINT, EXPLOSION-PROOF DESIGN.
- EASY INSTALLATION: ALL TOOLS INCLUDED; MANUAL AND VIDEO SUPPORT PROVIDED.
- COMPATIBILITY GUARANTEED: PERFECT FIT FOR IPHONE 11, NOT FOR OTHER MODELS.
When troubleshooting touchscreen responsiveness issues on a desktop tablet kiosk, there are a few potential culprits to consider. First, check to see if the screen is clean and free of any obstructions that may be interfering with the touch sensitivity. Next, ensure that the kiosk's software and drivers are up to date, as outdated software can sometimes cause touchscreen issues.
If the touchscreen is still not responding properly, try calibrating the screen to ensure that it is properly recognizing touch inputs. This can usually be done through the kiosk's settings or control panel.
If calibration does not resolve the issue, it may be necessary to restart the kiosk or even perform a factory reset to clear any software glitches that may be causing the problem.
Lastly, if none of these solutions work, it may be a hardware issue, such as a malfunctioning touchscreen digitizer or faulty wiring. In this case, it may be necessary to contact the manufacturer for further assistance or to have the kiosk serviced.
What is the best way to prevent touchscreen responsiveness issues on a desktop tablet kiosk?
- Regularly clean the touchscreen: Make sure to regularly clean the touchscreen surface to remove any dirt, dust, or fingerprints that may be interfering with responsiveness.
- Calibrate the touchscreen: Properly calibrating the touchscreen can help improve responsiveness and accuracy. Most operating systems have built-in calibration tools that can be used to adjust the sensitivity of the touchscreen.
- Update software and drivers: Keeping the software and drivers of the touchscreen up to date can help prevent responsiveness issues. Make sure to regularly check for updates and install them as needed.
- Limit background processes: Running too many background processes on the kiosk device can result in decreased responsiveness. Make sure to limit unnecessary processes to free up resources for the touchscreen to function properly.
- Protect the touchscreen: Using a screen protector or a protective case can help prevent physical damage to the touchscreen that may impact responsiveness. Additionally, setting up physical barriers around the kiosk can prevent accidental damage and spills that may affect the touchscreen.
- Use high-quality hardware: Investing in high-quality touchscreen hardware can help prevent responsiveness issues in the long run. Make sure to purchase a reliable and durable touchscreen monitor for the kiosk.
- Provide user education: Educating users on how to properly interact with the touchscreen can help prevent any accidental damage or misuse that may lead to responsiveness issues. Providing clear instructions on how to use the touchscreen effectively can also improve user experience.
How to clean the touchscreen to improve responsiveness on a desktop tablet kiosk?
To improve the responsiveness of your touchscreen on a desktop tablet kiosk, you will need to clean the screen properly. Here are some steps to follow:
- Power off the kiosk: Before cleaning the touchscreen, make sure to power off the kiosk to prevent any accidental clicks or damage.
- Use a microfiber cloth: Start by using a soft microfiber cloth to gently wipe the screen. The microfiber cloth is safe for touchscreens and will help remove any dust, fingerprints, and smudges without scratching the surface.
- Use a touchscreen cleaner: If the screen is still unresponsive after using a microfiber cloth, you can use a specialized touchscreen cleaner. Spray the cleaner onto the cloth, not directly onto the screen, and wipe the screen in a circular motion. Be sure to follow the manufacturer's instructions for the cleaner you are using.
- Avoid harsh chemicals: Avoid using harsh chemicals, such as ammonia or alcohol-based cleaners, as these can damage the touchscreen.
- Allow the screen to dry: After cleaning the screen, allow it to air dry completely before powering on the kiosk again.
- Calibrate the touchscreen: If the screen is still unresponsive after cleaning, you may need to recalibrate the touchscreen. Check the settings of your kiosk to see if there is an option to calibrate the touchscreen.
By following these steps to properly clean and maintain your touchscreen, you should see an improvement in the responsiveness of your desktop tablet kiosk.
How to perform a factory reset to troubleshoot touchscreen issues on a desktop tablet kiosk?
Performing a factory reset on a desktop tablet kiosk can help troubleshoot touchscreen issues by restoring the device to its original settings. Here are the steps to perform a factory reset:
- Start by turning off the kiosk and disconnecting any external devices or peripherals that are connected to it.
- Once the device is powered off, locate the reset button on the kiosk. This is usually a small hole that can be pressed with a paperclip or a similar tool.
- Press and hold the reset button for about 10-15 seconds until you see the device start to reboot.
- Once the device has rebooted, you will be prompted to enter the factory reset code. This code is typically provided by the manufacturer and is unique to each device.
- Follow the on-screen instructions to complete the factory reset process. This will erase all data and settings on the device, so make sure to back up any important files before proceeding.
- After the factory reset is completed, the device will restart and should now be back to its original settings. Test the touchscreen to see if the issues have been resolved.
If the touchscreen issues persist after performing a factory reset, it may indicate a hardware problem that requires further troubleshooting or repair. In this case, it is recommended to contact the manufacturer or a professional technician for assistance.
How to optimize the touchscreen sensitivity settings for different usage scenarios on a desktop tablet kiosk?
To optimize touchscreen sensitivity settings for different usage scenarios on a desktop tablet kiosk, consider the following tips:
- Adjust sensitivity levels: Most operating systems allow users to adjust the touchscreen sensitivity levels. In general, increasing sensitivity makes the screen more responsive to touch, while decreasing sensitivity may require more pressure to register a touch. Experiment with different sensitivity levels to find the right balance for your specific usage scenario.
- Enable touch calibration: Some touchscreen devices have a touch calibration tool that allows users to set the touchscreen sensitivity according to their preferences. Use this tool to fine-tune the sensitivity for optimal performance.
- Consider the user's needs: Different users may have different preferences when it comes to touchscreen sensitivity. For example, individuals with limited dexterity or mobility may prefer a more sensitive touchscreen, while others may prefer a lower sensitivity level. Take into account the needs of your target users when setting up the touchscreen sensitivity.
- Test in different scenarios: Test the touchscreen sensitivity in various scenarios to ensure it works well in different usage conditions. For example, consider how the touchscreen performs in high-traffic areas, with different lighting conditions, or when users are wearing gloves. Adjust the sensitivity settings as needed to ensure optimal performance in each scenario.
- Provide user instructions: If you make any changes to the touchscreen sensitivity settings, be sure to provide clear instructions to users on how to adjust the settings to their liking. This can help users customize the touchscreen sensitivity to their preferences and improve their overall experience with the kiosk.