
Best Joomla Installation Tools to Buy in July 2026
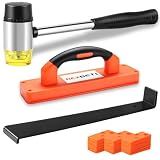
REXBETI Laminate Wood Flooring Installation Kit, LVP Installation Kit, Vinyl Flooring Tools - Tapping Block with Handle, Pull Bar, Double-Faced Mallet and Spacers
- DOUBLE-FACED MALLET WITH NON-SLIP GRIP ABSORBS VIBRATION FOR COMFORT.
- DURABLE PULL BAR PROTECTS FLOORS WHILE ENHANCING INSTALLATION STRENGTH.
- IMPROVED TAPPING BLOCK ALLOWS QUICK, POWERFUL FLOORING INSTALLATION.


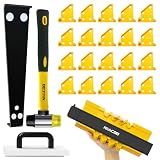
NAACOO Laminate Flooring Tools, LVP Installation Kit, Professional Vinyl Flooring Tools - Tapping Block with Handle, 10” Contour Gauge, Pull Bar, 2 in 1 Spacers, Double-Faced Mallet.
- EFFORTLESS INSTALLATION: MASTER ODD-SHAPED FLOORS WITH OUR CONTOUR GAUGE.
- DURABLE TOOLS: STURDY NYLON TAPPING BLOCK PROTECTS YOUR HANDS WHILE WORKING.
- VERSATILE SPACERS: CUSTOMIZE GAPS EASILY WITH 2 IN 1 DESIGN FOR ANY PROJECT.
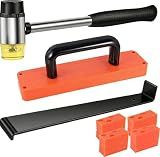
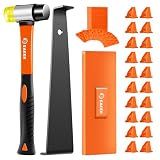
LOZAGU 43-Piece Laminate Flooring Tools, LVP installation kit, Vinyl Flooring Tools, Tapping Block with Handle, Spacers, Double-Faced Mallet and Pull Bar (43-PIECE)
- COMPLETE 43-PIECE KIT FOR SEAMLESS WOOD FLOORING INSTALLATION.
- ERGONOMIC TOOLS DESIGNED FOR COMFORT AND PRECISION.
- DURABLE MATERIALS ENSURE LONG-LASTING PERFORMANCE AND RELIABILITY.
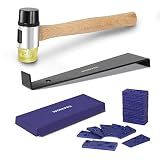
WORKPRO Laminate Wood Flooring Installation Kit with Reinforced Double-Faced Mallet, Heavy Duty Pull Bar, Tapping Block and 30-Piece Spacers Included,Multicolor
-
REINFORCED MALLET ENSURES A SOFTENED, POSITIVE STRIKE ON ALL SURFACES.
-
ENHANCED PULL BAR PROTECTS FLOORS FROM SCRATCHES AND ADDS DURABILITY.
-
COMPLETE KIT INCLUDES 30 NON-SLIP SPACERS FOR EASY FLOORING INSTALLATION.
Saker 63-Piece Laminate Flooring Tools, Laminate Wood Flooring Installation Kit,LVP Installation Kit with 60 Flooring Spacers,Vinyl Flooring Tools-Tapping Block,Flooring Pull bar, Rubber Mallet
-
BOOST EFFICIENCY BY 30% WITH COMPREHENSIVE TOOLS IN ONE KIT!
-
HEAVY-DUTY PULL BAR & MALLET ENSURE SCRATCH-FREE INSTALLATION!
-
STABLE 2-IN-1 SPACERS PREVENT SLIPPING FOR PERFECT GAPS!
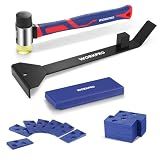
WORKPRO 43PC Laminate Flooring Installation Kit- Rubber Mallet with Fiberglass Handle, 17” Heavy Duty Pull and Pry Bar, Solid Tapping Block and 40 Spacers- Premium Wood Flooring Installation Tool
-
DURABLE 17-INCH STEEL PULL BAR FOR STRONG FLOORING INSTALLATION.
-
FIBERGLASS MALLET WITH NON-SLIP GRIP REDUCES FATIGUE WHILE WORKING.
-
COMPREHENSIVE 40-PIECE TOOLKIT FOR ALL YOUR FLOORING NEEDS!

NAACOO Laminate Flooring Tools,Vinyl Flooring Tools, Heavy Tapping Block, Heavy Pull Bar, 10”Contour Gauge, 20pc Upgrade Flooring Spacers, Rubber Mallet - Professional 5 in 1 Flooring Installation Kit
- EFFORTLESS FLOORING: TAPPING BLOCK CREATES TIGHT SEAMS WITHOUT MALLET.
- DURABLE DESIGN: HEAVY-DUTY TOOLS ENSURE LONG-LASTING PERFORMANCE AND PRECISION.
- VERSATILE SPACERS: 20 PC SET WITH DUAL SIZES FOR ACCURATE INSTALLATION GAPS.
To install Joomla on Liquid Web, you need to follow a few steps. First, make sure you have a hosting account with Liquid Web and access to their cPanel.
- Download Joomla: Visit the official Joomla website and download the latest version of the Joomla installation package. Save the package to your computer.
- Access cPanel: Log in to your Liquid Web account and navigate to the cPanel. Look for the "File Manager" icon and click on it to open the file manager.
- Upload Joomla Package: In the file manager, find the "public_html" directory or the directory where you want to install Joomla. Open the directory and click on the "Upload" button. Select the Joomla installation package file from your computer and upload it to the server.
- Extract Joomla Package: Once the upload is complete, select the Joomla installation package file in the file manager and click on the "Extract" button. This will extract the contents of the package into a new folder.
- Create a Database: Go back to the cPanel home and look for the "MySQL Databases" or "Databases" icon. Click on it and create a new database by entering a name and clicking on the "Create Database" button.
- Create a Database User: After creating the database, scroll down to the "MySQL Users" section and create a new user by entering a username and password. Click on the "Create User" button.
- Assign User to the Database: In the "Add User to Database" section, select the user and the database you created. Click on the "Add" or "Submit" button to assign the user to the database.
- Run Installation: Open a web browser and navigate to your domain or the directory where you uploaded the Joomla files. You will be redirected to the Joomla installation page. Select your language and click on the "Next" button.
- Database Configuration: On the next page, enter the database details you created earlier – database type, host, name, username, and password. You can leave the database prefix field as it is unless you have specific requirements. Click on the "Next" button.
- FTP Configuration (optional): If you want to enable FTP layer, you can enter the FTP details on this page. Otherwise, you can skip this step by clicking on the "Next" button.
- Site Configuration: Enter the name and description for your Joomla website. Set the email, username, and password for the main administrator account. Make sure to remember these login credentials. Click on the "Next" button.
- Remove Installation Folder: The installation is complete, but before you start using Joomla, you need to remove the installation folder. Click on the "Remove installation folder" button to delete the installation files from the server.
- Log in to Joomla: Once the installation folder is removed, you will be redirected to the Joomla administrator login page. Enter the administrator username and password you set earlier to access the Joomla admin panel.
That's it! You have successfully installed Joomla on Liquid Web and can now start building and managing your website using this powerful content management system.
What is the purpose of the Joomla Media Manager and how to use it on Liquid Web?
The purpose of the Joomla Media Manager is to manage and organize the files and media used in a Joomla website. It allows users to upload, delete, and organize various types of media files, such as images, videos, audios, and documents.
To use the Joomla Media Manager on Liquid Web, you can follow these steps:
- Log in to your Joomla website's administration panel.
- In the top menu, click on "Content" and then select "Media" from the dropdown menu.
- The Media Manager page will open, displaying the existing folders and files.
- To upload new files, click on the "Upload" button at the top left corner of the page.
- In the "Upload Files" section, click on the "Choose files" button to select files from your local computer. Alternatively, you can drag and drop files into the designated area.
- After selecting the files, click on the "Start Upload" button to initiate the upload process.
- Once the upload is complete, the files will appear in the current folder.
- To create new folders, click on the "New Folder" button and provide a name for the folder.
- You can also delete files or folders by selecting them and clicking on the "Delete" button.
- Use the "Select" checkbox next to each file or folder to select multiple items for bulk operations like copying, moving, or renaming.
- To preview an image file, click on the file name. It will open in a lightbox-style preview where you can view various details and make modifications if needed.
- To insert media into your Joomla content, you can copy the file URL by right-clicking on the file and selecting "Copy URL". In your content editor, use the appropriate Joomla tag, such as {image}URL{/image} for images.
- Optionally, you can also use the "Options" button at the top right corner of the Media Manager page to configure settings related to uploading, thumbnails, permissions, and more.
Remember to refer to the official Joomla documentation or Liquid Web's knowledge base for more detailed instructions or specific guidelines related to your hosting environment.
What is the purpose of Joomla modules and how to install and configure them on Liquid Web?
Joomla modules are used for adding specific functionality or content to a Joomla website. They are small and lightweight extensions that can be placed in various positions on the website layout.
To install and configure Joomla modules on Liquid Web, you can follow these steps:
- Log in to your Liquid Web account and access the Manage tab.
- Select your Joomla website from the list of websites.
- Click on the "Admin" button to access the Joomla admin panel.
- In the admin panel, go to the "Extensions" menu and select "Manage" from the dropdown.
- Click on the "Upload Package File" tab and browse for the module installation package on your computer. The package will typically have a .zip file extension.
- Once the package is selected, click on the "Upload & Install" button to install the module.
- After the installation completes, go to the "Extensions" menu again and select "Modules" from the dropdown.
- You will see a list of installed modules. Click on the module you want to configure.
- Adjust the module's settings according to your needs. The available configuration options may vary depending on the specific module.
- Save the changes and close the module configuration window.
The module should now be installed and configured on your Joomla website. You can then assign it to a specific position within your website's template layout by going to the "Extensions" menu, selecting "Templates," and clicking on the "Options" tab. From there, you can choose the desired module position and save the changes.
How to backup and restore a Joomla website on Liquid Web?
To backup and restore a Joomla website on Liquid Web, follow these steps:
Backup:
- Log in to your Liquid Web account.
- Navigate to the "Manage" tab and click on "Websites & Domains".
- Locate the domain name associated with your Joomla website and click on "Manage".
- Under "Website Hosting" section, click on "Backup Manager".
- In the Backup Manager, you will see options to create backups for both files and databases. Select the appropriate options for your needs and click on "Create Backup".
- Wait for the backup process to complete. You will receive an email notification when it's done.
Restore:
- Log in to your Liquid Web account.
- Navigate to the "Manage" tab and click on "Websites & Domains".
- Locate the domain name associated with your Joomla website and click on "Manage".
- Under "Website Hosting" section, click on "Backup Manager".
- In the Backup Manager, locate the backup you want to restore and click on "Restore" next to it.
- Follow the on-screen instructions to restore the backup. It will prompt you to choose the location to restore the files and databases.
- Review the restore settings and click on "Restore" to initiate the restore process.
- Wait for the restore process to complete. You will receive an email notification when it's done.
Note: It is always recommended to create a backup of your website before making any changes or updates to ensure you can revert back if any issues occur.