Best Color Calibration Tools to Buy in July 2026
DSLRKIT Lens Focus Calibration Tool Alignment Ruler Folding Card(Pack of 2)
- ENSURE PRECISE AUTO-FOCUS FOR SHARP SHOTS WITH EVERY LENS.
- COMPACT DESIGN: EASY TO CARRY FOR ON-THE-GO PHOTOGRAPHERS.
- COMPATIBLE WITH MAJOR BRANDS: NIKON, CANON, AND SONY CAMERAS.


Datacolor Spyder - Monitor Calibrator for Graphic Designers, Photographers, and Content Creators, Shows You True Colors, Works on OLED Monitors & LED Screens, Easy-to-Use Color Calibration Tool
- SIMULATE DEVICE COLORS ACCURATELY WITH DEVICEPREVIEW TM BETA.
- CALIBRATE OLED, MINI-LED, AND RETINA DISPLAYS WITH EASE.
- ADJUST SETTINGS AUTOMATICALLY FOR PERFECT RESULTS IN CHANGING LIGHT.
Datacolor SpyderLensCal - Optimize Your DSLR's Auto-Focus. Essential Tool for Razor-Sharp Focus and Outstanding Images
- ENHANCE AUTOFOCUS WITH PRECISE CALIBRATION FOR STUNNING IMAGES.
- COMPACT DESIGN MAKES LENS ADJUSTMENTS HASSLE-FREE ON-THE-GO.
- COMPATIBLE WITH TOP DSLR BRANDS FOR VERSATILE PHOTOGRAPHY USE.
DSLRKIT 28X18cm Lens Focus Calibration Tool Alignment Ruler Folding Card (Pack of 2)
- ENSURE PRECISE AUTO-FOCUS FOR STUNNING SHOTS WITH SHALLOW DEPTH!
- COMPATIBLE WITH NIKON, CANON, AND SONY FOR EASY CAMERA ADJUSTMENTS!
- COMPACT DESIGN MAKES IT PERFECT FOR ON-THE-GO PHOTOGRAPHERS!
Plustek Calibration Control Sheet - for ePhoto Z300 Scanner only
- PRECISE CALIBRATION FOR OPTIMAL EPHOTO Z300 PERFORMANCE.
- EASY-TO-USE DESIGN ENSURES QUICK SETUP AND ACCURACY.
- ENHANCE IMAGE QUALITY WITH RELIABLE CALIBRATION RESULTS.
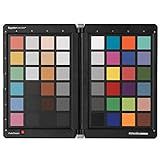
Datacolor Spyder Checkr – Color calibration tool for cameras. Ensure accurate, consistent color with varied cameras/light. Has 48 target colors + grey card for in-camera white balance
- INSTANT HSL PRESETS: STREAMLINE YOUR EDITING WORKFLOW EFFORTLESSLY.
- 48 ENGINEERED COLOR TARGETS: ACHIEVE ACCURATE SKIN TONES AND DETAILS.
- DURABLE & PORTABLE DESIGN: BUILT FOR IN-STUDIO OR ON-LOCATION USE.
Calibrating a photo scanner for accurate color reproduction is essential in order to ensure that the scanned images match the original colors of the photograph. To do this, you will need to use a calibration software or device that can help adjust the scanner settings to accurately reproduce colors.
Start by installing the calibration software or connecting the calibration device to your computer. Follow the instructions provided by the software or device to begin the calibration process. This may involve scanning a color chart or utilizing calibration targets to adjust the scanner's settings.
Make sure to set the scanner resolution to the desired quality and select the appropriate color profile for the type of image you are scanning. This will help in achieving accurate color reproduction. Additionally, it is important to ensure that the scanner is clean and free of any dust or debris that could affect the color reproduction.
After calibrating the scanner, you can test the accuracy of the color reproduction by scanning a sample image and comparing it to the original photograph. Make any necessary adjustments to the scanner settings to achieve the best results.
Regularly calibrating your photo scanner will help maintain accurate color reproduction and ensure that your scanned images look as close to the original as possible.
How do I ensure accurate color reproduction on a photo scanner?
To ensure accurate color reproduction on a photo scanner, follow these steps:
- Calibrate your scanner: Use a calibration tool or software to adjust the settings of your scanner to accurately reproduce colors. This will ensure that the colors in your scanned images match the original photo.
- Choose the right color mode: Make sure to select the appropriate color mode for your scanning needs. For colored photos, use the RGB color mode, while for black and white photos, use the grayscale mode.
- Use the correct resolution: Set the resolution of your scanner to at least 300 dpi (dots per inch) for high-quality color reproduction. Higher resolutions may be needed for larger prints or detailed images.
- Clean the scanner bed: Dust and debris on the scanner bed can affect the color reproduction of your scanned images. Make sure to clean the scanner bed regularly to ensure accurate colors.
- Adjust the exposure and color settings: Depending on the lighting conditions and quality of the original photo, you may need to adjust the exposure and color settings on your scanner to achieve accurate color reproduction.
- Perform test scans: Before scanning important photos, perform test scans to check the color accuracy and make any necessary adjustments.
By following these steps, you can ensure accurate color reproduction on your photo scanner and produce high-quality scanned images.
What is the importance of a consistent color workflow when calibrating a photo scanner?
A consistent color workflow is important when calibrating a photo scanner because it ensures that the colors in the scanned images are accurate and consistent across different devices and applications. This is crucial for photographers, graphic designers, and other professionals who rely on accurate color reproduction in their work.
By using a consistent color workflow, you can create a standard reference point for color calibration, which helps to maintain the integrity of the colors in your scanned images. This can also help to prevent issues such as color shifts, inaccurate color reproduction, and inconsistencies in the final output.
Additionally, a consistent color workflow can help to streamline your post-processing workflow and ensure that the images you produce are consistent with your artistic vision. This can save time and effort in the long run by minimizing the need for extensive color correction and adjustments after scanning.
Overall, a consistent color workflow is essential for achieving accurate and consistent colors in your scanned images, which is vital for creating high-quality, professional-looking results.
How do I calibrate a photo scanner using software?
- Install the scanning software that came with your scanner or download the latest version from the manufacturer's website.
- Open the scanning software and locate the calibration feature. This can usually be found under the settings or tools menu.
- Follow the on-screen instructions to calibrate your scanner. This may involve scanning a calibration sheet that came with your scanner or a specially designed test pattern.
- Make sure the calibration is successful by checking the preview of the scanned image. The colors and details should appear accurate and clear.
- If the calibration is not successful, try recalibrating the scanner or adjusting the settings manually to improve the scan quality.
- Once the calibration is complete, save the settings in the scanning software for future use. You may also need to recalibrate the scanner periodically to maintain optimal performance.
How do I calibrate a photo scanner for different paper types?
Calibrating a photo scanner for different paper types involves adjusting the settings on the scanner to ensure that the scanned images are accurately represented. Here are some steps to calibrate a photo scanner for different paper types:
- Choose the appropriate paper type: Before scanning, it is important to select the correct paper type on the scanner settings. This will ensure that the colors and textures of the paper are accurately captured in the scanned image.
- Adjust the resolution: Depending on the paper type, you may need to adjust the resolution of the scanner to ensure that the details are captured accurately. For example, glossy paper may require a higher resolution to capture fine details, while matte paper may require a lower resolution.
- Adjust the color settings: Different paper types may affect the colors in the scanned image. You may need to adjust the color settings on the scanner to ensure that the colors are accurately represented. This may include adjusting the brightness, contrast, and saturation levels.
- Perform test scans: Before scanning your final images, it is a good idea to perform test scans on different paper types to ensure that the settings are calibrated correctly. This will help you make any necessary adjustments before scanning your final images.
- Save your settings: Once you have calibrated the scanner for different paper types, make sure to save the settings. This will allow you to quickly access the appropriate settings for future scanning projects.
By following these steps, you can calibrate your photo scanner for different paper types and ensure that your scanned images are accurately represented.
How do I calibrate a photo scanner for scanning film negatives?
Calibrating a photo scanner for scanning film negatives typically involves adjusting the settings and software to ensure accurate color reproduction and proper exposure. Here are some steps you can take to calibrate your scanner for scanning film negatives:
- Clean the scanner bed and film negatives: Before you begin calibrating your scanner, make sure to clean the scanner bed and the film negatives to remove any dust or debris that may affect the scanning quality.
- Install the necessary software: If your scanner came with specific software for scanning film negatives, make sure to install it on your computer. This software may contain calibration tools and settings to optimize the scanning process.
- Adjust the color settings: Open the scanning software and navigate to the color settings. Adjust the color balance, saturation, and contrast to achieve accurate color reproduction for your film negatives.
- Set the resolution: Select the appropriate resolution for scanning your film negatives. Higher resolutions will result in more detailed scans, but may also require more storage space on your computer.
- Choose the film type: Select the type of film you are scanning (e.g. black and white, color negative, slide) in the scanning software. This will help the software apply the appropriate color profiles and adjustments for the specific type of film.
- Preview and adjust: Before scanning the entire film negative, use the preview function in the scanning software to see how the image will turn out. Make any necessary adjustments to the settings to achieve the desired results.
- Scan the film negatives: Once you are satisfied with the preview, proceed to scan the film negatives using the calibrated settings. Save the scanned images in a high-quality file format for further editing and printing.
By following these steps, you can calibrate your photo scanner for scanning film negatives and achieve accurate and high-quality results.
How do I troubleshoot color calibration issues on a photo scanner?
- Check the scanner settings: Make sure that the scanner is set to the correct color mode (such as RGB or CMYK) and resolution settings. Incorrect settings can result in color calibration issues.
- Clean the scanner glass: Dust and debris on the scanner glass can affect color accuracy. Clean the glass surface with a soft, lint-free cloth to ensure clear and accurate scans.
- Check the scanner software: Ensure that the scanner software is up to date and properly configured. Some scanners have built-in color calibration tools that can help adjust color settings.
- Calibrate the scanner: Some scanners have a calibration tool that can help adjust color settings for accurate color reproduction. Follow the manufacturer's instructions to calibrate the scanner.
- Test different scanning software: If you are still experiencing color calibration issues, try using a different scanning software program to see if the problem lies with the software you are using.
- Update scanner drivers: Make sure that the scanner drivers are up to date. Outdated drivers can cause color calibration issues and other scanning problems.
- Contact customer support: If you have tried all of the above steps and are still experiencing color calibration issues, contact the scanner manufacturer's customer support for further assistance. They may be able to provide additional troubleshooting steps or recommend a professional calibration service.