Best Photo Scanners to Buy in July 2026
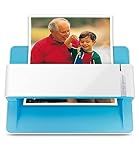
Plustek Photo Scanner ePhoto Z300, Scans 4x6 inch Photos in 2 Seconds, Auto crop and deskew with CCD Sensor, Supports Mac and PC
- SCAN PHOTOS & DOCUMENTS IN SECONDS: 1000 DIGITIZED IN AN AFTERNOON!
- SUPERIOR IMAGE ENHANCEMENT: REVIVE OLD PHOTOS WITH A CLICK!
- BROAD COMPATIBILITY: WORKS SEAMLESSLY WITH MAC & PC SYSTEMS.


Epson FastFoto FF-680W Wireless High-Speed Photo and Document Scanning System, Black
- SCAN 36 PHOTOS AT ONCE: FASTEST AT 1 PHOTO PER SECOND, 300 DPI.
- PRESERVE MEMORIES: RESTORE, ORGANIZE & SHARE POLAROIDS AND POSTCARDS.
- ADD VOICE/TEXT WITH FASTFOTO APP FOR MEMORABLE FAMILY SLIDESHOWS.

Epson Perfection V19 II Color Photo and Document Flatbed Scanner with 4800 dpi Optical Resolution, USB Power and High-Rise, Removable Lid
- HIGH 4800 DPI CLARITY – PERFECT FOR STUNNING PHOTO ENLARGEMENTS!
- ONE-TOUCH SCANNING SIMPLIFIES YOUR WORKFLOW – FEWER STEPS, FASTER RESULTS!
- CREATE EDITABLE DOCUMENTS EFFORTLESSLY WITH OCR FOR OFFICE FILES!

Canon imageFORMULA RS40 - Photo and Document Scanner, Auto Document Feeder, Windows and Mac, Scans Old and New Photos in Varying Sizes, USB Interface
- DIGITIZE MEMORIES: CREATE MONTAGES & SHARE PHOTOS SEAMLESSLY.
- SPEEDY SCANNING: SCAN 40 ITEMS/MIN WITH A SIMPLE BUTTON PRESS.
- VERSATILE FORMATS: SUPPORTS VARIOUS SIZES & FORMATS EFFORTLESSLY.
Canon Canoscan Lide 300 Scanner (PDF, AUTOSCAN, COPY, SEND)
- EFFORTLESS SCANNING WITH AUTO SCAN MODE FOR QUICK RESULTS!
- USB CONNECTIVITY FOR SEAMLESS AND INSTANT SETUP.
- EASILY DIGITIZE DOCUMENTS AND IMAGES FOR EASY ACCESS.
Epson - Perfection V39 II - Color Photo and Document Flatbed Scanner - 4800 dpi Optical Resolution - High-Rise, Removable Lid - Scan to Cloud - USB Power - Image Scanning - Black
- STUNNING 4800 DPI SCANS FOR CRYSTAL-CLEAR PHOTO ENLARGEMENTS.
- VERSATILE SCANNER FOR PHOTOS, DOCUMENTS, AND ARTWORK IN ONE DEVICE.
- ONE-TOUCH SCANNING SIMPLIFIES YOUR WORKFLOW WITH EASY OPERATION.
Using a photo scanner has several advantages over using a smartphone camera for digitizing photos. Photo scanners typically have higher resolution capabilities, which means they can capture more detail and produce higher quality digital images. They also offer more control over the scanning process, allowing users to adjust settings such as color balance and sharpness.
Additionally, photo scanners are designed specifically for scanning photos, so they are able to produce clear, crisp images without distortion or blurriness. They can also handle a variety of photo sizes and formats, making them versatile tools for digitizing a range of photos.
Photo scanners also typically come with software that helps users organize and edit their scanned images, making it easier to create digital photo albums or share images online. Overall, using a photo scanner can result in higher quality digital images that are better suited for archiving and sharing than those produced with a smartphone camera.
What is the best file format for saving scanned photos?
The best file format for saving scanned photos is generally considered to be TIFF (Tagged Image File Format). TIFF files are lossless, meaning there is no compression or loss of image quality, making them ideal for preserving high-quality images. Additionally, TIFF files are widely supported by image editing software and are a good choice for archiving purposes.
How to convert scanned photos into different file formats for various purposes?
- Use Online Converters: There are many online converters available that can convert scanned photos into different file formats. Simply upload your scanned photo, choose the desired output format, and download the converted file.
- Use Image Editing Software: Image editing software such as Adobe Photoshop or GIMP can also be used to convert scanned photos into different file formats. Simply open the scanned photo in the software and save it in the desired format.
- Use Scanner Software: If you are using a scanner to scan photos, most scanner software also have the option to save the scanned photos in different file formats. Simply select the desired format before scanning the photo.
- Use Mobile Apps: There are also mobile apps available that can convert scanned photos into different file formats. Simply download the app, upload the scanned photo, and choose the desired output format.
- Use Batch Conversion Tools: If you have multiple scanned photos that need to be converted into different file formats, batch conversion tools can be helpful. These tools allow you to convert multiple photos at once, saving you time and effort. Just select the photos you want to convert and choose the desired output format.
What is the best resolution for scanning photos with a photo scanner?
The recommended resolution for scanning photos with a photo scanner is typically around 300-600 DPI (dots per inch). This resolution will ensure that the scanned images are of high quality and can be easily printed or digitally shared without losing detail. However, the exact resolution may vary depending on the size and quality of the original photo, as well as the intended use of the scanned image.
How to organize and categorize scanned photos on a computer?
- Create a folder structure: Start by creating a main folder for all your scanned photos, and then create subfolders within it to organize the photos by year, event, or category.
- Use descriptive file names: When saving the scanned photos, give them descriptive file names that include information about the photo, such as the event or people featured in the photo.
- Use metadata: Take advantage of the metadata feature in your computer's operating system to add information about the photos, such as date taken, location, and keywords.
- Tag photos: Some photo management software allows you to tag photos with keywords, making it easier to search for specific photos later on.
- Create a backup: Make sure to regularly back up your scanned photos to an external hard drive or cloud storage to ensure that your photos are safe in case of a computer failure.
- Use photo management software: Consider using a photo management software, such as Adobe Lightroom or Google Photos, to help organize and categorize your scanned photos more easily.
- Sort photos by date: If you have a large collection of scanned photos, consider sorting them by date to make it easier to locate specific photos within a certain time frame.
- Remove duplicates: As you organize your scanned photos, be on the lookout for duplicate photos and delete them to avoid cluttering your photo collection.
What are the best practices for organizing a digital photo collection?
- Use descriptive file names: Instead of keeping the default file names assigned by your camera (e.g. IMG_1234), rename your photos to include important details such as date, location, or event.
- Create a folder structure: Organize your photos into folders based on categories such as year, month, event, or location. This will make it easier to find specific photos later on.
- Use metadata: Add metadata tags to your photos to include additional information such as keywords, people, and locations. This will make it easier to search and filter through your photos.
- Regularly back up your photos: Make sure to back up your photo collection on a regular basis to avoid losing your precious memories in case of a technical failure or accidental deletion.
- Delete unwanted photos: Periodically go through your photo collection and delete duplicates, blurry shots, and photos that no longer hold sentimental value.
- Use photo management software: Consider using photo management software such as Adobe Lightroom, Google Photos, or Apple Photos to help you efficiently organize and edit your photos.
- Share and showcase your photos: Share your photos with friends and family, create digital albums, or print your favorite photos to showcase them in your home.
How to scan oversized or oddly-shaped photos with a photo scanner?
- Ensure that your photo scanner is capable of scanning oversized or oddly-shaped photos. Some scanners have a removable lid that can accommodate larger items, while others may have the option to remove the lid entirely for more flexibility.
- If your scanner has a removable lid, take it off and position the oversized or oddly-shaped photo on the scanning bed. Make sure the photo is flat and as straight as possible to avoid any distortion in the scanned image.
- Adjust the settings on your scanner to accommodate the larger size of the photo. You may need to choose a custom scan size or select a setting for scanning larger documents.
- Preview the scan on your computer to ensure that the entire photo is captured and that it is in focus. Make any necessary adjustments before finalizing the scan.
- Once you are satisfied with the scan, save the image to your computer or external storage device. Consider using image editing software to crop and enhance the scanned photo if needed.
- If your scanner cannot accommodate the size or shape of the photo, consider using a digital camera or smartphone to capture the image instead. Make sure to use good lighting and a stable surface to avoid blurry or distorted images.
- Transfer the digital image to your computer and use image editing software to make any necessary adjustments. Cropping, rotating, and adjusting the colors can help improve the quality of the scanned photo.