
Best Animation Tools for Rust Developers to Buy in July 2026
Moho Pro 13.5 | The all-in-one animation tool for professionals and digital artists | Software for PC and Mac OS
-
SEAMLESS PSD INTEGRATION FOR EASY BITMAP CHARACTER ANIMATION.
-
POWERFUL RIGGING SYSTEM WITH SMART BONES AND ADVANCED CONSTRAINTS.
-
CREATE 3D-LIKE MOVEMENTS EFFORTLESSLY USING 2D DRAWING TOOLS.


Moho Debut 14 | Animation software for PC and macOS
- BEGINNER'S MODE MAKES ANIMATING EASY FOR FIRST-TIME CREATORS!
- INTUITIVE TOOLS HELP YOU DRAW, PAINT, AND IMPORT ARTWORK EFFORTLESSLY.
- EXPORT YOUR ANIMATIONS FOR WEB AND VIDEO-SHARE YOUR ART EASILY!
Moho Pro 14 | Professional animation software for PC and macOS
- SEAMLESS INTEGRATION WITH PHOTOSHOP’S PSD FOR QUICK IMPORTS!
- ADVANCED RIGGING SYSTEM WITH SMART BONES FOR DYNAMIC ANIMATIONS!
- NEW MOHO PRO 14 FEATURES ENHANCE DRAWING AND ANIMATION EASE!
Moho Debut 13.5 | Create your own cartoons and animations in minutes | Software for PC and Mac OS
- BEGINNER'S MODE: START ANIMATING EASILY, PERFECT FOR FIRST-TIMERS!
- INTUITIVE TOOLS: CREATE ART OR IMPORT DESIGNS FOR QUICK ANIMATION!
- ROBUST CONTENT LIBRARY: ACCESS CHARACTERS AND PROPS TO ENHANCE CREATIVITY!
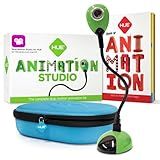
HUE Animation Studio: Complete Stop Motion Kit (Camera, Software, Book) for Windows/macOS (Green) with Carry Case
-
AWARD-WINNING KIT: TEACHER-RECOMMENDED FOR CREATIVE EDUCATION!
-
SUPPORTS MACOS & WINDOWS: EASY ANIMATION FOR ALL AGES!
-
DURABLE, ECO-FRIENDLY CASE: PROTECTS YOUR GEAR AND STAYS ORGANIZED!

CLIP STUDIO PAINT EX - Version 1 - Perpetual License - for Microsoft Windows and MacOS
- MAXIMIZE WORKFLOW WITH VERSATILE COMIC AND MANGA CREATION TOOLS.
- SEAMLESSLY INTEGRATE ARTWORK WITH ALL YOUR EXISTING GRAPHICS TOOLS.
- GET $5 CREDIT FOR THE CLIP STUDIO ASSET STORE WITH YOUR PURCHASE!
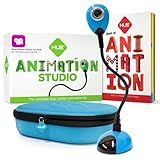
HUE Animation Studio: Complete Stop Motion Kit (Camera, Software, Book) for Windows/macOS (Blue) with Carry Case
- COMPLETE KIT: CAMERA, SOFTWARE, BOOK, STAGE & SOUND EFFECTS INCLUDED!
- STEM-APPROVED LEARNING FUN RECOMMENDED BY TEACHERS WORLDWIDE!
- DURABLE PACKAGING + 3-YEAR WARRANTY FOR LASTING CREATIVITY & PROTECTION!
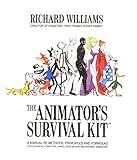
The Animator's Survival Kit: A Manual of Methods, Principles and Formulas for Classical, Computer, Games, Stop Motion and Internet Animators
- QUALITY ASSURANCE: EACH BOOK IS THOROUGHLY INSPECTED FOR QUALITY.
- AFFORDABLE PRICING: ENJOY SUBSTANTIAL SAVINGS COMPARED TO NEW BOOKS.
- ECO-FRIENDLY CHOICE: SUPPORT SUSTAINABILITY BY BUYING USED BOOKS.
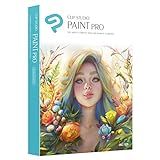
CLIP STUDIO PAINT PRO - Version 1 - Perpetual License - for Microsoft Windows and MacOS
- SKETCH EFFORTLESSLY WITH MOUSE OR PEN TABLET FOR TRUE CREATIVITY.
- ALL-IN-ONE TOOL FOR ILLUSTRATION, MANGA, AND COMIC CREATION.
- ACCESS 10,000+ FREE ASSETS AND GET $5 CREDIT FOR MORE!
To animate the terminal in Rust, you can use libraries like "crossterm" or "termion" to interact with the terminal and update its contents dynamically. By using these libraries, you can clear the terminal screen, move the cursor, change colors and styles, and display text in different positions.
To create animations, you can update the contents of the terminal in a loop, making changes such as displaying different frames or messages at regular intervals. By combining various terminal commands and functionalities provided by these libraries, you can create a wide range of animations and visual effects in the terminal using Rust programming language.
How to use modules in Rust?
In Rust, modules are used to organize code and to create a hierarchy of namespaces for better code organization and modularity.
To use modules in Rust, you can follow these steps:
- Declare a module by using the mod keyword followed by the module name. For example, mod my_module; declares a module named my_module.
- Create a new Rust file with the same name as the module (e.g., my_module.rs) in the same directory as your main lib.rs or main.rs file.
- Define the functionality within the module by adding functions, structs, enums, or other items to the module file.
- To use the module in your code, you can use use statements to bring the module into scope. For example, use my_module; or use crate::my_module; if the module is in the same crate.
- You can also use mod statements within a module file to create sub-modules. For example, if you have a module named my_module, you can create a sub-module named sub_module by adding mod sub_module; inside the my_module.rs file.
- To access items defined within a module or sub-module, you can use the module path to specify the full path to the item. For example, crate::my_module::my_function().
By following these steps, you can effectively use modules in Rust to organize your code and improve code readability and maintainability.
How to write comments in Rust?
In Rust, comments are written by using two forward slashes // for single-line comments and /* */ for multi-line comments. Here are some examples:
// This is a single-line comment
/* This is a multi-line comment */
It is important to note that comments are ignored by the Rust compiler and are used to provide information to other developers or to document code.
How to compile a Rust program?
To compile a Rust program, you can use the rustc command followed by the name of the Rust source file. Here is the general syntax to compile a Rust program:
rustc <source_file_name.rs>
For example, if your Rust program is saved in a file named hello.rs, you can compile it using the following command:
rustc hello.rs
After compiling, an executable file will be generated in the same directory with the name hello (or hello.exe on Windows). You can run the executable by simply typing its name in the terminal:
./hello
Alternatively, you can also use a build system like Cargo, which is the recommended way to manage and build Rust projects. Cargo handles dependencies, building, and running Rust programs with ease. Here is how you can use Cargo to build a Rust program:
- Create a new Rust project using Cargo:
cargo new <project_name>
- Move into the project directory:
cd <project_name>
- Write your Rust code in the src/main.rs file.
- Build the project using Cargo:
cargo build
This will compile the project and create an executable in the target/debug directory. You can run the executable by typing:
./target/debug/<project_name>
Cargo provides additional features such as running tests, managing dependencies, and more. It is recommended to use Cargo for managing Rust projects.
How to create a new project in Rust?
To create a new project in Rust, you can follow these steps:
- Install Rust: If you haven't already, you'll need to install Rust on your system. You can do this by following the instructions on the official Rust website: https://www.rust-lang.org/tools/install
- Create a new project directory: Create a new directory for your project using the mkdir command in your terminal. For example:
mkdir my_project cd my_project
- Initialize a new Rust project: Once you're in your project directory, you can initialize a new Rust project using the Cargo tool, which is Rust's package manager and build system. To do this, run the following command in your terminal:
cargo new my_project cd my_project
- Add dependencies: If your project requires external dependencies, you can add them to your Cargo.toml file. Open the Cargo.toml file in your project directory and add the necessary dependencies under the [dependencies] section.
- Write your code: Now you can start writing your Rust code in the src directory of your project. By convention, the main code file is usually named main.rs, but you can have multiple files in the src directory if needed.
- Build and run your project: Once you've written your code, you can build and run your project using the Cargo tool. To build your project, run:
cargo build
To run your project, run:
cargo run
That's it! You've now created a new project in Rust and can start coding.
What is Rust's ownership system?
Rust's ownership system is a set of rules and mechanisms that govern how memory is managed in Rust programs. It is designed to prevent common memory-related bugs such as null pointer dereferences, dangling pointers, and memory leaks.
In Rust, each value has a single "owner" that is responsible for allocating and freeing the memory used by that value. Ownership of a value can be transferred to another owner, but there can only be one owner at any given time. When the owner goes out of scope, the memory used by the value is automatically freed.
Rust also enforces strict borrowing rules to prevent data races and other concurrency issues. Values can be borrowed by reference, which allows other parts of the program to access the value without taking ownership. Borrowing can be either mutable or immutable, and there are rules governing how multiple references can coexist.
Overall, Rust's ownership system provides a high level of safety and guarantees memory safety and data race freedom without the need for a garbage collector.
How to use Cargo in Rust?
To use Cargo in Rust, follow these steps:
- Create a new Rust project or navigate to an existing Rust project directory in your terminal.
- To create a new Rust project, run the following command:
cargo new project_name
- Navigate to the project directory by running:
cd project_name
- Add dependencies to your project by modifying the Cargo.toml file. You can specify dependencies under the [dependencies] section in the Cargo.toml file.
- To build the project, run:
cargo build
- To run the project without building it, run:
cargo run
- To test the project, run:
cargo test
- To create optimized builds for release, run:
cargo build --release
- To check for and update outdated dependencies in your project, run:
cargo update
Cargo is a powerful tool for managing Rust projects, dependencies, and building processes. By following these steps, you can successfully use Cargo in your Rust projects.