Best Tools to Check Ink Levels to Buy in July 2026
M1630 Pro Automatic Maintenance& Cutter A3 DTF Printer Bundle for T-Shirt Direct to Film Printing,White Ink Circulation Heat Transfer Home Use Machine for Fabric,Clothing(Printer,Oven,Laptop,Supplies)
- EFFORTLESS PRINTING WITH BUILT-IN HEATING FOR SHARP, VIBRANT DESIGNS!
- ZERO WASTE WITH PRECISION CUTTER; SAVE TIME AND BOOST PRODUCTIVITY!
- RELIABLE SUPPORT AND LIFETIME UPDATES FOR WORRY-FREE OPERATION!


Lancelot Auto-Maintenance A3 M1630 Pro DTF Printer Transfer Printing Machine with White Ink Circulation and Auto-Film Cutter for DIY Print T-Shirt,Doule Speed for L1800/R1390 DTF Printer
-
SMART HOLIDAY MODE: PROTECTS PRINTHEADS DURING LONG BREAKS-NO CLOGS!
-
REMARKABLE PRINT SPEED: PRINT TWICE AS FAST WITH STUNNING 720X1440DPI!
-
AUTOMATIC FILM CUTTER: EFFORTLESSLY TRIMS FILMS-SAVE TIME & REDUCE WASTE!
Printer Ink 61 61XL Black Compatible for HP 61 Black Ink Cartridge Work for Envy 4500 5530 4502 5535 Officejet 4630 4632 4635 DeskJet 2540 1010 3050a Printer Ink Cartridges(2 Black)
- COST-EFFECTIVE ALTERNATIVE: RELIABLE REMANUFACTURED 61XL CARTRIDGES.
- COMPATIBLE WITH MULTIPLE HP PRINTER MODELS FOR VERSATILE USE.
- HIGH YIELD: PRINT UP TO 750 PAGES FOR EFFICIENT, LONG-LASTING USE.
Vagmuxado Ink Damper Fit for E-pson ET-8550 ET-8500 L8050 L18050 L8058 L18050 L8160 L8180 L8188 Printer, Printer Ink Absorber, 2PCS
- COMPATIBLE WITH MAJOR EPSON MODELS FOR VERSATILE USE.
- HIGH-QUALITY PP MATERIAL ENSURES LONG-LASTING PERFORMANCE.
- DUAL-CHAMBER DESIGN PREVENTS PRINTING ISSUES EFFECTIVELY.
![Mrs. D's Corner IEP Goal Monitoring Data Tracker Notepad | 50 Pages 8.5"x11" | Progress Monitoring Data Sheets for Special Education Teachers & Case Managers [Flexibound]](https://cdn.blogweb.me/1/51_Qb393w03_L_SL_160_52c7fcf902.jpg)
Mrs. D's Corner IEP Goal Monitoring Data Tracker Notepad | 50 Pages 8.5"x11" | Progress Monitoring Data Sheets for Special Education Teachers & Case Managers [Flexibound]
-
STREAMLINE IEP TRACKING WITH EASY-TO-USE PRE-PRINTED SHEETS!
-
ELIMINATE WASTED TIME AND INK-FEATURES 50 READY-TO-USE SHEETS!
-
VISUALIZE STUDENT GROWTH CLEARLY FOR INFORMED DATA-DRIVEN DECISIONS!
Ink Tubing Printer Flexible Tube Replacement for Photo Nachine, Ink Tube, Printer Ink Line(5m-4 rows)
- DURABLE PP MATERIAL: LIGHTWEIGHT, TOUGH, AND CORROSION-RESISTANT.
- FLEXIBLE OPTIONS: CHOOSE FROM VARIOUS LENGTHS; PERFECT FIT GUARANTEED.
- VERSATILE USAGE: IDEAL FOR PRINTERS, PHOTO MACHINES, AND PRODUCTION LINES.
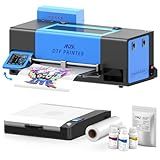
MZK A3 Pro XP600 DTF Printer,Automatic Time Cleaning Printhead Maintain+Ink Anti-Clog Filter,2X-Speed Compared to L1800,5" Rotatable Touch Screen,Dual Ink Level Alert,Film Cutter,Gift Ink 2 Years
- SAVE $1000+ ON SUPPLIES WITH 2 YEARS OF FREE INK & POWDER!
- ENJOY HASSLE-FREE PRINTING WITH USER-FRIENDLY, VIRUS-FREE SOFTWARE!
- EXPERIENCE HIGH-SPEED, HIGH-DEF PRINTING-180 SHEETS DAILY!
To check ink levels on a wireless printer, you can follow these general steps:
- Ensure that your wireless printer is connected to your computer or mobile device over a network. Make sure both devices are connected to the same network.
- Open the printer software or utility for your specific printer model. This software is usually installed when you set up the printer initially.
- Look for an option or menu tab related to ink or supplies. The location and wording may vary, but it is usually labeled as "Ink Levels," "Cartridge Information," or similar.
- Click or select the ink levels option to view the status of each ink cartridge installed in your printer.
- Depending on your printer model, you may see a graphical representation of ink levels, a percentage, or an estimated number of remaining pages. Some printers also display a warning when the ink levels are low or when a cartridge needs replacement.
- Take note of the ink levels to determine if any cartridges need to be replaced. If the ink levels are critically low, you may want to have replacement cartridges ready in order to avoid interruptions in printing.
Note: The above instructions provide a general guideline, and the specific steps may differ depending on the printer brand and model you use. If you are unsure about the procedure, consult your printer's user manual, visit the manufacturer's website for support, or search online for instructions tailored to your particular printer model.
How can I check ink levels wirelessly on my printer?
To check ink levels wirelessly on your printer, you can follow these steps:
- Ensure that your printer is connected to the same Wi-Fi network as your computer or mobile device.
- Install the printer software and drivers on your computer. Most printer manufacturers provide software that includes ink monitoring features.
- Open the printer software on your computer or launch the printer app on your mobile device.
- Look for an option that allows you to check ink levels. This option might be labeled as "Ink Levels," "Supply Levels," or something similar.
- Click or tap on the ink level option to view the current ink levels for each cartridge in your printer. Some printers may display a visual representation, while others may provide a percentage or a numerical value.
- If needed, some printers also offer the option to enable notifications for low ink levels. This way, you can receive alerts when the ink is running low.
Please note that the steps may vary slightly depending on your printer brand and model. If you are unsure, you can refer to the printer's user manual or visit the manufacturer's website for specific instructions.
How do I interpret the ink level readings on my wireless printer?
Interpreting ink level readings on a wireless printer may vary depending on the specific printer model and manufacturer. However, here are general steps to follow:
- Open the printer software or utility on your computer: Locate the printer software or utility installed on your computer. This software is typically provided by the printer manufacturer.
- Access ink level information: Once the printer software is open, navigate to the ink level section or tab. The exact location and wording may vary depending on the printer software.
- Look for visual indicators: The ink level readings are usually displayed as visual indicators, such as bars or bars that gradually fill up. Each bar represents the ink level in a specific cartridge or color.
- Understand the meaning of indicators: Generally, when the ink level is full or nearly full, all the bars will be displayed. As the ink levels deplete, the bars will gradually decrease. Some printers may use different symbols or colors to indicate ink levels.
- Check for warning messages: In addition to visual indicators, the printer software may display warning messages or notifications when ink levels are critically low. These messages can provide more detailed information about each cartridge.
- Take appropriate action: Based on the ink level readings, you can determine if any cartridges need replacement. If the ink level is low or depleted, you may need to purchase and install new ink cartridges.
Remember that the steps provided above are general guidelines, and the specific instructions may vary depending on your wireless printer model and software. It is recommended to refer to your printer's manual or manufacturer's website for more detailed instructions specific to your printer model.
What is the process for replacing ink cartridges on a wireless printer?
The process for replacing ink cartridges on a wireless printer may vary slightly depending on the make and model of your specific printer. However, the general steps involved are as follows:
- Ensure that your printer is turned on and connected to the same wireless network as your computer or smartphone.
- Open the printer's lid or access panel to reveal the ink cartridge carriage. This may involve lifting a scanning unit, flipping a cover or pressing a button to access the ink cartridge area. Consult the printer's user manual for specific instructions.
- Wait for the ink cartridge carriage to move and stop at the replacement position. Some printers may automatically move the carriage to the center, while others require you to press a specific button or use the printer's control panel to move the carriage.
- Identify the empty ink cartridge that needs to be replaced. Most printers have separate cartridges for different colors (e.g., black, cyan, magenta, yellow).
- Press the release tab or gently push down on the old ink cartridge to release it from the carriage. Pull the cartridge out of its slot.
- Unbox the new ink cartridge and remove any protective packaging (e.g., plastic wrap, tape).
- Hold the new cartridge by the sides, align it with the empty slot in the carriage, and gently push it into place at a slight angle until it clicks securely.
- Repeat steps 4 to 7 for any additional ink cartridges that need to be replaced.
- Close the printer's lid or access panel.
- Wait for the printer to initialize and recognize the new cartridges. This could take a few minutes. Some printers may prompt you to align or calibrate the cartridges using the printer's control panel or on-screen instructions.
- Print a test page to ensure that the new ink cartridges are working correctly.
- Dispose of the empty cartridges properly, following the manufacturer's guidelines or recycling instructions.
It's important to note that the above instructions serve as a general guideline, and it's recommended to consult your printer's user manual for specific instructions tailored to your device.
What is the most efficient way to check ink levels on a wireless printer?
The most efficient way to check ink levels on a wireless printer would be to use the printer's software or control panel. Here are the steps to do that:
- Open the computer or device that is connected to the wireless printer.
- Go to the printer's settings or control panel, which can usually be accessed through the "Start" menu or system preferences.
- Look for an option related to ink levels. It may be labeled as "Printer Status," "Ink Levels," or something similar.
- Click on the ink level option, and a window or dialog box will open displaying the current ink levels of each cartridge installed in the printer.
- Some printers may also have an option to send a notification or email when the ink levels are low, which can be helpful in ensuring you never run out of ink.
Note: The exact steps may vary depending on the brand and model of your wireless printer. If you are unsure, refer to the printer's manual or visit the manufacturer's website for specific instructions.