
Best Cleaning Kits for Logitech Mice to Buy in July 2026
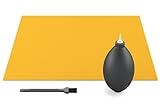
Glorious Keyboard, Mouse & Mousepad Cleaning Kit - Included Brush, Blower & Microfiber Cloth (GLO-Acc-CK)
-
COMPACT BRUSH: SMALL SIZE, BIG CLEAN - EASILY REMOVES DIRT WITHOUT BRISTLE SHEDDING.
-
POWER DUSTER: PRECISION AIRFLOW - REACHES TOUGH SPOTS; REDUCES CLEANING FATIGUE.
-
MICROFIBER CLOTH: SCRATCH-FREE SHINE - KEEPS MONITORS AND DEVICES HYGIENIC AND SPOTLESS.


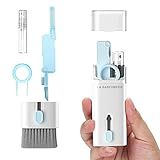
Electronics Cleaner Kit. Keyboard Brush, Airpod Cleaning Tool, Phone Screen Cleaner. for Computers, MacBooks, Laptops, Airpods Pro, Headphones.
-
ALL-IN-ONE KIT: BRUSHES, TOOLS, AND SPRAY FOR COMPLETE CLEANING.
-
DEEP CLEANS: MICROFIBER PAD AND SPRAY TACKLE TOUGH SMUDGES EASILY.
-
COMPATIBLE WITH ALL DEVICES: PERFECT FOR LAPTOPS, PHONES, AND MORE!
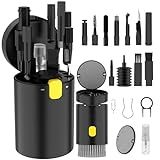
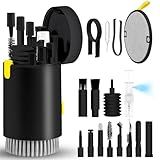
VICHYIE 20 in 1 Multifunctional Cleaner Kit for Electronic Devices, Keyboard Cleaning Brush, Headphones Cleaner Kit for AirPods, Multi-Tool for Cleaning Laptop, Earbuds, Camera, Cellphones (Black)
-
COMPLETE CLEANING SOLUTION FOR ALL YOUR ELECTRONICS IN ONE KIT!
-
PORTABLE DESIGN WITH ESSENTIAL TOOLS FOR EASY ON-THE-GO CLEANING.
-
DEEP CLEANS KEYBOARDS, HEADPHONES, AND SCREENS EFFORTLESSLY.
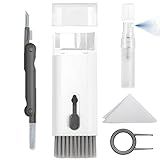
Walrfid Airpods Electronic Screen 7 in 1 Cleaner Kit Laptop Keyboard Cleaning Tool for ipad/iwatch/Computer/Phone/MacBook with 5ml Touchscreen Cleaners Mist (Grey)
- ALL-IN-1 CLEANING KIT: PERFECT FOR LAPTOPS, EARBUDS, AND SCREENS.
- FOLDABLE PEN CLEANS TOUGH DIRT IN CRACKS AND CHARGING HOLES EASILY.
- COMPACT DESIGN MAKES IT PORTABLE-IDEAL FOR ON-THE-GO CLEANING!
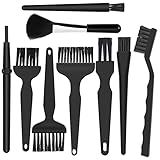
9 in 1 Anti Static Brushes Small Cleaning Kit Multi-Purpose Nylon Brush for Keyboard, PC Motherboards, Camera, Phone, Laptop, MacBook, Computer
-
9 BRUSHES FOR EVERY CLEANING NEED-PERFECT FOR SCREENS & KEYBOARDS!
-
DURABLE & LIGHTWEIGHT-MADE WITH ANTI-STATIC NYLON FOR LONG USE!
-
EFFICIENT CLEANING IN HARD-TO-REACH AREAS-KEEP DEVICES SPARKLING!
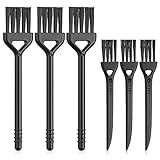
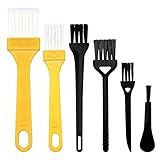
Computer PC Keyboard Laptop Electronics Camera Small Cleaning Brush Kit (Black, Set of 7)
- VERSATILE BRUSH KIT FOR EVERY CLEANING TASK, FROM GROUTS TO DETAILS.
- IDEAL FOR ELECTRONICS MAINTENANCE, PERFECT FOR KEYBOARDS AND PRINTERS.
- COMPATIBLE WITH AIR DUSTERS, GEL, AND VACUUMS FOR COMPLETE CLEANING.
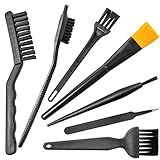
Computer Keyboard Cleaning Brush PC Laptop Keyboard Cleaning Kit Cleaner Antistatic Cleaning Brush Vent Printer Cleaner Gap Track Narrow Space Cleaning Tools
- TACKLE NARROW SPACES WITH A VERSATILE 6-PIECE CLEANING BRUSH SET!
- DURABLE MATERIALS ENSURE LONG-LASTING PERFORMANCE AND EFFICIENCY.
- EFFORTLESSLY CLEAN HARD-TO-REACH AREAS WITH EASE AND PRECISION!
walrfid Laptop Phone Screen Cleaner Kit, Computer Keyboard Brush Cleaning Spray for iPhone AirPods MacBook iPad, 20-in-1 Electronic Device Clean Tool for Camera Earbud Car Screens (Black)
- EFFORTLESSLY REMOVES FINGERPRINTS AND SMUDGES FROM SCREENS.
- ECO-FRIENDLY MATERIALS ENSURE SAFE CLEANING FOR ALL DEVICES.
- COMPACT DESIGN MAKES IT TRAVEL-FRIENDLY FOR ON-THE-GO USE.
Computer Keyboard Cleaning Brush PC Laptop Keyboard Cleaning Kit Cleaner Antistatic Cleaning Brush Vent Printer Cleaner Gap Track Narrow Space Cleaning Tools
- VERSATILE SET CLEANS HARD-TO-REACH SPOTS IN VARIOUS APPLIANCES.
- DURABLE MATERIALS ENSURE LONG-LASTING PERFORMANCE AND EASY CLEANUP.
- PERFECT FOR DUSTING SLIDING DOORS, WINDOWS, AND DELICATE AREAS.
Cleaning the sensor on a Logitech optical mouse is a relatively straightforward process that can be done using a few simple techniques:
- Unplug the mouse: Before starting the cleaning process, make sure the mouse is not connected to the computer or any other device. This will prevent any accidental clicks or movements during the cleaning.
- Prepare a clean surface: Find a clean and flat surface, preferably covered with a soft cloth or a mouse pad. This will prevent any scratches or damage to the mouse while cleaning.
- Inspect the sensor: On the bottom of the Logitech optical mouse, you will see a small, usually red, light-emitting diode (LED) sensor. Inspect this sensor and surrounding area for any visible dust, dirt, or debris that might hinder its performance.
- Use compressed air: If there is visible dust or debris on the sensor, you can use a can of compressed air to blow away the particles. Hold the can in an upright position and direct short bursts of air onto the sensor. Be careful not to shake the can or tilt it too much, as this may cause condensed moisture to come out, which can damage the sensor.
- Wipe with a soft cloth: If the sensor is relatively clean but needs a gentle wipe down, use a soft, lint-free cloth to wipe away any remaining dirt or smudges. Gently apply pressure and wipe in straight motions to avoid scratching the surface.
- Check the feet: While you are cleaning the mouse, it is also a good idea to inspect the small plastic feet on the bottom of the mouse. If these feet are dirty or worn out, it might hinder smooth movement. If necessary, clean them gently with a cloth or replace them if they are too worn.
- Reconnect the mouse: Once you have thoroughly cleaned the sensor and the surface of the mouse, you can reconnect it to your computer or other devices.
Remember to regularly clean your Logitech optical mouse to ensure smooth and accurate tracking. This will help maintain optimal performance and extend the lifespan of your mouse.
How to effectively remove dirt and grime from a mouse sensor?
To effectively remove dirt and grime from a mouse sensor, here are some steps you can follow:
- Turn off your computer and unplug the mouse to prevent accidental clicks during the cleaning process.
- Inspect the sensor area to identify any visible dirt or grime. Use a flashlight if needed.
- Use a compressed air canister to blow away loose debris from the sensor. Hold the canister about 1-2 inches away from the sensor and give it a few short bursts of air. This should help dislodge any loose particles.
- If there are still stubborn dirt or grime spots, use a lint-free microfiber cloth or cotton swab lightly moistened with isopropyl alcohol (at least 70%). Make sure the cloth is only slightly damp, not wet. Excess liquid can damage the sensor.
- Gently swipe the cloth or cotton swab across the sensor, applying light pressure to remove any remaining dirt or grime. Be careful not to press too hard, as this may damage the sensor.
- If you encounter any difficult-to-remove residue, you can try using a specialized sensor cleaning kit specifically designed for cleaning delicate electronics. Follow the instructions provided with the kit.
- Once you've cleaned the sensor, let it air dry for a few minutes before plugging the mouse back in.
- After reconnecting the mouse, test it on a clean surface to ensure the sensor is working properly. If you notice any issues, repeat the cleaning process or consider seeking professional assistance.
Remember to regularly clean your mouse pad or use a clean surface for optimal performance and to prevent dirt and grime buildup on the sensor.
How to troubleshoot cursor jumping issues by cleaning the sensor?
If you're experiencing cursor jumping issues with your mouse, you can troubleshoot and potentially resolve the problem by cleaning the sensor. Here's a step-by-step guide on how to do it:
- Turn off your computer: Before cleaning the mouse sensor, make sure you turn off your computer or at least unplug the mouse to avoid any accidental clicks or movement of the cursor.
- Remove the mouse ball (if applicable): If you have an older ball mouse, twist the cover on the bottom of the mouse counterclockwise to remove it. Take out the mouse ball and set it aside.
- Access the sensor area: Locate the sensor on the bottom side of the mouse. It is usually a small, rectangular opening where the light emits from.
- Use compressed air: Take a can of compressed air and blow short bursts of air onto the sensor. Make sure to hold the can upright to prevent any liquid from escaping. This will help remove any dust or debris that might obstruct the sensor.
- Check for residue: Use a clean, lint-free cloth or a cotton swab dampened with rubbing alcohol to gently wipe the sensor area. Be cautious not to scratch or damage the sensor. This will remove any residue or smudges that might affect its performance.
- Reassemble and test: Once you have cleaned the sensor, reinsert the mouse ball (if applicable) and secure the cover back in place. Plug in or turn on your computer, and test the mouse to see if the cursor jumping issue has been resolved.
If the problem persists even after cleaning the sensor, there might be other underlying causes such as driver issues or a faulty mouse. If that's the case, you may need to try other troubleshooting methods or consider replacing the mouse.
What are the different ways to clean a sensor on a Logitech optical mouse?
There are several different methods you can try to clean the sensor on a Logitech optical mouse:
- Compressed Air: Use a can of compressed air to blow away any dust or debris that may be on the sensor or the surrounding area.
- Soft Cloth or Brush: Gently wipe the sensor and surrounding area with a soft cloth or a small brush to remove any loose debris.
- Cotton Swab: Moisten a cotton swab with isopropyl alcohol and gently clean the sensor and surrounding area. Make sure the swab is not too wet to avoid damaging the mouse.
- Mousepad: Sometimes the issue may be due to the surface you are using the mouse on. Using a clean mousepad can help ensure optimal performance.
Remember to unplug the mouse before attempting any cleaning methods, and always be gentle when cleaning the sensor to avoid any damage.