Best Static IP Address Configuration Tools for Wireless Printers to Buy in July 2026

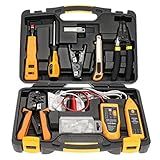
Solsop Pass Through RJ45 Crimp Tool Kit All-in-One Ethernet Crimper Cat7 Cat6 Cat5 Crimping Tool with Network Cable Tester, 50-Pack Cat6 RJ45 Pass Through Connector, 50-Pack Connector Boots
-
VERSATILE CRIMPING TOOL: CRIMPS ALL RJ45/RJ11 STANDARDS AND CABLES.
-
DURABLE CABLE TESTER: TESTS UP TO 300M FOR RELIABLE NETWORK PERFORMANCE.
-
ERGONOMIC DESIGN: COMFORT GRIP ALLOWS EASY, ONE-HANDED OPERATION.


Network Tool Kit, ZOERAX 11 in 1 Professional RJ45 Crimp Tool Kit - Pass Through Crimper, RJ45 Tester, 110/88 Punch Down Tool, Stripper, Cutter, Cat6 Pass Through Connectors and Boots
-
PORTABLE & DURABLE: IDEAL FOR HOMES, OFFICES, AND OUTDOOR USE.
-
ALL-IN-ONE TOOLSET: CRIMP, TEST, AND MANAGE CABLES EFFORTLESSLY.
-
COMPREHENSIVE ACCESSORIES: INCLUDES ESSENTIAL TOOLS FOR ANY NETWORK TASK.
Gaobige Network Tool Kit for Cat5 Cat5e Cat6, 11 in 1 Portable Ethernet Cable Crimper Kit with a Ethernet Crimping Tool, 8p8c 6p6c Connectors rj45 rj11 Cat5 Cat6 Cable Tester, 110 Punch Down Tool
- ALL-IN-ONE TOOLKIT FOR EFFICIENT NETWORK SETUP AND REPAIRS.
- PROFESSIONAL CRIMPER SAVES TIME ON RJ45, RJ11, AND RJ12 CABLES.
- VERSATILE CABLE TESTER FOR QUICK DIAGNOSTICS OF VARIOUS CONNECTIONS.

Network Cable Untwist Tool, Engineer Wire Straightener for CAT5/CAT5e/CAT6/CAT7 Wires Pair Separator Tools Quickly & Easily Untwists (3)
- EFFORTLESSLY UNTWIST CAT5/CAT6 PAIRS FOR FASTER CONNECTIONS!
- MINIMIZE FINGER STRAIN ON LARGE JOBS WITH OUR ERGONOMIC DESIGN.
- PORTABLE & EASY-TO-USE TOOL FOR QUICK, EFFICIENT CABLE HANDLING.

Cat7 RJ45 Crimping Tool, Cat 7 Cat6 Cat5 Pass Through Ethernet Crimping Tool Kit, Network Crimping Tool With Cable Tester, Multiply Stripper, Blades,50Pcs Cat 6 Connectors and Strain Relief Boots
- COMPLETE KIT: CRIMP, STRIP, AND TEST CABLES EFFORTLESSLY.
- SUPPORTS MULTIPLE CABLE TYPES: CAT5 TO CAT7, VERSATILE USAGE!
- INCLUDES 50 CONNECTORS AND BOOTS FOR EXTENSIVE NETWORKING NEEDS.
Network Cable Untwist Tool – Wire Straightener & Stripper for Category 5/6 Cables, Twisted Wire Separator, for Engineers
- QUICK AND EASY UNTWISTING: INNOVATIVE ROLLER DESIGN FOR FAST WIRE SEPARATION.
- ERGONOMIC COMFORT: REDUCES HAND FATIGUE FOR PROLONGED, EFFORTLESS USE.
- DURABLE CONSTRUCTION: BUILT WITH ABS AND METAL FOR LONG-LASTING RELIABILITY.
Cable Matters 7-in-1 Network Tool Kit with RJ45 Ethernet Crimping Tool, Punch Down Device, Punch Down Stand, Cable Tester, RJ45 Connectors & Boots, and Wire Strippers - Carrying Case Included
-
ALL-IN-ONE TOOLKIT: 7-IN-1 KIT FOR BUILDING & TESTING ETHERNET NETWORKS.
-
USER-FRIENDLY TOOLS: INCLUDES CRIMPER, TESTER & PUNCH DOWN TOOLS.
-
PORTABLE DESIGN: DURABLE CARRYING CASE FOR EASY STORAGE & TRANSPORT.
InstallerParts Professional Network Tool Kit 15 In 1 - RJ45 Crimper Tool Cat 5 Cat6 Cable Tester, Gauge Wire Stripper Cutting Twisting Tool, Ethernet Punch Down Tool, Screwdriver, Knife
-
LIGHTWEIGHT, DURABLE CASE KEEPS TOOLS ORGANIZED FOR HOME OR OUTDOOR USE.
-
HIGH-QUALITY CRIMPER ENSURES PRECISION FOR ALL TYPES OF NETWORK CABLES.
-
ESSENTIAL TOOLS LIKE TESTERS AND SCREWDRIVERS INCLUDED FOR EVERY JOB.
To configure a static IP address for a wireless printer, follow these steps:
- Turn on your wireless printer and make sure it is connected to your Wi-Fi network. Check the printer's documentation for specific instructions on how to connect it to your network.
- Identify the printer's current IP address. This can usually be done by accessing the printer's settings or network menu on its display screen or by printing a network configuration page.
- On your computer, open a web browser and enter the IP address of your printer into the address bar. This will open the printer's web-based configuration page.
- Login to the printer's configuration page using the username and password provided in your printer's documentation. If you have not set a custom username and password, it may be the default one mentioned in the documentation.
- Once logged in, navigate to the network settings or TCP/IP settings section of the printer's configuration page.
- Look for an option to configure the IP address settings and select the option to set a static IP address.
- Enter the desired static IP address, subnet mask, and default gateway. These details can typically be obtained from your router's configuration page or network settings.
- Save the changes and wait for the printer to reboot.
- After the printer has rebooted, check if the new static IP address has been assigned. You can do this by printing another network configuration page or checking the printer's display screen.
- Once you have confirmed that the static IP address has been successfully configured, update the printer's IP address in any relevant computer or device settings to ensure they can still communicate with the printer properly.
Remember, the steps may vary slightly depending on the printer model and manufacturer. It is recommended to consult the printer's documentation or contact the manufacturer's support for specific instructions tailored to your printer.
How to configure a wireless printer's IP address using a router's configuration page?
To configure a wireless printer's IP address using a router's configuration page, you can follow these steps:
- Connect the printer to your Wi-Fi network following the manufacturer's instructions. Ensure that the printer is connected to the same network as your router.
- Open a web browser on a device that is connected to the same Wi-Fi network.
- Enter the IP address of your router in the browser's address bar and press Enter. You can usually find the router's IP address on the back or bottom of the router, or in the manual that came with it.
- Log in to the router's configuration page using your username and password. This information is often printed on the router or can be found in the router's manual.
- Once logged in, navigate to the "Wireless" or "Wi-Fi" section of the router's configuration page.
- Look for a setting called "Connected Devices," "DHCP Reservation," or something similar. This is where you can assign a static IP address to your printer.
- Find the MAC address of your printer. It is usually printed on a sticker attached to the printer or can be found in the printer's settings menu.
- In the router's configuration page, locate the "Add Reservation" or "Add Device" option. Enter the MAC address of your printer and assign it an IP address within the same range as the router's IP address.
- Save the changes and exit the router's configuration page.
- Restart your printer to apply the new IP address. It should now have a static IP address that is accessible on your network.
Please note that the process may vary slightly depending on the router model and manufacturer. If you have difficulty finding the specific settings or need further assistance, consult the router's manual or contact the router manufacturer's support.
What is DHCP, and how does it relate to configuring a static IP address for a wireless printer?
DHCP stands for Dynamic Host Configuration Protocol. It is a network protocol used to automatically assign IP addresses and other network configuration parameters to devices on a network.
When DHCP is enabled on a network, devices such as computers, smartphones, and printers can obtain IP addresses automatically from a DHCP server. This eliminates the need for manually configuring IP addresses on each device.
On the other hand, a static IP address is a manually assigned IP address that remains unchanged, providing a fixed address for a specific device on a network. Static IP addresses are preferred in certain situations, such as when hosting a website or configuring certain network devices.
For configuring a static IP address for a wireless printer, it typically involves accessing the printer's settings or configuration interface and manually setting an IP address that is different from the DHCP range of the network. This ensures that the printer always uses the same IP address and can be easily accessed by other devices on the network. By configuring a static IP, the printer's IP address remains constant, even if the network is reset or the printer is powered off and on again.
How to avoid IP conflicts when configuring a static IP address for a printer?
To avoid IP conflicts when configuring a static IP address for a printer, follow these steps:
- Determine the range of IP addresses used in your network: Check the range of IP addresses assigned by your router's DHCP server. This range typically starts with the lowest address and ends with the highest address reserved for DHCP.
- Choose an IP address outside the DHCP range: Select an IP address from the available range that is outside of the DHCP server's range. This ensures that the static IP you assign to the printer doesn't clash with dynamically assigned IP addresses.
- Configure the printer with the static IP address: Access the printer's settings or control panel. Look for the network settings or TCP/IP settings. Enter the chosen IP address, subnet mask, default gateway, and DNS server information.
- Reserve the static IP address in your router: Log in to your router's administration interface. Locate the DHCP settings or DHCP reservation section. Find the printer's MAC address and assign the chosen static IP address to it. This reserves the IP address for the printer, preventing the router from assigning it to another device.
- Test the connectivity: Restart the printer, and ensure it successfully connects to the network with the assigned static IP address. Verify that there are no IP conflicts within the network.
By following these steps, you can configure a static IP address for your printer without encountering IP conflicts within your network.