
Best Tools for Automated Testing in Capybara to Buy in July 2026
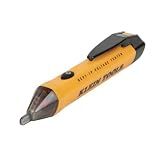
Klein Tools NCVT1P Voltage Tester, Non-Contact Low Voltage Tester Pen, 50V to 1000V AC, Audible and Flashing LED Alarms, Pocket Clip
- NON-CONTACT VOLTAGE DETECTION FOR SAFETY AND CONVENIENCE.
- BRIGHT LED ALERTS FOR EASY VOLTAGE INDICATION AND QUICK RESPONSES.
- LIGHTWEIGHT, DURABLE DESIGN WITH 6.6-FOOT DROP PROTECTION.


Hands-On Automated Testing with Playwright: Create fast, reliable, and scalable tests for modern web apps with Microsoft's automation framework
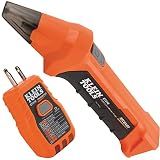
Klein Tools ET310 AC Circuit Breaker Finder, Electric and Voltage Tester with Integrated GFCI Outlet Tester
-
QUICKLY PINPOINT BREAKERS FOR EFFICIENT ELECTRICAL TROUBLESHOOTING.
-
TWO-PART SYSTEM ENSURES ACCURATE, EASY BREAKER IDENTIFICATION.
-
VISUAL AND AUDIBLE CUES GUARANTEE HASSLE-FREE CIRCUIT LOCATING.
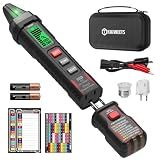
KAIWEETS Circuit Breaker Finder with LCD Display, GFCI Outlet Tester, AC 90-130V Electrical Circuit Tracer Tool with NCV Tset & Flashlight, Includes Carrying Case with Adapter, Alligator Clips -KT303P
- ALL-IN-ONE TOOL FOR QUICK BREAKER LOCATING & SAFETY TESTING.
- LCD DISPLAY PROVIDES CLEAR FEEDBACK FOR FAST, ACCURATE READINGS.
- COMPLETE KIT INCLUDES ADAPTERS & LABELS FOR VERSATILE APPLICATIONS.

Design Patterns for High-Quality Automated Tests: Clean Code for Bulletproof Tests
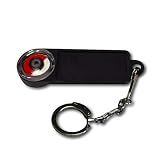
Rotation Tester and AC Detector for Circulating Pumps etc
- INSTANTLY SHOWS ROTATION DIRECTION FOR QUICK ADJUSTMENTS.
- ACCURATELY DETECTS AC FIELDS FOR ENHANCED SAFETY.
- EASILY IDENTIFIES SOLENOID VALVES FOR EFFICIENT TROUBLESHOOTING.

Selenium Testing Tools Cookbook - Second Edition
To confirm a JavaScript popup with Capybara, you can use the accept_confirm method. This method accepts a block where you can perform actions before confirming the popup. You can also use the dismiss_confirm method to dismiss the popup.
Here is an example code snippet:
accept_confirm do click_button 'Delete' end
In the above code, the popup will be accepted when the 'Delete' button is clicked. This allows you to interact with JavaScript popups in your tests using Capybara.
What is the process for dismissing a JavaScript popup with Capybara?
To dismiss a JavaScript popup using Capybara, you can use the page.accept_confirm method. This method will accept the popup dialog and dismiss it.
Here is an example of how you can dismiss a JavaScript popup using Capybara:
# Click on a button that triggers a JavaScript popup click_button 'Show Popup'
Dismiss the popup
page.dismiss_confirm do click_button 'OK' end
In this example, we first click on a button that triggers a JavaScript popup. Then, we use the page.dismiss_confirm method to dismiss the popup when the "OK" button is clicked within the popup dialog.
Alternatively, you can use the page.accept_confirm method to accept the popup dialog:
# Click on a button that triggers a JavaScript popup click_button 'Show Popup'
Accept the popup
page.accept_confirm do click_button 'OK' end
In this example, we use the page.accept_confirm method to accept the popup when the "OK" button is clicked within the popup dialog.
By using these methods, you can easily dismiss or accept JavaScript popups in your Capybara tests.
How to handle dynamic content within JavaScript popups in Capybara?
To handle dynamic content within JavaScript popups in Capybara, you can use the accept_confirm or dismiss_confirm method to interact with the popup. However, if the content within the popup is dynamic and changes based on user input or other factors, you may need to use a combination of techniques to handle the content.
One approach is to use Capybara's within method to scope your interactions to the popup, allowing you to locate and interact with specific elements within the popup. For example, you can use within to find and interact with a specific element within the popup:
within_window(-> { page.current_window }) do within('.popup') do click_button 'Submit' end end
You can also use Capybara's page.driver.browser method to execute JavaScript code directly within the popup. This can be useful for interacting with elements or handling dynamic content that may not be easily accessible using Capybara's standard methods. For example, you can use execute_script to set the value of an input field within the popup:
page.driver.browser.execute_script("document.querySelector('.popup input[name=email]').value = 'test@example.com'")
By combining these techniques with your knowledge of the dynamic content within the popup, you should be able to effectively handle dynamic content within JavaScript popups in Capybara.
What is the default behavior of Capybara when encountering a JavaScript popup?
The default behavior of Capybara when encountering a JavaScript popup is to raise an error. Capybara does not have built-in support for handling JavaScript popups, so it will throw an error if a popup appears during a test.
To handle JavaScript popups in Capybara, you can use additional tools or libraries such as Selenium WebDriver or Poltergeist. These tools provide the ability to interact with JavaScript popups and handle them in your tests.