Best Tools to Create Stunning Pie Charts to Buy in July 2026
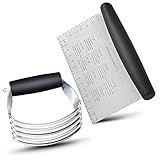
ALLTOP Stainless Steel Bench Scraper and Pastry Blender Cutter Set, Efficient Multipurpose Kitchen Baking Essential Tool with Comfortable Grip Handle-Perfect for Nut, Pie and Dough Processing - Black
- 2-IN-1 DESIGN: BLEND, MEASURE, AND TRANSFER DOUGH EFFORTLESSLY!
- BUILT TO LAST: HIGH-QUALITY STAINLESS STEEL ENSURES LIFETIME DURABILITY.
- VERSATILE USE: PERFECT FOR BAKING, CHOPPING, AND HASSLE-FREE CLEANUP!


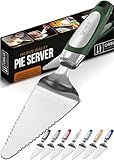
Orblue Pie Server, Essential Kitchen Tool, Serrated on Both Sides, Great for Right or Left Handed Chef, Stainless Steel Flatware, Cake Cutter, Dark Green
- DUAL SERRATED EDGES CATER TO BOTH RIGHT AND LEFT-HANDED USERS.
- DURABLE, RUST-RESISTANT STAINLESS STEEL ENSURES LONG-LASTING USE.
- ERGONOMIC HANDLE PROVIDES A COMFORTABLE, SECURE GRIP FOR SLICING.
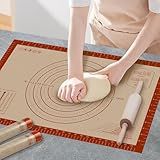
Silicone Baking Mat with Measurements, Extra Large 0.7mm 24" x 16" Pastry Dough Sheet, Pie Crust Rolling sourdough tools Supplies for Making Pizza, Pie, Christmas Cookies, Bread, Non Stick
- UPGRADE YOUR BAKING: 0.7MM THICK FOR DURABILITY AND STABILITY.
- NONSTICK & EASY CLEAN: ROLL DOUGH WITHOUT EXTRA FLOUR; DISHWASHER SAFE!
- SECURE GRIP: NON-SLIP SURFACE ENSURES PERFECT ROLLING AND CUTTING.
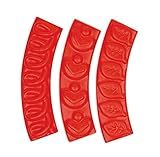
Talisman Designs Pastry Stamps | Set of 3 | Pie Crust Embosser | Pie Decorating Tools & Gadgets | Pie Baking Crust Cutters | Cute & Functional Kitchen Supplies
- CREATE STUNNING, PROFESSIONAL-LOOKING PIES WITH EASE AND PRECISION.
- ENHANCE PIES WITH UNIQUE SHAPES AND PATTERNS FOR VISUAL APPEAL.
- DURABLE, DISHWASHER-SAFE DESIGN FOR HASSLE-FREE BAKING AND CLEANUP.
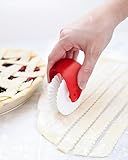
Talisman Designs Pie Crust Decorating Tools | Pastry Wheel Cutter | Set of 1
- PERFECT LATTICE CUTS EVERY TIME WITH EASY-TO-USE DESIGN!
- VERSATILE TOOL: IDEAL FOR PASTRY, PASTA, AND FONDANT CUTTING!
- DURABLE, DISHWASHER-SAFE DESIGN FOR EFFORTLESS CLEANING!
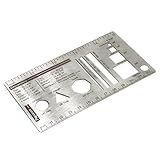
UPTTHOW Culinary Ruler Stainless Streel Mini Cutting Reference Template Cooking Measurement for Food Essential Kitchen Tool with Weight Temperature Baking Conversion Chart for Beginner and Chef (5*3")
- CUT WITH PRECISION: STRIPS, CIRCLES, AND SQUARES IN ANY THICKNESS!
- EASY CONVERSIONS: TEMPERATURE & WEIGHT CHARTS FOR QUICK KITCHEN USE!
- PORTABLE DESIGN: COMPACT SIZE FITS IN POCKETS-PERFECT FOR ON-THE-GO!
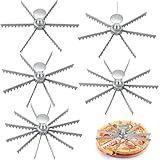
Hushee 5 Pcs Pie and Cake Marker Aluminum Alloy Guideline and Portion Divider Cake Cutter Cut Silver Pie Slice Cutter Baking Tools Kitchen Accessories Cook Supplies for Pizza (6,7,8,10,12 Cut)
- ACHIEVE PERFECT PORTIONS WITH 5 VERSATILE PIE CUTTERS IN ONE SET!
- DURABLE ALUMINUM DESIGN: RUST-PROOF FOR LONG-LASTING USE!
- SAFE & EASY OPERATION: CREATE EXACT MARKS FOR EFFORTLESS SLICING!
3 Pcs Ohms Law Wheel Stickers; Ohm's Law Pie Chart Physics Stickers Electricity Explained Science Teacher Sticker for Water Bottle Tumbler Phone Case Laptop 3"x3"
-
PERSONALIZE ANY ITEM-CAR, LAPTOP, WATER BOTTLE, AND MORE!
-
UNIQUE GIFTS FOR ALL AGES; PERFECT FOR ANY CELEBRATION OR OCCASION.
-
DURABLE, WEATHERPROOF DESIGN ENSURES VIBRANT COLORS LAST OVER TIME.
Pastry Wheel Decorator and Cutter, 4PCS Pie Wheel Pastry Wheel Roll Pie Crust Cutter Pastry Cutter Pie Cutter Pizza Pastry Pie Lattice DIY Baking Cooking Tool for Beautiful Pie Crust or Ravioli Pasta
- CREATE STUNNING PIES EFFORTLESSLY WITH OUR EASY-TO-USE PASTRY WHEEL!
- VERSATILE TOOL FOR PIES, PASTA, AND PASTRIES-BAKE LIKE A PRO!
- DURABLE, DISHWASHER-SAFE DESIGN ENSURES LONG-LASTING PERFORMANCE!
Soro Essentials- 10-Cut Aluminum Pie and Cake Marker- Guideline and Portion Divider Cake Cutter Silver Pie Slice Cutter Baking Tools Kitchen Accessories Cook Supplies for Cheesecake Pizza
-
CREATE UNIFORM SLICES FOR PERFECT PRESENTATION EVERY TIME!
-
REDUCE WASTE AND CONTROL PORTION SIZES FOR COST EFFICIENCY.
-
VERSATILE TOOL FOR CAKES, PIES, CHEESECAKES, AND MORE!
To create a pie chart in Matplotlib, you can follow these steps:
- Import the required libraries: import matplotlib.pyplot as plt
- Prepare your data: labels = ['Label1', 'Label2', 'Label3', ...] # Labels for each section of the pie sizes = [size1, size2, size3, ...] # Sizes/proportions for each section
- Create the pie chart: plt.pie(sizes, labels=labels) Optionally, you can use additional parameters such as colors, explode, startangle, etc. to customize the appearance of the chart.
- Add a title and/or legend (if desired): plt.title('Title of the Pie Chart') plt.legend()
- Display the chart: plt.show()
- If you want to save the chart as an image file instead of displaying it, you can use: plt.savefig('chart.png')
That's it! By following these steps, you can create a pie chart using Matplotlib in Python. Remember to adjust the data and customize the chart as per your requirements.
How to remove the top and right spines from a plot in Matplotlib?
To remove the top and right spines from a plot in Matplotlib, you can use the spines attribute of the Axes object and set their visibility to False. Here's an example:
import matplotlib.pyplot as plt
Create a figure and an axes object
fig, ax = plt.subplots()
Generate some sample data
x = [0, 1, 2, 3, 4, 5] y = [0, 1, 4, 9, 16, 25]
Plot the data
ax.plot(x, y)
Remove the top and right spines
ax.spines['top'].set_visible(False) ax.spines['right'].set_visible(False)
Show the plot
plt.show()
In this example, we create a figure and an axes object using plt.subplots(). Then, we plot the data using ax.plot(x, y). Finally, we remove the top and right spines by setting their visibility to False using ax.spines['top'].set_visible(False) and ax.spines['right'].set_visible(False).
Running this code will display the plot with the top and right spines removed.
How to control axis tick labels in Matplotlib?
To control axis tick labels in Matplotlib, you can use the following methods:
- Customize the tick labels: plt.xticks() and plt.yticks() functions can be used to specify the positions and labels of the tick marks on the x-axis and y-axis, respectively. You can pass an array of values to these functions to set the positions of the tick marks. You can also pass a list of labels to set the corresponding tick labels.
Example 1: Changing x-axis tick labels to custom labels
import matplotlib.pyplot as plt
x = [1, 2, 3, 4, 5] y = [2, 4, 6, 8, 10]
plt.plot(x, y) plt.xticks(x, ['A', 'B', 'C', 'D', 'E'])
plt.show()
Example 2: Setting x-axis tick labels to specific positions
import matplotlib.pyplot as plt
x = [1, 2, 3, 4, 5] y = [2, 4, 6, 8, 10]
plt.plot(x, y) plt.xticks([1, 3, 5], ['Minimum', 'Average', 'Maximum'])
plt.show()
- Format the tick labels: You can use the plt.tick_params() function to customize various properties of the tick labels, such as font size, rotation, and alignment. You can set the labelsize parameter to specify the font size of the tick labels. You can set the rotation parameter to rotate the tick labels, and the ha (horizontal alignment) parameter to align them.
Example: Formatting x-axis tick labels
import matplotlib.pyplot as plt
x = [1, 2, 3, 4, 5] y = [2, 4, 6, 8, 10]
plt.plot(x, y) plt.xticks(fontsize=12, rotation=45, ha='right')
plt.show()
These methods allow you to control the appearance of tick labels on the x-axis and y-axis in Matplotlib. You can adjust them according to your specific requirements.
How to create a stacked bar chart in Matplotlib?
To create a stacked bar chart in Matplotlib, you can follow these steps:
- Import the necessary libraries:
import matplotlib.pyplot as plt import numpy as np
- Define the data for the chart. In this example, we will use three categories and their respective values:
categories = ['Category 1', 'Category 2', 'Category 3'] values1 = [10, 15, 12] values2 = [8, 12, 10]
- Compute the cumulative values for each category. This is required to create the stacked bars:
bottom_values1 = np.zeros(len(values1)) bottom_values2 = values1
- Create the bar chart using the bar function. Pass the x-coordinate (position of the bars), values, and bottom values for each category:
plt.bar(categories, values1, label='Value 1') plt.bar(categories, values2, bottom=bottom_values2, label='Value 2')
- Customize the chart by adding labels, legend, and title:
plt.xlabel('Categories') plt.ylabel('Values') plt.legend() plt.title('Stacked Bar Chart')
- Finally, display the chart:
plt.show()
Here's the complete code:
import matplotlib.pyplot as plt import numpy as np
categories = ['Category 1', 'Category 2', 'Category 3'] values1 = [10, 15, 12] values2 = [8, 12, 10]
bottom_values1 = np.zeros(len(values1)) bottom_values2 = values1
plt.bar(categories, values1, label='Value 1') plt.bar(categories, values2, bottom=bottom_values2, label='Value 2')
plt.xlabel('Categories') plt.ylabel('Values') plt.legend() plt.title('Stacked Bar Chart')
plt.show()
This will create a stacked bar chart with two values for each category.
How to create a polar plot in Matplotlib?
To create a polar plot in Matplotlib, you can follow these steps:
- Import the necessary libraries:
import numpy as np import matplotlib.pyplot as plt
- Define the data for the polar plot:
theta = np.linspace(0, 2*np.pi, 100) radius = np.abs(np.sin(5*theta))
- Create a polar plot using the plt.polar function:
plt.polar(theta, radius)
- Customize the plot by adding labels, title, or grid lines:
plt.xlabel("Theta") plt.ylabel("Radius") plt.title("Polar Plot") plt.grid(True)
- Show the polar plot using plt.show():
plt.show()
Here's an example of creating a simple polar plot with a sinusoidal curve:
import numpy as np import matplotlib.pyplot as plt
theta = np.linspace(0, 2*np.pi, 100) radius = np.abs(np.sin(5*theta))
plt.polar(theta, radius) plt.xlabel("Theta") plt.ylabel("Radius") plt.title("Polar Plot") plt.grid(True) plt.show()
This will display the polar plot with a sinusoidal curve. You can modify the data or customize the plot to suit your needs.