Best Tools to Create Candlestick Charts to Buy in July 2026
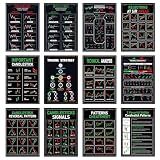
12Pcs Trading Chart Pattern Posters Candlestick Pattern Poster Bulletin Board Crypto and Stock Market Trading Poster Office Decorations for Trader Investor Supplies Wall Door Decor 11 x 15.7 Inches
- COMPREHENSIVE CHEAT SHEET: 12 DETAILED TRADING PATTERNS FOR QUICK REFERENCE.
- STYLISH & PROFESSIONAL DESIGN: ENHANCES ANY TRADING SPACE OR CLASSROOM.
- DURABLE QUALITY: THICK, LAMINATED POSTERS FOR EASY CLEANING AND LONGEVITY.


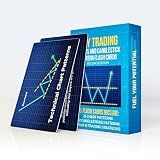
Day Trading Flash Cards – 65 Cards with Stock Market Chart Patterns, Candlestick Patterns & Trading Strategies | Technical Analysis for Day Trading, Options & Swing Trading | 2nd Edition
-
MASTER TRADING FAST WITH 65 FLASH CARDS IN YOUR HANDS!
-
LEARN PATTERNS AND STRATEGIES TO MAXIMIZE PROFITS INSTANTLY!
-
DURABLE & PORTABLE DESIGN: TRADE ANYTIME, ANYWHERE!
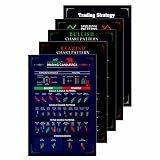
Trading Chart (Set of 5) Posters, 350 GSM Candlestick Pattern Cheat Sheet, Trade Setup Kit for Stock, Forex and Crypto Market (30 x 21 CM, Unframed)
- MASTER MARKET ANALYSIS WITH ESSENTIAL CANDLESTICK PATTERNS TODAY!
- IMPROVE YOUR DECISIONS USING ORGANIZED CHARTS FOR QUICKER RECOGNITION!
- DURABLE 350 GSM PAPER ENSURES QUALITY FOR EVERY TRADING SESSION!

Candlestick Pattern Cheat Sheet for Trading – 3-Page Durable Cardstock with 190+ Chart Patterns – Includes Candlestick and Traditional Technical Analysis for Stock, Crypto, and Forex Traders
-
ACCESS 190+ PATTERNS: MASTER TRADING WITH VAST CANDLESTICK AND CHART DESIGNS.
-
INFORMED TRADING DECISIONS: LEVERAGE HISTORICAL PATTERNS FOR BETTER CALLS.
-
DURABLE & PORTABLE: WATERPROOF CARDSTOCK DESIGNED FOR LONG-LASTING USE.
Stock Market Quick Reference Guide: A cheat sheet for Day Traders. Includes Stock Market Chart Patterns, Candlestick Patterns, Key Indicators, ... key information about the stock market
Candlestick Charting Explained Workbook: Step-by-Step Exercises and Tests to Help You Master Candlestick Charting: Step-By-Step Exercises And Tests To Help You Master Candlestick Charting
- AFFORDABLE PRICES: QUALITY BOOKS AT A FRACTION OF NEW COSTS.
- ECO-FRIENDLY CHOICE: PROMOTE SUSTAINABILITY BY REUSING BOOKS.
- THOROUGH QUALITY CHECKS: RELIABLE SELECTION ENSURES CUSTOMER SATISFACTION.
Candlestick Charting Explained: Timeless Techniques for Trading Stocks and Futures
Technical Analysis of Candlestick and Chart Patterns: 13 Custom Technical Indicators, 5 Winning Trading Setups and a Customizable Trading Robot to automate your day and swing trading strategies
Japanese Candlestick Charting Techniques: A Contemporary Guide to the Ancient Investment Techniques of the Far East, Second Edition
To create a candlestick chart using matplotlib, you first need to import the necessary libraries, such as matplotlib, matplotlib.finance, and matplotlib.dates. Next, you would read in your financial data and convert it into a format that is compatible with matplotlib. Then, you can use the candlestick_ohlc function to plot the candlestick chart based on your data. Make sure to customize your chart by adding labels, titles, and adjusting the colors and styles of the candlesticks as needed. Finally, show the chart using plt.show(). Experiment with different parameters and settings to create a visually appealing and informative candlestick chart.
How to add axis labels to a candlestick chart in matplotlib?
To add axis labels to a candlestick chart in matplotlib, you can use the following code:
import matplotlib.pyplot as plt from mpl_finance import candlestick_ohlc import pandas as pd import matplotlib.dates as mdates
Create a dataframe with your data
For example:
data = {'date': ['2021-01-01', '2021-01-02', '2021-01-03'], 'open': [100, 110, 105], 'high': [120, 115, 118], 'low': [90, 105, 100], 'close': [110, 112, 115]} df = pd.DataFrame(data)
Convert date to matplotlib dates
df['date'] = pd.to_datetime(df['date']) df['date'] = df['date'].map(mdates.date2num)
Create the candlestick chart
fig, ax = plt.subplots() candlestick_ohlc(ax, zip(df['date'], df['open'], df['high'], df['low'], df['close']), width=0.6, colorup='g', colordown='r')
Set the x-axis labels
ax.xaxis_date() ax.xaxis.set_major_formatter(mdates.DateFormatter('%Y-%m-%d'))
Set the y-axis labels
plt.xlabel('Date') plt.ylabel('Price')
plt.show()
This code will create a candlestick chart using the data from the dataframe df and add axis labels for the x-axis and y-axis. You can customize the labels further by changing the plt.xlabel() and plt.ylabel() functions to suit your needs.
How to create a candlestick chart with moving averages in matplotlib?
To create a candlestick chart with moving averages in matplotlib, you can follow these steps:
- Import the necessary libraries:
import matplotlib.pyplot as plt import pandas as pd import matplotlib.dates as mdates from mpl_finance import candlestick_ohlc
- Read the data into a pandas dataframe:
data = pd.read_csv('data.csv') data['Date'] = pd.to_datetime(data['Date']) data = data.set_index('Date')
- Calculate the moving averages:
data['MA_20'] = data['Close'].rolling(window=20).mean() data['MA_50'] = data['Close'].rolling(window=50).mean()
- Create the candlestick chart with moving averages:
fig, ax = plt.subplots() ax.xaxis_date()
candlestick_ohlc(ax, zip(mdates.date2num(data.index.to_pydatetime()), data['Open'], data['High'], data['Low'], data['Close']), width=0.6, colorup='g', colordown='r')
plt.plot(data.index, data['MA_20'], label='MA 20', color='blue') plt.plot(data.index, data['MA_50'], label='MA 50', color='orange')
plt.legend() plt.show()
This code reads the data from a CSV file, calculates the moving averages, and then plots a candlestick chart with the closing prices, along with the 20-day and 50-day moving averages. You can customize the chart further by adjusting the window size for the moving averages, changing the colors, or adding additional indicators.
How to add a legend to a candlestick chart in matplotlib?
To add a legend to a candlestick chart in matplotlib, you can use the matplotlib.pyplot.legend() function. Here is an example code snippet to demonstrate how to add a legend to a candlestick chart:
import matplotlib.pyplot as plt from mplfinance.original_flavor import candlestick_ohlc import matplotlib.dates as mdates import pandas as pd
Sample data
data = { 'date': pd.date_range(start='1/1/2021', periods=10), 'open': [100, 110, 120, 130, 140, 150, 160, 170, 180, 190], 'high': [120, 130, 140, 150, 160, 170, 180, 190, 200, 210], 'low': [90, 100, 110, 120, 130, 140, 150, 160, 170, 180], 'close': [110, 120, 130, 140, 150, 160, 170, 180, 190, 200] }
df = pd.DataFrame(data)
Create a figure and an axes
fig, ax = plt.subplots()
Plot the candlestick chart
candlestick_ohlc(ax, zip(mdates.date2num(df['date']), df['open'], df['high'], df['low'], df['close']), width=0.6, colorup='g', colordown='r')
Add legend
plt.legend(['Open', 'High', 'Low', 'Close'], loc='upper left')
Display the plot
plt.show()
In this example, we first create a candlestick chart using the candlestick_ohlc() function from the mplfinance.original_flavor module. Then, we use the plt.legend() function to add a legend to the plot, specifying the labels for each data series. Finally, we display the plot using plt.show().
What is a shooting star candlestick pattern?
A shooting star candlestick pattern is a bearish reversal pattern that typically occurs at the end of an uptrend. It is characterized by a small body at the top of the candle with a long upper shadow, and little to no lower shadow. The long upper shadow indicates that the price opened high, but was unable to sustain its momentum and closed near the low of the session, suggesting a potential reversal in the trend. Traders often see the shooting star as a sign of weakness and a potential signal to sell or go short.
How to add annotations to a candlestick chart in matplotlib?
You can add annotations to a candlestick chart in matplotlib by using the annotate function. Here is an example code snippet to add annotations to a candlestick chart:
import matplotlib.pyplot as plt from mpl_finance import candlestick_ohlc import pandas as pd import numpy as np
Create a sample dataframe with OHLC data
data = {'Date': pd.date_range(start='1/1/2021', periods=10), 'Open': np.random.randint(100, 200, 10), 'High': np.random.randint(200, 300, 10), 'Low': np.random.randint(50, 100, 10), 'Close': np.random.randint(100, 200, 10)} df = pd.DataFrame(data) df['Date'] = df['Date'].apply(lambda x: x.toordinal())
Create a figure and axis
fig, ax = plt.subplots()
Plot the candlestick chart
candlestick_ohlc(ax, df.values, width=0.6, colorup='g', colordown='r')
Add annotations to the chart
for i in range(len(df)): ax.annotate(str(df['Close'][i]), (df['Date'][i], df['High'][i]), textcoords="offset points", xytext=(0,10), ha='center')
plt.show()
In this code snippet, we first create a sample dataframe with OHLC data. We then plot the candlestick chart using the candlestick_ohlc function. Next, we loop through each data point in the dataframe and add annotations to the chart using the annotate function. The annotate function takes the text to display, the position of the annotation, the position of the text relative to the position, and the horizontal alignment of the text.
You can adjust the position and formatting of the annotations as needed to customize the appearance of the annotations on your candlestick chart.