
Best Webhook Tools to Buy in July 2026
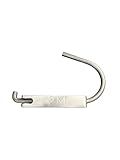
Universal Tool Holder Cordless Tool Hook Monster Belt Hook Tool Holster Made in The USA
- VERSATILE HOLDER FOR TOOLS: DRILLS, SAWS, AND GARDEN ESSENTIALS.
- IDEAL GIFT FOR DADS AND CONSTRUCTION WORKERS-MADE IN THE USA!
- ERGONOMIC DESIGN FOR LEFT OR RIGHT-HAND USE, PERFECT FOR ANY TASK.


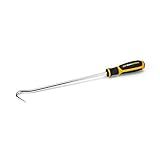
GEARWRENCH Heavy-Duty Full Hook - 84021H
- VERSATILE TOOL FOR EASY HOSE REMOVAL AND LINE HOOKING.
- SECURE BLADES PREVENT TWISTING FOR SAFER, RELIABLE USE.
- ERGONOMIC HANDLE DESIGN ENHANCES STRENGTH AND COMFORT.

Webhooks verstehen und anwenden mit C# und Make.com: Praxisleitfaden zur Erstellung, Verarbeitung und Integration von Webhooks mit .NET und Make.com (German Edition)
To create a custom webhook in Shopify, you will need to access your Shopify admin panel and navigate to the Settings section. From there, find the Notifications option and click on it. Look for the Webhooks option and click on Add webhook. Then, you will need to provide the URL where you want the webhook data to be sent and select the events you want to trigger the webhook. Finally, click Save to create your custom webhook in Shopify.
How to set up webhook subscriptions in Shopify?
To set up webhook subscriptions in Shopify, follow these steps:
- Log in to your Shopify admin dashboard.
- Click on "Settings" and then select "Notifications" from the menu.
- Scroll down to the "Webhooks" section and click on the "Create webhook" button.
- In the "Event" field, select the type of event you want to subscribe to. This could be order creation, order fulfillment, customer creation, etc.
- In the "Format" field, choose the format in which you want to receive the webhook data. Shopify supports both JSON and XML formats.
- In the "URL" field, enter the URL of the endpoint where you want to receive the webhook notifications.
- Click on the "Save webhook" button to create the webhook subscription.
- You can view and manage your webhook subscriptions in the "Webhooks" section of the Notifications settings.
Once you have set up your webhook subscriptions, Shopify will send notifications to the specified endpoint whenever the selected events occur in your store. You can use these notifications to automate processes, synchronize data with external systems, and more.
What is the difference between webhook events and webhook subscriptions in Shopify?
Webhook events and webhook subscriptions are both ways for an application to receive real-time notifications about changes to Shopify data. However, they serve slightly different purposes:
- Webhook Events: Webhook events are specific actions or changes that occur within a Shopify store, such as when an order is created, a customer is updated, or a product is deleted. Applications can subscribe to specific webhook events to receive notifications only for those particular actions. For example, an application might only want to be notified when a new order is created.
- Webhook Subscriptions: Webhook subscriptions are the overall setup that determines which webhook events an application will receive notifications for. Subscriptions specify the events that an application is interested in and sets up the necessary communication channels for receiving those notifications. Applications can have multiple webhook subscriptions set up to receive different types of notifications.
In summary, webhook events are the specific actions that trigger notifications, while webhook subscriptions are the overarching setup that defines which events an application will receive notifications for.
What are the different types of webhooks available in Shopify?
There are several types of webhooks available in Shopify, including:
- Order webhooks: These webhooks notify you when an order is created, updated, or deleted.
- Customer webhooks: These webhooks notify you when a customer is created, updated, or deleted.
- Product webhooks: These webhooks notify you when a product is created, updated, or deleted.
- Cart webhooks: These webhooks notify you when a cart is created, updated, or deleted.
- App uninstall webhooks: These webhooks notify you when a merchant uninstalls your Shopify app.
- Fulfillment webhooks: These webhooks notify you when a fulfillment is created, updated, or deleted.
- Inventory webhooks: These webhooks notify you when inventory levels are updated for a product.
- Shop webhooks: These webhooks notify you when the shop settings are updated.
Overall, webhooks in Shopify allow you to automate processes and receive real-time notifications for various events happening on your store.