Best Email Notification Tools to Buy in July 2026
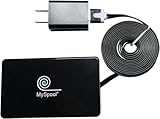
Power Failure Detector with Text Message and Email Alerts. Sends SMS Power Outage Alarms and Restoration Alerts to Two Phones.
-
INSTANT ALERTS FOR POWER OUTAGES KEEP YOU IN THE LOOP 24/7.
-
WIFI-ENABLED: RECEIVE NOTIFICATIONS VIA TEXT, EMAIL, OR APP ALERTS.
-
REMOTE CONFIG: EASILY UPDATE CONTACTS ANYWHERE WITHOUT HASSLES.


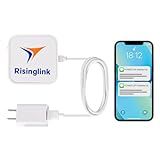
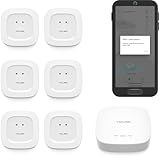
Risinglink Power Failure Alarm, Power Failure Detector, with Text Message, Email, and Audio Alerts(2nd Generation)
-
QUICK SETUP: EFFORTLESSLY CONNECT TO WI-FI WITHOUT EXTRA HUBS OR FEES.
-
INSTANT ALERTS: DETECTS OUTAGES IN 3 SECONDS FOR TIMELY RESPONSES.
-
RELIABLE NOTIFICATIONS: REGISTER MULTIPLE CONTACTS FOR GUARANTEED ALERTS.

MOCREO WiFi Freezer Thermometer with Alarm, Wireless Refrigerator Temperature Sensor with Remote App Notification, Email Alert, 2 Years Free Data Export, for Home Kitchen Fridge Hot Tub
-
STAY UPDATED ANYWHERE: GET INSTANT ALERTS VIA APP, EMAIL, OR LOUD ALARM.
-
HIGH ACCURACY MONITORING: PRECISE READINGS FROM -40°F TO 257°F ENSURE SAFETY.
-
EFFORTLESS SETUP: QUICK PLUG-AND-PLAY INSTALLATION FOR IMMEDIATE USE.
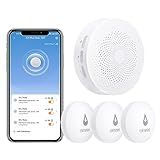
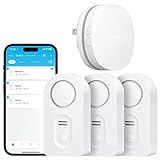
Winees WiFi Water Detector, 3 Pack Water Sensors with Leak Alert Email&SMS Notification, 100dB Adjustable Alarm, 100M Transmission for Basement, Bathroom, Laundry, IFTTT
- ROBUST IP66 WATERPROOF HOUSING FOR LASTING USE IN HUMID AREAS
- EASY SETUP WITH PRE-PAIRED SENSORS IN COMPACT 1.8MM DESIGN
- INSTANT ALERTS VIA APP, SMS, AND EMAIL FOR REAL-TIME UPDATES
YoLink Water Leak Starter Kit: Hub + 6 Leak Sensor 1 (Silent), LoRa Long-Range, App/SMS/Email Alerts, D2D Offline Triggers, 2 AAA Up to 5-Year Battery, Compatible with Alexa/IFTTT/Home Assistant
- COMPREHENSIVE COVERAGE: PROTECT EVERY CORNER WITH A COMPLETE KIT.
- RELIABLE ALERTS: GET INSTANT UPDATES VIA APP, SMS, AND EMAIL.
- OFFLINE FUNCTIONALITY: OPERATE WITHOUT INTERNET FOR LOCAL SAFETY.
Govee WiFi Water Leak Detector 3 Packs, Leak Alert with Remotely Email/APP Push and Sound Alarm, Smart Water Sensor with 100dB Adjustable Alarm, Suit for Home and Basement
- INSTANT ALERTS VIA EMAIL & APP FOR IMMEDIATE WATER LEAK DETECTION.
- CONNECT UP TO 10 SENSORS FOR COMPREHENSIVE HOME WATER PROTECTION.
- ADJUSTABLE VOLUME LEVELS AND 100DB ALARM FOR VARIED ENVIRONMENTS.
To customize email notifications in Shopify, first navigate to the "Settings" section of your Shopify admin dashboard. From there, click on "Notifications" under the "Notifications" tab. Here, you can customize the design and content of your email notifications including order confirmations, shipping updates, and customer account creations. You can customize the email templates, add your logo, change the colors, and edit the text to match your branding. Additionally, you can set up automatic notifications for specific events and choose which emails you want to send to customers. Shopify also allows you to preview your email notifications before saving your changes to ensure they meet your satisfaction.
How to create email notification campaigns in Shopify?
To create email notification campaigns in Shopify, follow these steps:
- Log in to your Shopify account and navigate to the "Marketing" section in the dashboard.
- Click on "Campaigns" and then select "Email campaigns."
- Click on the "Create Campaign" button to start a new email campaign.
- Choose the type of email campaign you want to create, such as a promotional campaign, a newsletter, or an abandoned cart email.
- Set up the campaign details, including the subject line, sender name, and email content. You can use the Shopify email editor to design the email template or upload your own custom HTML template.
- Select the recipients for the email campaign. You can choose to send the email to all customers, a specific customer segment, or target customers based on their behavior or purchase history.
- Set up the timing and frequency of the email campaign. You can schedule the campaign to be sent immediately or at a later date, and choose whether to send the email once or set up a series of automated emails.
- Review and test the email campaign before sending it out to ensure that everything looks and works as intended.
- Once you are satisfied with the campaign, click on the "Send Campaign" button to launch the email notification to your selected recipients.
- Monitor the performance of your email campaign in the Shopify dashboard to track open rates, click-through rates, and conversions. Use this data to optimize future email campaigns and improve their effectiveness.
How to add discount codes to email notifications in Shopify?
To add discount codes to email notifications in Shopify, follow these steps:
- Login to your Shopify admin dashboard.
- In the left-hand menu, click on "Settings" and then click on "Notifications".
- Scroll down to the email templates section and find the email notification template you want to add the discount code to (e.g. Order confirmation, Abandoned cart, etc.).
- Click on the template to open it for editing.
- In the email template editor, locate the section where you want to insert the discount code.
- To include a discount code, you can use the Liquid language code {{ discount_code }}. Insert this code where you want the discount code to appear in the email.
- Save your changes by clicking on the "Save" button at the bottom of the page.
- Test the email notification by placing a test order or triggering the email notification you edited.
Your email notification should now include the discount code when it is sent out to customers.
What are the benefits of customizing email notifications in Shopify?
- Personalization: Customizing email notifications allows you to personalize the messages that are sent to your customers. This can help strengthen your brand identity and make your customers feel valued.
- Increased engagement: Sending relevant and tailored email notifications can help increase engagement with your customers. This can lead to higher open rates, click-through rates, and ultimately, increased sales.
- Improved customer experience: By customizing email notifications, you can provide your customers with a better overall experience. This can help build loyalty and encourage repeat business.
- Targeted messaging: Customizing email notifications allows you to send targeted messages to specific customer segments. This can help you tailor your marketing efforts to better meet the needs of your customers.
- Brand consistency: Customized email notifications help ensure that all customer communications are consistent with your brand's voice and messaging. This can help reinforce your brand identity and create a cohesive customer experience.
How to schedule email notifications in Shopify?
To schedule email notifications in Shopify, follow these steps:
- Log in to your Shopify admin dashboard.
- Click on "Settings" and then select "Notifications" in the menu.
- Scroll down to the section titled "Customer notifications" and click on the notification you want to schedule, such as "Order Confirmation" or "Shipping Confirmation".
- On the notification page, find the option to schedule the notification and click on it. This option may be located under the heading "Schedule this notification".
- Choose the date and time you want the notification to be sent out to customers.
- Save your changes and the notification will now be scheduled to go out at the specified time.
- Repeat this process for any other email notifications you want to schedule in Shopify.
Please note that not all email notifications in Shopify can be scheduled, so you may need to use a third-party app or service to schedule notifications that are not available in the Shopify admin.
How to customize the content of email notifications in Shopify?
To customize the content of email notifications in Shopify, follow these steps:
- Log in to your Shopify admin dashboard.
- Click on "Settings" and then "Notifications" in the sidebar menu.
- In the Notifications page, you will see a list of notification templates such as Order Confirmation, Shipping Confirmation, etc.
- Click on the notification template that you want to customize.
- In the Email Template section, you can edit the email subject line and the email body content. You can use the Variables dropdown menu to insert dynamic content such as customer name, order number, etc.
- Make your desired changes to the content of the email notification.
- Click on the "Save" button to save your changes.
You can also customize the design of the email notifications by clicking on the "Edit design" button in the Email Template section. Here, you can customize the colors, fonts, and layout of the email template.
Remember to test your email notifications by placing a test order or using Shopify's email testing feature to ensure that the content and design are displaying correctly.
What are the best practices for customizing email notifications in Shopify?
- Personalize the content: Make sure to customize the email notifications with the recipient's name, order details, and any other relevant information. This will make the emails feel more personal and engaging.
- Use branded templates: Create custom email templates that align with your brand's style and tone. This will help reinforce your brand identity and make your emails more recognizable to customers.
- Keep it concise: Try to keep the content of the email notifications short and to the point. Customers are more likely to read and engage with emails that are easy to digest.
- Include clear calls-to-action: Make sure to include clear calls-to-action in your email notifications, such as links to track orders, confirm purchases, or leave reviews. This will help drive customer engagement and encourage repeat purchases.
- Customize the timing: Consider customizing the timing of your email notifications based on customer behavior or preferences. For example, you could send order confirmation emails immediately after a purchase, and follow-up emails or promotional offers at a later time.
- Regularly test and optimize: Track the performance of your email notifications and regularly test different variations to see what resonates best with your customers. Use analytics and feedback to optimize your email strategy over time.
- Provide options for customers to manage preferences: Offer customers the ability to manage their email preferences, such as opting out of certain types of notifications or choosing the frequency of emails they receive. This will help improve customer satisfaction and reduce the likelihood of unsubscribes.