Best LaTeX Bracket Accessories to Buy in July 2026
The LaTeX Companion (Tools and Techniques for Computer Typesetting)


The LaTeX Companion: Parts I & II (Tools and Techniques for Computer Typesetting)
Gellen Liquid Latex for Nails, Peel Off Cuticle Guard for Nail Polish Skin Barrier Protector Nail Art Liquid Latex Tape for Manicure Home Salon 15ml Pink Cuticle Protectors Gifts for Women
- CREATE STUNNING NAIL ART EFFORTLESSLY WITH GELLEN LIQUID LATEX!
- SAFE, NON-IRRITATING FORMULA ENSURES A WORRY-FREE APPLICATION.
- QUICK-DRYING LATEX TAPE SIMPLIFIES CLEANUP FOR PERFECT NAILS!

LaTeX Beginner's Guide: Create visually appealing texts, articles, and books for business and science using LaTeX

LaTeX: A Document Preparation System
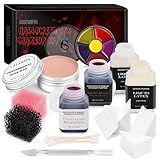
CHASPA Halloween Liquid Latex Special Effects SFX Makeup Kit - Scar Wax + 2 Btl Liquid Latex + 2 Btl Fake Blood + Spatula Tool + 2Pcs Stipple Sponge + 4Pcs Makeup Sponges + Cotton Swabs
- CREATE STUNNING EFFECTS: ACHIEVE REALISTIC WOUNDS AND SCARS EFFORTLESSLY!
- SAFE FOR EVERYONE: NON-TOXIC, SKIN-FRIENDLY FORMULA FOR SAFE USE.
- PERFECT FOR ANY EVENT: STAND OUT AT HALLOWEEN, THEATER, AND MORE!
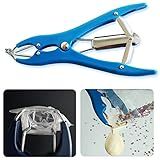
Balloon Stuffing Machine Tools, Balloon Stretcher OpeningTool Stuffer Kit for Filler Clear Balloons/Bobo Balloons/Latex Balloons/Bubble Balloons for Confetti Rose Flowers
- VERSATILE TOOL FOR VARIOUS BALLOON SIZES: 8 TO 36 OPTIONS!
- EFFORTLESSLY EXPAND BALLOON OPENINGS FOR EASY STUFFING.
- SATISFACTION GUARANTEED: REFUND OR REPLACE IF NOT HAPPY!
Math Into LaTeX
- AFFORDABLE PRICES ATTRACT BUDGET-CONSCIOUS READERS.
- ECO-FRIENDLY OPTION PROMOTES SUSTAINABILITY IN READING.
- QUALITY ASSURANCE ENSURES SATISFACTION WITH EVERY PURCHASE.
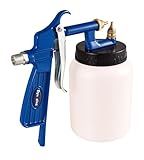
Dynastus Siphon Air Spray Gun for Spraying Oil-Based or Latex Paints, with Filtering and Cleaning Kits
- VERSATILE SPRAYING FOR LATEX, ENAMELS, STAINS, AND ADHESIVES.
- WORKS WITH 3/4 HP COMPRESSOR FOR DIVERSE SMALL-TO-MEDIUM JOBS.
- CORROSION-RESISTANT, EASY-CLEAN DESIGN FOR LOW-MAINTENANCE USE.
To display a two-row bracket in LaTeX, you can use the \left and \right commands combined with an invisible separator. For example, you can use the array environment to align the elements in two rows, and to ensure proper sizing of the brackets, enclose the array in \left( and \right) or any bracket of your choice. An example syntax would be:
\[ \left( \begin{array}{c} a \\ b \end{array} \right) \]
This code snippet displays a two-row structure with elements "a" and "b" enclosed in parentheses. You can adjust the alignment and add more columns or customize the delimiters as needed.
How to define custom commands in LaTeX?
In LaTeX, you can define your own custom commands using the \newcommand or \renewcommand macros. This enables you to create commands for frequently-used text, symbols, or even entire constructs, making your document more readable and your writing more efficient. Here's how you can use them:
Using \newcommand
The \newcommand macro is used to define new commands. The basic syntax is:
\newcommand{\commandname}[num]{definition}
- \commandname is the name of the new command you wish to define.
- num is an optional argument that specifies how many arguments your command will take (up to 9). If omitted, it defaults to 0, meaning no arguments.
- definition is how the command should be expanded when used.
Examples
- Without arguments: \newcommand{\R}{\mathbb{R}} This defines a command \R which represents the real number symbol \mathbb{R}.
- With arguments: \newcommand{\vect}[1]{\boldsymbol{#1}} This creates a command \vect which will bold the input text. For instance, \vect{x} will be replaced by \boldsymbol{x}.
Using \renewcommand
If you need to redefine an existing command, use \renewcommand. The syntax is the same as \newcommand:
\renewcommand{\commandname}[num]{definition}
Notes and Best Practices
- Conflict Avoidance: Before using \newcommand, ensure the command name is not already in use. If it is, you'll get an error.
- Legible and Meaningful Names: Choose descriptive and meaningful names for your custom commands to make your document easier to read and maintain.
- Scope: Custom commands are defined within the scope they are declared. If declared in the preamble, they are available throughout the document.
- Limiting Scope: If needed just in a part of the document, define them within an environment or group.
Here's a short example to illustrate custom commands in a LaTeX document setup:
\documentclass{article}
% Define custom commands \newcommand{\R}{\mathbb{R}} \newcommand{\vect}[1]{\boldsymbol{#1}} \newcommand{\set}[1]{\left\{ #1 \right\}}
\renewcommand{\familydefault}{\sfdefault} % Example of changing default text family
\begin{document}
The set of real numbers is denoted as \R.
A vector can be represented as $\vect{v}$.
You can create a set of elements like \set{1, 2, 3}.
\end{document}
With these techniques, you can customize your LaTeX documents more effectively and make them easier to manage.
How to align equations in LaTeX?
In LaTeX, aligning equations is commonly done using the align environment provided by the amsmath package. This environment allows you to align equations at specific points, typically the equal signs or any other chosen symbols.
Here's a simple example of how to use the align environment:
\documentclass{article} \usepackage{amsmath}
\begin{document}
\begin{align} a &= b + c \\ x + y &= z^2 \\ p &= q - r \end{align}
\end{document}
In this example, the & symbol is used to indicate where you want the equations to be aligned. Each equation line ends with a double backslash \\ to separate it from the next line.
A few additional points to keep in mind:
- Consistent Alignment: Use & to mark the alignment positions consistently across each line. Typically, in equations, you'll align at the equal sign or other operators.
- Numbering: Each line of the align environment is automatically numbered. If you want to suppress numbering on specific lines, you can use \nonumber after the equation, or use align* instead of align to suppress all numbering.
- Multiline Equations: If you have long equations that need to wrap, you can break them across lines within the align environment, making sure to place the alignment & where needed.
- Subequations: To group related equations under a single number with individual letters, use the subequations environment along with align.
Here's how you can suppress numbering for a specific line or for all lines:
- To suppress numbering for a specific line: \begin{align} a &= b + c \nonumber \\ x + y &= z^2 \\ p &= q - r \end{align}
- To suppress numbering for all lines, use align*: \begin{align*} a &= b + c \\ x + y &= z^2 \\ p &= q - r \end{align*}
The align environment is very versatile, making it a preferred method for aligning equations in LaTeX documents.
How to use conditionals in LaTeX?
In LaTeX, conditionals can be used in a variety of ways depending on the specific packages and needs. Here are some commonly used packages and methods for implementing conditionals in LaTeX:
1. Using ifthen package
The ifthen package provides simple conditional commands. To use it, you need to include it in your preamble:
\usepackage{ifthen}
Here are some basic commands:
- \ifthenelse{}{}{}: This command checks the . If it's true, it executes the , otherwise, it executes the .
- \boolean{name}: Defines a new boolean.
- \setboolean{name}{value}: Sets the value (true/false) for a previously defined boolean.
Example:
\documentclass{article} \usepackage{ifthen}
\begin{document}
\newboolean{mybool} \setboolean{mybool}{true}
\ifthenelse{\boolean{mybool}} {This text is shown if mybool is true.} {This text is shown if mybool is false.}
\end{document}
2. Using etoolbox package
The etoolbox package provides more advanced features for conditionals. Include it in your preamble with:
\usepackage{etoolbox}
Key commands include:
- \ifboolexpr{}: More complex boolean expressions.
- \booltrue and `\boolfalse`: Set boolean values.
Example:
\documentclass{article} \usepackage{etoolbox}
\begin{document}
\newbool{examplebool} \booltrue{examplebool}
\ifboolexpr{ test {\ifbool{examplebool}} } {This condition is true.} {This condition is false.}
\end{document}
3. Using Plain TeX Conditionals
LaTeX also supports plain TeX conditionals, although they are usually less user-friendly:
- \if ... \else ... \fi: These are the basic conditionals.
Example:
\documentclass{article}
\begin{document}
\newif\ifexample \exampletrue % set to false to switch branches
\ifexample This is true. \else This is false. \fi
\end{document}
Each of these methods has its use cases, and you can choose based on the complexity of the conditions you need to evaluate in your LaTeX document.
What is Overleaf and how is it used with LaTeX?
Overleaf is a popular online collaborative platform for creating, editing, and sharing LaTeX documents. LaTeX is a typesetting system widely used for producing scientific and mathematical documents due to its powerful handling of formulas, citations, bibliographies, and overall document structure.
Here’s how Overleaf is used with LaTeX:
- Online Editor: Overleaf provides a web-based LaTeX editor that allows users to write and edit LaTeX code without needing to install any software locally. It is accessible through web browsers on any device.
- Collaborative Features: Overleaf enables multiple users to collaborate in real time on the same document. This is particularly beneficial for researchers, academics, and students who work in groups or remotely.
- Pre-built Templates: Overleaf offers a wide range of templates for various types of documents, such as journal articles, theses, resumes, and more. These templates follow the specific formatting guidelines required for different publications, making it easier for users to adhere to them.
- Version Control: The platform includes version control features that allow users to track changes, revert to previous versions, and manage different document versions efficiently.
- Automatic Previewing: Overleaf automatically compiles LaTeX code and provides a live preview of the document. This immediate feedback helps users see the effects of their changes without having to manually compile the document.
- Integration with Repositories: Overleaf can integrate with GitHub and other version control systems, allowing users to sync their projects with external repositories for additional version tracking and collaboration outside the platform.
- Bibliography Management: Overleaf supports bibliographic management tools like BibTeX and BibLaTeX, enabling users to manage references and citations efficiently.
- Ease of Sharing and Publishing: Completed documents can be easily shared via a link or exported as PDF files. Overleaf also simplifies the submission process to many academic journals by providing direct submission links.
Overall, Overleaf makes it easier for users to write and manage LaTeX documents through its cloud-based services, especially in collaborative settings, without needing deep technical knowledge of LaTeX compiling processes.
How to create lists in LaTeX?
In LaTeX, you can create lists using various environments depending on the type of list you want to create. Here’s how you can create three common types of lists: itemized lists, enumerated lists, and description lists.
Itemized List
This is an unordered list where each item begins with a bullet point. You can create it using the itemize environment:
\begin{itemize} \item First item \item Second item \item Third item \end{itemize}
Enumerated List
This is an ordered list where each item is numbered. Use the enumerate environment:
\begin{enumerate} \item First item \item Second item \item Third item \end{enumerate}
Description List
This list allows you to have items with a label and a description. Use the description environment:
\begin{description} \item[First] Description for the first item \item[Second] Description for the second item \item[Third] Description for the third item \end{description}
Nested Lists
You can also nest lists within each other by placing one list environment inside another:
\begin{itemize} \item First item \begin{enumerate} \item Sub-item 1 \item Sub-item 2 \end{enumerate} \item Second item \end{itemize}
Customizing Lists
LaTeX provides ways to customize lists, including changing the labels or adjusting the spacing. For more advanced customizations, you might want to explore LaTeX packages such as enumitem, which provides additional options.
Here’s an example using the enumitem package to customize spacing:
\usepackage{enumitem}
\begin{document}
\begin{itemize}[noitemsep] \item First item \item Second item \end{itemize}
\end{document}
In this example, noitemsep removes the vertical spacing between list items.
With these tools and environments, you should be able to create and customize lists to suit your document’s needs in LaTeX.
How to create fractions in LaTeX?
In LaTeX, you can create fractions using the \frac command. This command is used in math mode to represent fractions. Here is how you can do it:
- Simple Fractions: Use the \frac{numerator}{denominator} command in math mode. For example, to write the fraction ( \frac{a}{b} ), you can use: \documentclass{article} \usepackage{amsmath} % Recommended for better math formatting \begin{document} Here is a simple fraction: \( \frac{a}{b} \). \end{document}
- Display Mode: If you want the fraction to be displayed more prominently, centered on its own line, you can use the display math mode with \[ ... \]: \documentclass{article} \usepackage{amsmath} \begin{document} Here is the fraction in display mode: \[ \frac{a}{b} \] \end{document}
- Text Mode: If you need to include a fraction in text mode without entering full math mode, you can use the \textstyle within the math environment: \documentclass{article} \begin{document} In text, you can include fractions like this: $\textstyle \frac{a}{b}$. \end{document}
- Nested Fractions: For nested fractions, you can still use the \frac command multiple times. Note that readability and size may become an issue for deeply nested fractions: \documentclass{article} \usepackage{amsmath} \begin{document} Here is a nested fraction: \[ \frac{\frac{a}{b}}{\frac{c}{d}} \] \end{document}
- Common Mistakes: Remember that \frac needs to be used in math mode, denoted by $...$, \(...\), or \[...\]. Ensure that the amsmath package is included for more flexible and robust math typesetting as it is highly recommended when working with mathematical formulas.
Using these techniques, you can create a wide variety of fractions in your LaTeX documents, tailored to fit the style and context you need.