Best PowerShell Tools to Export CSV to Buy in February 2026

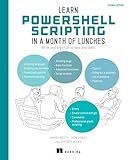
Learn PowerShell Scripting in a Month of Lunches, Second Edition: Write and organize scripts and tools


PowerShell for Sysadmins: Workflow Automation Made Easy


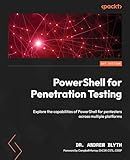
PowerShell for Penetration Testing: Explore the capabilities of PowerShell for pentesters across multiple platforms


PowerShell Advanced Cookbook: Enhance your scripting skills and master PowerShell with 90+ advanced recipes (English Edition)


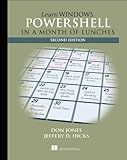
Learn Windows PowerShell in a Month of Lunches


To export data to a CSV file in PowerShell, you can use the Export-Csv cmdlet. First, you need to have the data you want to export in a variable or an array. Then, use the Export-Csv cmdlet followed by the path where you want to save the CSV file. For example:
$data = Get-Process $data | Export-Csv -Path C:\data.csv
This will export the data from the Get-Process cmdlet to a CSV file named data.csv in the C: drive. Remember to specify the path where you want to save the CSV file and the appropriate file name.
How to export specific columns to csv in powershell?
To export specific columns to a CSV file in PowerShell, you can first import the data into a variable and then select the specific columns using the Select-Object cmdlet before exporting it to the CSV file. Here's an example:
# Import the data into a variable $data = Import-Csv "input.csv"
Select specific columns
$selectedData = $data | Select-Object Column1, Column2, Column3
Export the selected data to a CSV file
$selectedData | Export-Csv "output.csv" -NoTypeInformation
In this example, replace Column1, Column2, and Column3 with the actual column names you want to export. Make sure to adjust the file paths for the input and output files as needed.
How to export data from a powershell script to a csv file?
To export data from a PowerShell script to a CSV file, you can use the Export-Csv cmdlet. Here is how you can do it:
- Create a PowerShell script that generates the data you want to export. For example, let's say you have a script that collects information about the processes running on a computer:
$processes = Get-Process
- Next, use the Export-Csv cmdlet to export the data to a CSV file. Specify the variable containing your data and the path to the CSV file where you want to store the data. For example:
$processes | Export-Csv -Path C:\path\to\output.csv -NoTypeInformation
The -NoTypeInformation parameter excludes the type information from the CSV file, which makes it cleaner and easier to read when you open the CSV file.
- Save and run the script in PowerShell. After running the script, a CSV file will be created at the specified path with the data exported from the script.
How to export data to csv in powershell?
To export data to a CSV file in PowerShell, you can use the Export-Csv cmdlet. Here's an example of how to do this:
- First, you need to have the data you want to export in a PowerShell variable. For example, let's say you have an array of objects called $data:
$data = @( [PSCustomObject]@{Name='Alice'; Age=25}, [PSCustomObject]@{Name='Bob'; Age=30} )
- Next, use the Export-Csv cmdlet to export the data to a CSV file. Specify the path of the CSV file you want to create, like this:
$data | Export-Csv -Path 'C:\path\to\output.csv' -NoTypeInformation
In this example, the data in the $data variable will be exported to a CSV file named output.csv located at C:\path\to\.
The -NoTypeInformation parameter prevents the type information from being included in the CSV file, making it more readable.
That's it! Your data should now be exported to the specified CSV file.
