
Best Helm Chart Upgrade Tools to Buy in July 2026
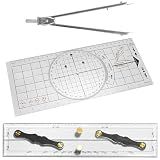
3 Pcs Marine Navigation Kit, Nautical Chart Plotting Tool Set with Single Hand Divider, Navigation Ruler and Protractor, Drafting Supplies for Boating, Sailing, Seafaring
- COMPLETE KIT FOR SAFE AND EASY MARINE NAVIGATION ON EVERY VOYAGE.
- HIGH-TRANSPARENCY SCALES ENSURE PRECISE READINGS AND REDUCE ERRORS.
- STREAMLINED DESIGN SIMPLIFIES PLOTTING AND SAVES VALUABLE NAVIGATION TIME.


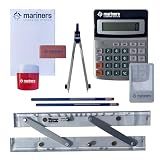
Mariners Chart Plotting Tool Kit - Marine Navigation Equipment, Weems and Plath Parallel Rulers, Dividers & Accessories for Nautical Charts, Sailing and Boating Exam Preparation
-
MASTER NAVIGATION SKILLS WITH ESSENTIAL PLOTTING TOOLS FOR BOATERS.
-
COMPLETE TOOLKIT FOR PRECISE ROUTE PLOTTING IN ANY CONDITIONS.
-
IDEAL FOR SAILING EXAM PREP AND PROFESSIONAL MARITIME TRAINING.
Managing Kubernetes Resources Using Helm: Simplifying how to build, package, and distribute applications for Kubernetes, 2nd Edition
Mastering Kubernetes: Level up your container orchestration skills with Kubernetes to build, run, secure, and observe large-scale distributed apps, 3rd Edition
Mastering Kubernetes: Dive into Kubernetes and learn how to create and operate world-class cloud-native systems
ESV Gospel Transformation Study Bible: Christ in All of Scripture, Grace for All of Life (Ebook)
When working with Helm charts, it is essential to understand how to handle upgrades with persistent data. Persistent data refers to data that needs to be preserved across upgrades or chart releases.
Here are a few approaches to handle upgrades with persistent data in Helm charts:
- Separate the data from the chart: In this approach, the persistent data is stored outside the chart, usually in a separate storage system such as a database or a file system. When performing upgrades, the chart can be released without affecting the persistent data. The data can be accessed or migrated as required.
- Use a StatefulSet: When working with stateful applications that require persistent data, it is recommended to use a StatefulSet instead of a Deployment in your Helm chart. StatefulSets provide stable and unique network identities for each pod in a set, allowing for stable storage where each pod can access its own persistent data.
- Use Helm hooks: Helm provides pre-upgrade and post-upgrade hooks that you can utilize to handle data cleanup or migration during upgrades. These hooks allow you to execute custom scripts or commands before or after the upgrade process. By using these hooks, you can ensure that persistent data is handled properly during upgrades.
- Leverage database backup and restore: If your application relies on a database for persistent data, one strategy is to take a backup of the database before performing an upgrade and restore the data after the upgrade is completed. This ensures that the data remains unaffected during the upgrade process.
- Utilize a Helm chart with upgrade-compatible persistence: Some Helm charts are specifically designed to handle upgrades with persistent data seamlessly. These charts may provide features such as data migration scripts, automatic backup and restore mechanisms, or other built-in functionalities to ensure smooth upgrades without data loss.
When handling upgrades with persistent data in Helm charts, it is crucial to consider the specific requirements and characteristics of your application. Understanding the data flow and the dependencies will help in choosing the most appropriate approach for handling persistent data during upgrades.
How to enable persistent storage in a Helm chart?
To enable persistent storage in a Helm chart, you can follow these steps:
- Create a values.yaml file or update the existing one for your Helm chart. This file is used to store custom configurations.
- In the values.yaml file, define a section for persistent storage configuration. For example: persistence: enabled: true storageClassName: accessMode: ReadWriteOnce size: 10Gi This example configures the persistent storage to be enabled, specifies the storage class name, the access mode as "ReadWriteOnce", and the storage size as 10Gi. You can customize the values as per your requirements.
- In the Helm chart's deployment or statefulset definition, update the volume and volume mount configurations to use the persistent storage. For example, in a Deployment definition: ... spec: volumes: - name: my-persistent-storage persistentVolumeClaim: claimName: my-pvc containers: - name: my-app image: my-image volumeMounts: - mountPath: /data name: my-persistent-storage ... Here, the volumes section defines a Volume with a name and refers to the PersistentVolumeClaim (PVC) my-pvc. The volumeMounts section then mounts this volume at the desired path /data within the container.
- Create or update the PVC definition in a separate file or in the same chart's templates directory to bind it with the storage class configuration. For example: apiVersion: v1 kind: PersistentVolumeClaim metadata: name: my-pvc spec: storageClassName: accessModes: - ReadWriteOnce resources: requests: storage: 10Gi This example creates a PVC named my-pvc and binds it to the specified storage class with the desired access mode and storage size.
- Install or upgrade the Helm chart with the new configurations: helm install -f values.yaml Make sure to replace with the name of your chart and with the path to the directory containing the chart.
By following these steps, you can enable and configure persistent storage in a Helm chart.
How to handle upgrades with persistent data in Helm charts?
When dealing with persistent data in Helm charts, you need to take certain precautions to handle upgrades properly. Here are some best practices:
- Use StatefulSets: If your application requires persistent data, it is recommended to use Kubernetes StatefulSets instead of Deployments. StatefulSets provide stable network identities and stable storage, which help maintain the data integrity during upgrades.
- Versioned storage resources: Explicitly version your storage resources, such as PersistentVolumeClaims (PVCs), so that when you upgrade your Helm release, the existing PVCs are not inadvertently modified or deleted.
- Use PVCs outside the chart: Consider separating the PVC creation/deletion from the chart itself. By creating PVCs outside the chart or in a separate chart, you can ensure that the PVCs are not affected during chart upgrades.
- Use persistent volume resize capability: If you want to change the size of your persistent volumes during an upgrade, you can make use of Kubernetes' persistent volume resize capability. Helm allows you to configure the PVC size as a Helm value, so you can easily adjust it during an upgrade.
- Store configuration in ConfigMaps or Secrets: Instead of storing configuration data within the application itself, you can externalize the configuration using Kubernetes ConfigMaps or Secrets. This way, you can easily update the configuration without affecting the persistent data during Helm upgrades.
- Test upgrades carefully: Before performing a Helm upgrade, test the upgrade process in a non-production environment. Validate that the persistent data is not lost or corrupted during the upgrade.
Remember to back up your persistent data regularly to ensure data integrity in case of any issues during the upgrade process.
How to perform a rolling upgrade with Helm?
To perform a rolling upgrade with Helm, you can follow these steps:
- Ensure that you have Helm installed and properly configured with your Kubernetes cluster.
- Use the helm upgrade command to perform the rolling upgrade. The command syntax is as follows: helm upgrade [flags] Replace with the name of the release you want to upgrade and with the path to the updated chart directory or release package. The [flags] can be used to customize the upgrade process (e.g., --set to override specific values).
- Helm will compare the existing release with the updated chart and determine the changes to be applied. During the upgrade process, Helm will perform a rolling update, which means that it will update the resources one at a time to minimize downtime.
- Monitor the upgrade progress using the helm status command. This command will display the current status of the release, including the version, revision, and any notes or warnings.
- Once the upgrade is complete, verify the new release version and test the application to ensure everything is functioning as expected.
Note: It's important to thoroughly review the chart version and release notes before performing an upgrade to understand any breaking changes or specific instructions provided by the chart maintainers.
How to deploy a StatefulSet using a Helm chart?
To deploy a StatefulSet using a Helm chart, follow these steps:
- Install Helm: Helm is a package manager for Kubernetes. Install it on your local machine by following the instructions here.
- Create a new Helm chart: Initialize a new Helm chart by running the following command: helm create statefulset-chart
- Update the Helm chart: Open the statefulset-chart directory and update the following files: values.yaml: Update the default values for your StatefulSet. For example, you can set the number of replicas, the image name, and any other relevant configuration variables.
- Create a StatefulSet template: Open the templates directory and create a new file, e.g., statefulset.yaml. In this file, define the StatefulSet configuration using Kubernetes YAML syntax. Here's an example of a basic StatefulSet template: apiVersion: apps/v1 kind: StatefulSet metadata: name: {{ include "statefulsechart.fullname" . }} labels: app.kubernetes.io/name: {{ include "statefulsechart.name" . }} helm.sh/chart: {{ include "statefulsechart.chart" . }} app.kubernetes.io/instance: {{ .Release.Name }} app.kubernetes.io/managed-by: {{ .Release.Service }} spec: replicas: {{ .Values.replicaCount }} selector: matchLabels: app.kubernetes.io/name: {{ include "statefulset-chart.name" . }} template: metadata: labels: app.kubernetes.io/name: {{ include "statefulset-chart.name" . }} spec: containers: - name: {{ .Chart.Name }} image: {{ .Values.image.repository }}:{{ .Values.image.tag }} ports: - containerPort: {{ .Values.containerPort }} This is a simple template that defines a StatefulSet with the number of replicas specified in the values.yaml file. The container image, container port, and other settings are also pulled from the values.yaml file.
- Package the Helm chart: Package the Helm chart by running the following command from the root of the chart directory: helm package statefulset-chart This will create a .tgz file with the packaged Helm chart.
- Deploy the Helm chart: Install the Helm chart onto your Kubernetes cluster by running the following command: helm install my-statefulset statefulset-chart-0.1.0.tgz This command will deploy the StatefulSet with the name my-statefulset into your cluster.
That's it! You have successfully deployed a StatefulSet using a Helm chart. You can now customize the configuration and add more features to the chart as required.