Best Wireless Printer Driver Installation Tools to Buy in July 2026
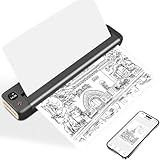
Portable Printers Wireless for Travel, Inkless Thermal Printer, A285M Small Bluetooth Mobile Printer Support 8.5" X 11" Letter & A4 Thermal Paper, Compatible with Phone Laptop for Home Office Receipt
- COMPACT & LIGHTWEIGHT: WEIGHS JUST 1.5LB FOR ULTIMATE PORTABILITY.
- WIRELESS BLUETOOTH COMPATIBILITY: EFFORTLESSLY CONNECT TO MULTIPLE DEVICES.
- INKLESS & COST-EFFECTIVE: ADVANCED THERMAL TECHNOLOGY ELIMINATES INK COSTS.


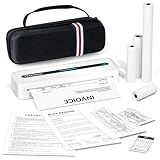
Portable Printers Wireless for Travel, A285M Bluetooth Inkless Thermal Printer Support 8.5" X 11" US Letter, Mobile Printer for Phone Laptop, with Case & 4 Rolls Thermal Paper, for Home Office Receipt
- COMPACT & LIGHTWEIGHT: WEIGHS JUST 1.5LB FOR EASY ON-THE-GO PRINTING.
- INKLESS & COST-EFFECTIVE: PRINT EFFORTLESSLY WITH NO INK OR TONER NEEDED.
- MULTI-DEVICE COMPATIBILITY: BLUETOOTH-ENABLED FOR SEAMLESS DEVICE CONNECTION.
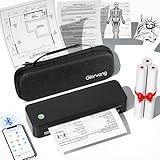
TATTMUSE Portable Printers Wireless for Travel, Inkless Printer for Phone & Laptop, Mobile Thermal Small Bluetooth Compact Dot Matrix Printer for Home Use, Support 8.5" X 11" US Letter & A4 Size
-
DUAL-ZONE PRECISION ENHANCES CLARITY FOR SHARP, PROFESSIONAL PRINTS.
-
DOUBLE-TAP JAM REVERSAL: HASSLE-FREE PRINTING WITHOUT INTERRUPTIONS.
-
COOL CHARGING BOOSTS BATTERY LIFE UP TO 4× FOR ON-THE-GO RELIABILITY.
Rongta Portable Printer, Bluetooth&WiFi Inkless Thermal Printer Wireless for Travel, Compatible with Android iOS Phone & Laptop, Supports 8.5" X 11" US Letter for Office, Home, Car, Gray
- ULTRA-LIGHT DESIGN: WEIGHS ONLY 0.99 LBS FOR ULTIMATE PORTABILITY.
- FAST & VERSATILE: CONNECT VIA BLUETOOTH/WIFI AND PRINT IN SECONDS.
- QUIET OPERATION: PRINT BELOW 60DB-PERFECT FOR QUIET SPACES!

Rongta Portable Printer Wireless for Travel, F82 Inkless Bluetooth&WiFi Thermal Printers 300DPI, Compatible with iOS, Android, Laptop, Support 8.5"x11" US Letter&A4 for Office, Home, Car, Black
- SEAMLESS PRINTING ANYWHERE: WIFI/BLUETOOTH/USB FOR VERSATILE CONNECTIVITY.
- COMPACT & PORTABLE: LIGHTWEIGHT DESIGN PERFECT FOR ON-THE-GO PRINTING.
- HIGH-QUALITY THERMAL PRINTS: 300DPI FOR SHARP TEXT AND GRAPHICS, NO INK NEEDED.
Gloryang Inkless Portable Printer for Travel, Wireless Thermal Printer Supports 8.5 x 11 Inch Thermal Paper, Bluetooth Machine Includes Carry Case and 3 Rolls of Paper Kit, Black
- INKLESS TECH: SAVE MONEY AND HASSLE-NO INK OR TONER NEEDED!
- BLUETOOTH & MOBILE: EFFORTLESS PRINTING FROM ANY DEVICE, ANYWHERE.
- ULTRA-PORTABLE: LIGHTWEIGHT AND COMPACT FOR PRINTING ON THE GO!
Phomemo Portable Printers Wireless for Travel, M832 Bluetooth Inkless Thermal Printer Support 8.5''x11'' US Letter & A4, Mobile Printer for Phone Laptop, for Office School Car Home Use, with Case
-
COST-EFFECTIVE INKLESS PRINTING: ENJOY HASSLE-FREE PRINTING WITHOUT INK COSTS.
-
ULTRA-PORTABLE DESIGN: WEIGHS JUST 1.5LB, PERFECT FOR TRAVEL AND ON-THE-GO.
-
VERSATILE PAPER SUPPORT: PRINT IN 5 SIZES TO MEET ALL YOUR DOCUMENT NEEDS.
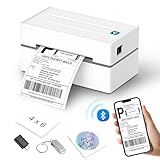
Anycash Bluetooth Thermal Label Printer, Wireless 4x6 Shipping Label Printers for Small Business, Compatible with Android&iOS and Windows, Address Label Printer for Amazon, Ebay, Shopify, Etsy, USPS
- BLUETOOTH PRINTING ON IOS & ANDROID FOR ULTIMATE CONVENIENCE.
- COMPATIBLE WITH FEDEX, UPS, USPS, AMAZON, SHOPIFY & MORE!
- FAST 180MM/S PRINTING-SAVE TIME & MONEY WITH NO INK REQUIRED.
Rongta Portable Printer Wireless for Travel, F82 Inkless Bluetooth&WiFi Thermal Printers 300DPI, Compatible with iOS, Android, Laptop, Support 8.5"x11" US Letter&A4 for Office, Home, Car, White
- EFFORTLESS CONNECTIVITY: PRINT VIA WIFI, BLUETOOTH, OR USB WITH EASE.
- HIGH-QUALITY PRINTS: 300DPI RESOLUTION FOR SHARP TEXT AND GRAPHICS.
- ULTRA-PORTABLE: COMPACT DESIGN PERFECT FOR TRAVEL AND MOBILE WORK.
Hoorola Bluetooth Thermal Label Printer, Wireless 4x6 Shipping Label Printer for Small Business & Shipping Packages, Support iPhone, Android, Windows, macOS, Work for Amazon, Ebay, Shopify, Etsy, USPS
- PRINT 72 LABELS/MIN WITH COST-SAVING, NO-INK THERMAL TECHNOLOGY.
- EFFORTLESSLY CONNECT VIA BLUETOOTH FOR EASY, WIRELESS PRINTING.
- COMPATIBLE WITH VARIOUS PLATFORMS AND MULTIPLE LABEL SIZES.
To install drivers for a wireless printer on Windows 10, follow these steps:
- First, connect your wireless printer to your Wi-Fi network. Ensure that the printer is turned on and in the setup mode.
- Open the "Settings" app on your Windows 10 computer by clicking on the "Start" menu and selecting the gear icon.
- In the Settings window, click on "Devices."
- Within the Devices settings, select "Printers & scanners" from the left-hand side panel.
- Click on the "Add a printer or scanner" option. Windows will then start searching for any available printers.
- If your printer is detected, select it from the list that appears. If it is not listed, ensure that the printer is properly connected to the Wi-Fi network and in the setup mode, then click on the "The printer that I want isn't listed" link.
- In the "Add Printer" window, click on the "Add a Bluetooth, wireless, or network printer" option.
- Windows will now search for available printers. Wait for it to complete the search, and if your printer appears in the list, select it and click on "Next" to proceed.
- If the driver for your printer is not automatically installed by Windows, click on the "Windows Update" button. This will trigger Windows to search for and download the appropriate driver for your printer from the internet. Wait for the driver installation process to complete.
- Once the driver installation is finished, Windows should recognize your printer and add it to your list of devices. You can now start using your wireless printer on Windows 10.
Note: In some cases, the driver installation process may require you to download and install it manually from the manufacturer's website. Make sure to check the manufacturer's support website for the latest drivers compatible with your specific printer model.
What should be done if Windows 10 fails to automatically detect and install wireless printer drivers?
If Windows 10 fails to automatically detect and install wireless printer drivers, you can try the following steps to manually install the drivers:
- Check compatibility: Ensure that your wireless printer is compatible with Windows 10. Verify this by visiting the printer manufacturer's website and checking the system requirements.
- Download the drivers: Go to the printer manufacturer's website and locate the software or drivers section. Look for the appropriate drivers for your printer model and download them onto your computer. Make sure to select the correct Windows 10 version (32-bit or 64-bit).
- Install the drivers: Once the drivers are downloaded, locate the downloaded file and double-click on it to begin the installation process. Follow the on-screen instructions to complete the installation.
- Connect the printer: Turn on your wireless printer, make sure it is connected to your local network, and ensure that it is in the range of the Wi-Fi router. Refer to the printer's manual or manufacturer's website for specific instructions on how to connect the printer to the network.
- Add the printer: Open the "Settings" app in Windows 10, then go to "Devices" > "Printers & scanners". Click on "Add a printer or scanner" and wait for Windows to detect the printer. It may take a few moments for the printer to appear in the list.
- Select the printer: Once the printer is detected, click on it in the list of available printers. Windows will try to install the necessary drivers automatically. If prompted, choose the option to install the drivers manually and browse to the location where you downloaded and installed the drivers in step 3.
- Follow on-screen instructions: Follow any additional on-screen prompts to complete the installation process. Once the drivers are installed, you should be able to use your wireless printer with Windows 10.
If you encounter any issues during the process, consult the printer manufacturer's support website, or contact their support team for further assistance.
How to reinstall drivers for a wireless printer on Windows 10?
To reinstall drivers for a wireless printer on Windows 10, follow these steps:
- Uninstall the existing drivers: Go to the Start menu, open the Control Panel, and click on "Devices and Printers." Right-click on your wireless printer and select "Remove Device" or "Uninstall." Confirm the action when prompted.
- Disconnect the printer: If the printer is connected via USB or Ethernet cable, detach it from the computer. If it is connected wirelessly, ensure that it is powered off or disconnected from the Wi-Fi network.
- Download the latest drivers: Visit the manufacturer's website and navigate to the support or drivers section. Locate the specific model of your printer and download the most recent driver software compatible with Windows 10.
- Install the new drivers: Once the download is complete, locate the downloaded file and double-click to start the installation process. Follow the on-screen instructions to install the drivers. Connect the printer (via USB, Ethernet, or Wi-Fi) when prompted during the installation.
- Configure the printer: After the installation, turn on the printer and wait for it to initialize. Windows 10 should automatically detect the printer and install further necessary software. If prompted, select the appropriate options such as printer name, network settings, etc.
- Test the printer: Once the installation and configuration are complete, try printing a test page to ensure that the printer is working correctly. You can do this by going to the Control Panel, selecting "Devices and Printers," right-clicking on the printer, and choosing "Print Test Page."
Remember to always use the latest driver software provided by the printer manufacturer to ensure compatibility and optimal functionality.
What precautions should be taken before and during the installation of wireless printer drivers on Windows 10?
Before installing wireless printer drivers on Windows 10, there are a few precautions that should be taken:
- Check system requirements: Ensure that your computer meets the minimum system requirements for the printer and the drivers.
- Disconnect old printer connections: If you have an old printer connected, disconnect it and remove its drivers before installing new ones.
- Backup important files: It's always a good practice to backup important files before making any system changes.
- Disable antivirus software: Temporarily disable your antivirus software during the installation process, as it can sometimes interfere with the installation.
- Download drivers from the manufacturer's website: Always download the latest drivers from the official website of your printer's manufacturer. Avoid using third-party websites, as they may contain outdated or malicious drivers.
During the installation process, make sure to follow these precautions:
- Close unnecessary programs: Close all other applications running on your computer to prevent any conflicts during the installation.
- Run the installation as an administrator: Right-click on the installation file and select "Run as administrator" to ensure all necessary permissions are granted.
- Read and follow the installation instructions: Carefully read and follow the on-screen instructions provided by the driver installer. Do not skip any steps or actions mentioned.
- Only install necessary components: Some printer drivers come with additional software or toolbars. During the installation, make sure to select only the necessary components and avoid installing any unnecessary software.
- Restart the computer if prompted: After the installation is complete, if prompted, restart your computer to finalize the driver installation process.
Following these precautions will help ensure a smooth installation of wireless printer drivers on Windows 10, reducing the chances of any issues or conflicts.