
Best Studio Subwoofer Integration Solutions to Buy in July 2026
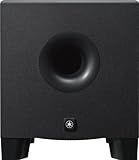
Yamaha HS8 Studio Subwoofer,Black
- DEEP, POWERFUL BASS: 22HZ TO 150HZ FREQUENCY RESPONSE.
- HIGH-OUTPUT: 150W AMPLIFIER DELIVERS UNMATCHED SOUND QUALITY.
- CUSTOMIZABLE SOUND: LOW CUT & HIGH CUT CONTROLS ENHANCE BASS.


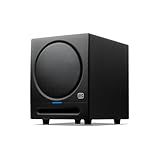
PreSonus Eris Sub 8BT — 8" Inch Powered Subwoofer, Powered Sub, Active Subwoofer, Wireless, Bluetooth, Home Audio, Bass Speaker, Home Theater, Music Production, Gaming
-
STUDIO-QUALITY BLUETOOTH SUBWOOFER FOR ACCURATE SOUND PRODUCTION.
-
TIGHT BASS AND CLEAR AUDIO ELEVATE YOUR MULTIMEDIA EXPERIENCE.
-
FLEXIBLE CONNECTIVITY OPTIONS FOR SEAMLESS INTEGRATION WITH DEVICES.
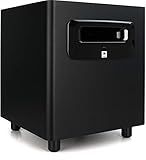
JBL Professional LSR310S - Studio Monitor Subwoofer, 10-Inch, Black
-
EXPERIENCE DEEP BASS DOWN TO 20 HZ WITH JBL'S PATENTED PORT DESIGN.
-
ACTIVATE XLF SETTING FOR CLUB-LIKE BASS IN YOUR CONTROL ROOM.
-
PROFESSIONAL BALANCED INPUTS ENSURE SEAMLESS CONNECTIVITY WITH ANY SYSTEM.
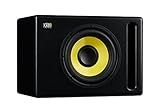
KRK S10.4 S10 Generation 4 10" 160 Watt Powered Studio Subwoofer
- DEEP BASS EXTENSION TO 28HZ FOR POWERFUL AUDIO EXPERIENCE.
- FLEXIBLE PLACEMENT WITH FRONT-FIRING BASS PORT AND CURVED DESIGN.
- CONVENIENT FOOTSWITCH CONTROL FOR EASY SUB AND CROSSOVER ADJUSTMENTS.
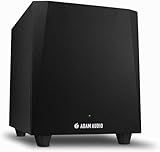
ADAM Audio T10S Studio Subwoofer for recording, mixing and mastering, Studio Quality Sound (Single)
- POWERFUL COMPACT SUBWOOFER ENHANCES LOW BASS FOR CLEAR SOUND.
- OPTIMIZED FOR T5V AND T7V MONITORS, ENSURING PERFECT SYNERGY.
- FLEXIBLE PLACEMENT AND EASY CALIBRATION FOR ANY STUDIO SETUP.
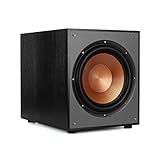
Klipsch R-120SW Subwoofer, Black
- POWERFUL 12 WOOFER DELIVERS DEEP BASS, 29HZ TO 120HZ RANGE.
- IMPRESSIVE 116DB MAX OUTPUT FOR A THRILLING AUDIO EXPERIENCE.
- 400 WATTS PEAK POWER & REAR PORT FOR ENHANCED BASS PERFORMANCE.
Integrating studio subwoofers into a home studio environment can greatly enhance the overall sound quality of your mixes. To effectively integrate subwoofers, it is important to consider factors such as positioning, setup, and room acoustics.
Firstly, it is crucial to position the subwoofers correctly within your studio space. Placing the subwoofers in the corners of the room or near walls can help maximize bass response. Experiment with different placements to find the optimal position for your setup.
Next, ensure that the subwoofers are properly set up and calibrated with your existing studio monitors. This includes adjusting the crossover frequency, volume levels, and phase alignment to achieve a balanced and cohesive sound across all speakers.
Consider investing in bass traps or acoustic treatment to improve the acoustics of your room and minimize any unwanted reflections or standing waves that may affect the subwoofer's performance.
Finally, regularly test and adjust the subwoofers to ensure they are seamlessly integrated into your monitoring system. Use reference tracks and calibration tools to fine-tune the subwoofer settings and achieve an accurate and balanced sound across the frequency spectrum.
How to control the volume of studio subwoofers in a home studio?
There are a few different ways you can control the volume of studio subwoofers in a home studio:
- Use the volume control on the subwoofer itself: Most studio subwoofers have a built-in volume control knob that allows you to adjust the volume directly on the subwoofer itself. This is the simplest way to control the volume.
- Use a dedicated subwoofer controller: Some studio subwoofers come with a separate controller that allows you to adjust the volume, as well as other settings such as crossover frequency and phase. This can give you more precise control over the subwoofer's sound.
- Use your audio interface or DAW: Many audio interfaces and digital audio workstations (DAWs) have the ability to control the volume of individual tracks or channels. You can use this feature to adjust the volume of the subwoofer in your mix.
- Use a separate volume control device: If none of the above options are available to you, you can also use a separate volume control device, such as a passive volume control knob or an external volume controller, to adjust the volume of the subwoofer.
Overall, the best method for controlling the volume of studio subwoofers in a home studio will depend on your specific setup and preferences. Experiment with different options to find the one that works best for you.
What is the importance of proper acoustics when using studio subwoofers?
Proper acoustics are crucial when using studio subwoofers because they directly impact the accuracy and quality of sound reproduction. Here are some reasons why proper acoustics are important when using studio subwoofers:
- Accurate frequency response: Proper acoustics help to ensure that the studio subwoofers reproduce sound accurately across the entire frequency range. This is important for mixing and mastering tasks, as it allows the audio engineer to accurately assess the balance and tonal characteristics of the music.
- Minimize interference: Good acoustics help to minimize reflections, standing waves, and other forms of interference that can color the sound and result in inaccuracies in the audio mix. By minimizing these issues, the audio engineer can make more informed decisions when mixing and mastering music.
- Bass management: Studio subwoofers are designed to handle low frequencies, but they need to be properly integrated into the existing studio setup to ensure a seamless transition between the subwoofer and the main speakers. Proper acoustics help in achieving this integration, resulting in a more cohesive sound and better overall listening experience.
- Reduce distortion: Inadequate acoustics can lead to distortion and muddiness in the low frequencies, which can compromise the clarity and detail of the audio mix. Proper acoustics help to minimize these issues, resulting in a more accurate and balanced sound.
In conclusion, proper acoustics are essential when using studio subwoofers to ensure accurate sound reproduction, minimize interference, improve bass management, and reduce distortion. By investing in good acoustics for your studio, you can create a more accurate and enjoyable listening experience for both yourself and your audience.
How to troubleshoot common issues with studio subwoofers?
- Check power connections: Make sure the subwoofer is plugged in and turned on. Double check the power cord and outlet to ensure they are working properly.
- Adjust volume and settings: Check the volume level on both the subwoofer and your audio source. Make sure the subwoofer is not on mute or turned down too low.
- Verify input connections: Ensure that the subwoofer is properly connected to your audio source (e.g. receiver, amplifier, sound card) using the correct cables (e.g. RCA, XLR, etc.). Check for loose or damaged connections.
- Check the subwoofer's internal settings: Some subwoofers have settings that can be adjusted to optimize performance, such as crossover frequency, phase control, and level adjustments. Refer to the user manual for instructions on how to adjust these settings.
- Test the subwoofer with another audio source: If possible, connect the subwoofer to a different audio source to determine if the issue is with the subwoofer or the original audio source.
- Position the subwoofer properly: The location and placement of the subwoofer can greatly affect its performance. Place the subwoofer in a corner or against a wall to maximize bass output. Experiment with different placements to find the best sound.
- Check for mechanical issues: Inspect the subwoofer for any physical damage, loose parts, or debris that could be affecting its performance. Tighten any loose screws or connections and clean the subwoofer if necessary.
- Consult the manufacturer or seek professional help: If you are unable to resolve the issue on your own, contact the manufacturer for technical support or consider taking the subwoofer to a professional audio technician for further diagnosis and repair.