
Best Studio Subwoofers for Optimal Sound to Buy in July 2026
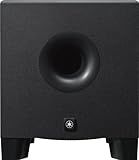
Yamaha HS8 Studio Subwoofer,Black
- DEEP BASS RESPONSE: 22HZ FOR POWERFUL LOW-END ENHANCEMENTS.
- 150W HIGH-POWER AMPLIFIER FOR DYNAMIC SOUND PERFORMANCE.
- CUSTOMIZABLE SOUND: LOW AND HIGH CUT CONTROLS FOR PERFECT TUNING.


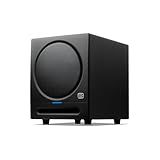
PreSonus Eris Sub 8BT — 8" Inch Powered Subwoofer, Powered Sub, Active Subwoofer, Wireless, Bluetooth, Home Audio, Bass Speaker, Home Theater, Music Production, Gaming
-
STUDIO-QUALITY SOUND FOR MUSIC PRODUCTION AND MULTIMEDIA NEEDS.
-
IMPRESSIVE 100-WATT OUTPUT, DELIVERING DEEP BASS DOWN TO 30 HZ.
-
BLUETOOTH 5.0 CONNECTIVITY ENSURES SEAMLESS INTEGRATION WITH DEVICES.
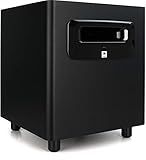
JBL Professional LSR310S - Studio Monitor Subwoofer, 10-Inch, Black
- EXPERIENCE DEEP, DYNAMIC BASS WITH PATENTED JBL PORT DESIGN.
- XLF SETTING EMULATES CLUB BASS FOR INSPIRING DANCE TRACK PRODUCTION.
- CUSTOM DRIVER DELIVERS POWERFUL, RELIABLE LOW FREQUENCIES UP TO 20 HZ.
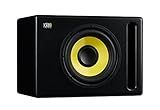
KRK S10.4 S10 Generation 4 10" 160 Watt Powered Studio Subwoofer
- DEEP BASS EXTENSION TO 28HZ FOR POWERFUL SOUND EXPERIENCE.
- CONVENIENT FOOTSWITCH CONTROL FOR EASY SUB MANAGEMENT.
- VERSATILE CURVED DESIGN WITH FRONT-FIRING PORT FOR PLACEMENT.
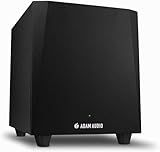
ADAM Audio T10S Studio Subwoofer for recording, mixing and mastering, Studio Quality Sound (Single)
- EXTEND BASS RESPONSE FOR CLEARER LOW FREQUENCIES WITH T10S.
- PERFECTLY COMPLEMENTS ADAM AUDIO T5V AND T7V STUDIO MONITORS.
- EASILY CUSTOMIZABLE FOR ANY ROOM WITH ADJUSTABLE SETTINGS.
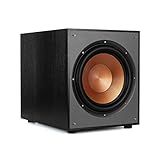
Klipsch R-120SW Subwoofer, Black
- POWERFUL 12 WOOFER DELIVERS DEEP BASS (29HZ - 120HZ)
- HIGH OUTPUT UP TO 116DB ENHANCES ANY AUDIO EXPERIENCE
- ROBUST 400W PEAK POWER FOR UNMATCHED PERFORMANCE AND CLARITY

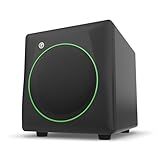
Edifier T5s Powered Active Subwoofer with 70W RMS, 8" Long-Throw Woofer, Deep Bass (35Hz) Speaker, Built-in Amp, Low Distortion, Phase Selector & Energy-Efficient for Home & Studio Audio, Black
-
EXPERIENCE DEEP BASS: ENJOY POWERFUL 35HZ BASS WITH AN 8-INCH DRIVER.
-
PRECISION CONTROL: CUSTOMIZE SETTINGS FOR SEAMLESS STEREO INTEGRATION.
-
SPACE-SAVING DESIGN: COMPACT SUBWOOFER BLENDS WITH ANY HOME DECOR.
Mackie CR8SBT 8” Powered Subwoofer with Desktop Remote, Bluetooth, TRS, RCA, Crossover and Polarity Controls, Compatible with CR Series Powered Studio Monitors
-
PROFESSIONAL SOUND WITH POWERFUL BASS FOR STUDIOS & HOME USE.
-
EFFORTLESSLY STREAM VIA BLUETOOTH, NO SETUP HASSLE REQUIRED.
-
SLEEK DESIGN COMPLEMENTS ANY SPACE, ENHANCING AESTHETIC APPEAL.
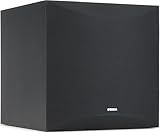
Yamaha Audio 10" 100W Powered Subwoofer - Black (NS-SW100BL)
- TWISTED FLARE PORT DELIVERS POWERFUL, TIGHT BASS RESPONSE.
- ADVANCED YST II ENHANCES SOUND CLARITY AND PERFORMANCE.
- SLEEK DESIGN MAKES IT A STYLISH FIT FOR ANY ROOM DECOR.
Klipsch R-12SW Powerful Deep Bass Front Firing 12" Copper-Spun Driver 400W Digital Power Subwoofer 14" X 18.5" X 16"
- 400W ALL-DIGITAL AMP FOR UNMATCHED SOUND POWER AND CLARITY.
- VERSATILE DESIGN EXCELS WITH BOTH MUSIC AND MOVIES.
- EASY COMPATIBILITY WITH MOST RECEIVERS VIA LINE/LFE INPUTS.
When setting up studio subwoofers for optimal sound, it is important to consider the placement of the subwoofers in your studio space. Subwoofers are typically placed on the floor in corners or along walls to maximize low-frequency response. Experiment with different positions to find the placement that provides the best bass response.
It is also important to properly calibrate your subwoofers with your main speakers to ensure a balanced sound. This can be done using a sound level meter or through the use of a calibration microphone and software. Adjusting the crossover frequency and volume levels of the subwoofers can help achieve a seamless blend between the low frequencies produced by the subwoofers and the rest of your speaker system.
Additionally, consider the acoustics of your studio space when setting up subwoofers. Make sure to address any acoustic issues such as standing waves or bass traps to prevent unwanted reflections and resonances that can affect the overall sound quality. Experiment with different room treatments and placements to find the optimal setup for your subwoofers.
Lastly, take the time to properly fine-tune the settings of your subwoofers by listening to a variety of music genres and adjusting the controls accordingly. Trust your ears and make subtle changes until you achieve the desired sound quality. By following these steps and taking the time to properly set up your studio subwoofers, you can ensure optimal sound quality in your studio environment.
What is the proper way to power studio subwoofers?
- Use a dedicated power source: It is recommended to use a separate power outlet or power strip specifically for the subwoofers, rather than sharing a power source with other equipment.
- Use the correct power cable: Make sure to use the appropriate power cable that is rated for the power output of the subwoofers. Avoid using extension cords or adapters that are not designed for high power equipment.
- Check the power requirements of the subwoofers: Make sure to check the power rating of the subwoofers and ensure that the power source can provide enough power to properly drive the speakers.
- Avoid overloading the power source: Do not connect too many subwoofers or other high power equipment to the same power source, as this can cause voltage fluctuations and potential damage to the equipment.
- Use a power conditioner: Consider using a power conditioner to regulate the voltage and protect the subwoofers from power surges or fluctuations. This can help ensure consistent and clean power delivery to the speakers.
- Consult the manufacturer's guidelines: Always refer to the manufacturer's recommendations and guidelines for powering the specific model of subwoofers to ensure proper setup and operation.
What is the purpose of studio subwoofers in a sound system?
The purpose of studio subwoofers in a sound system is to reproduce low-frequency sounds, such as bass notes and rumbling effects, with accuracy and clarity. By adding a subwoofer to a studio monitoring setup, producers and engineers can more accurately hear and mix the lower frequencies present in their music, ensuring a balanced and full sound across all frequencies. Subwoofers also help to create a more immersive listening experience, allowing the listener to feel the full impact of the music.
How to configure studio subwoofers for surround sound systems?
Configuring studio subwoofers for surround sound systems can greatly enhance the audio experience. Here are steps to help you set up your studio subwoofers for your surround sound system:
- Positioning: Place the subwoofers in strategic locations in the room. A common setup is to place one subwoofer in the front of the room and another in the back. This helps to evenly distribute the low-frequency sound throughout the space.
- Calibration: Use a calibration microphone or an audio calibration software to adjust the levels and settings for your subwoofers. This will help ensure that the subwoofers are properly integrated with the other speakers in your surround sound system.
- Crossover settings: Set the crossover frequency on your subwoofers to match the rest of your speakers. This will ensure that the subwoofers are only producing the low frequencies that they are designed for, while the other speakers handle the mid and high frequencies.
- Phase adjustment: Adjust the phase of the subwoofers to ensure they are in sync with the other speakers in your surround sound system. This can help prevent any cancellation or reinforcement of frequencies in different parts of the room.
- Test and fine-tune: Once you have configured your studio subwoofers, listen to various audio sources to test the balance and performance of your surround sound system. Make any necessary adjustments to the settings until you are satisfied with the sound quality.
By following these steps, you can configure your studio subwoofers for your surround sound system and enjoy a more immersive audio experience.
How to calibrate studio subwoofers for accurate bass response?
Calibrating studio subwoofers for accurate bass response is essential in achieving a balanced and clear sound in a studio environment. Here are some steps to help you calibrate your subwoofers:
- Positioning: Proper placement of your subwoofers is crucial for achieving accurate bass response. Place your subwoofers in corners of the room or against a wall for maximum bass output. Make sure they are not too close to any walls or corners to avoid boomy bass reflections.
- Adjusting crossover frequency: Set the crossover frequency on your subwoofer to match that of your main speakers. This will ensure a smooth transition between the main speakers and the subwoofer, creating a cohesive sound. Typically, a crossover frequency between 80-120Hz is suitable for most studio setups.
- Setting volume levels: Use a SPL meter to measure the volume levels of your subwoofers and main speakers. Start by setting the volume levels of your main speakers to a comfortable listening level, then adjust the volume of your subwoofers until they blend seamlessly with the main speakers. Aim for a balanced sound where the bass is neither overpowering nor lacking.
- Room acoustics: Consider the acoustics of your room when calibrating your subwoofers. Room reflections and resonances can impact the accuracy of bass response. Use acoustic treatment such as bass traps and diffusers to minimize reflections and improve the overall sound quality.
- Fine-tuning with test tones: Use test tones or frequency sweeps to fine-tune the bass response of your subwoofers. Listen for any peaks or dips in the bass frequency range and adjust the settings on your subwoofers accordingly to achieve a smooth and balanced bass response.
By following these steps and regularly calibrating your subwoofers, you can ensure accurate bass response in your studio setup, leading to a more professional and enjoyable listening experience.
What is the role of studio subwoofers in music production?
Studio subwoofers play a critical role in music production by reproducing low-frequency sounds with accuracy and power. They provide depth, punch, and impact to the bass frequencies in a mix, allowing producers and engineers to accurately monitor and balance the overall sound of a track. Subwoofers help ensure that the bass frequencies are represented clearly and evenly, which is essential for creating a balanced, professional-sounding mix. Additionally, they can help producers and engineers identify and address any issues with the low end of a mix, such as muddiness or lack of definition. Overall, studio subwoofers are a crucial tool for achieving a well-rounded, full-bodied sound in music production.