
Best Studio Subwoofer Positioning Tips to Buy in July 2026
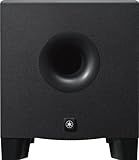
Yamaha HS8 Studio Subwoofer,Black
- DEEP BASS DOWN TO 22HZ FOR POWERFUL, IMMERSIVE SOUND.
- 150W HIGH-POWER AMPLIFIER DELIVERS IMPACTFUL AUDIO PERFORMANCE.
- ADJUSTABLE LOW AND HIGH CUT CONTROLS FOR TAILORED SOUND PRECISION.


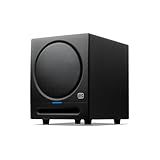
PreSonus Eris Sub 8BT — 8" Inch Powered Subwoofer, Powered Sub, Active Subwoofer, Wireless, Bluetooth, Home Audio, Bass Speaker, Home Theater, Music Production, Gaming
-
STUDIO-QUALITY SOUND: EXPERIENCE PRECISE AUDIO FOR MUSIC AND MULTIMEDIA.
-
FLEXIBLE CONNECTIVITY: BLUETOOTH 5.0 AND MULTIPLE INPUTS FOR EASY INTEGRATION.
-
CUSTOMIZABLE OUTPUT: TUNE SETTINGS FOR OPTIMAL SOUND IN ANY ROOM.
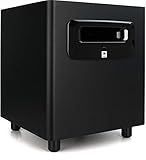
JBL Professional LSR310S - Studio Monitor Subwoofer, 10-Inch, Black
- EXPERIENCE CLUB-QUALITY BASS: XLF SETTING EMULATES DANCE CLUB SOUND.
- POWERFUL, RELIABLE PERFORMANCE: 20 HZ DEPTH & 113 DB PEAK OUTPUT.
- VERSATILE CONNECTIONS: COMPATIBLE WITH BALANCED XLR AND 1/4 INPUTS.
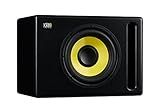
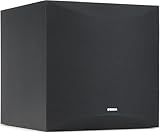
KRK S10.4 S10 Generation 4 10" 160 Watt Powered Studio Subwoofer
- DEEP BASS DOWN TO 28HZ WITH IMPRESSIVE 117 DB MAX SPL.
- FLEXIBLE PLACEMENT WITH CURVED DESIGN AND FRONT-FIRING BASS PORT.
- EASY CONTROL OF SUB AND CROSSOVER FILTERS WITH FOOTSWITCH OPTION.
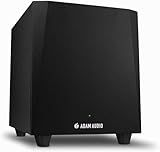
ADAM Audio T10S Studio Subwoofer for recording, mixing and mastering, Studio Quality Sound (Single)
- EXTEND YOUR BASS RESPONSE FOR CLEAR LOW FREQUENCIES WITH THE T10S.
- PERFECTLY PAIRS WITH ADAM AUDIO T5V AND T7V STUDIO MONITORS.
- ADJUSTABLE SETTINGS FOR SEAMLESS INTEGRATION IN ANY STUDIO SETUP.
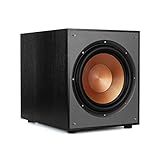
Klipsch R-120SW Subwoofer, Black
- POWERFUL 12 SUBWOOFER DELIVERS DEEP BASS DOWN TO 29HZ.
- HIGH OUTPUT: 116DB MAX FOR AN IMMERSIVE AUDIO EXPERIENCE.
- EFFICIENT BASS-REFLEX DESIGN FOR ENHANCED SOUND QUALITY.

Edifier T5s Powered Active Subwoofer with 70W RMS, 8" Long-Throw Woofer, Deep Bass (35Hz) Speaker, Built-in Amp, Low Distortion, Phase Selector & Energy-Efficient for Home & Studio Audio, Black
- EXPERIENCE DEEP 35HZ BASS WITH POWERFUL 70W RMS OUTPUT!
- PRECISION CONTROLS ENSURE PERFECT INTEGRATION WITH ANY AUDIO SETUP.
- SLEEK DESIGN AND LOW DISTORTION FIT SEAMLESSLY IN ANY DECOR.
Mackie CR8SBT 8” Powered Subwoofer with Desktop Remote, Bluetooth, TRS, RCA, Crossover and Polarity Controls, Compatible with CR Series Powered Studio Monitors
- POWERFUL 8” WOOFER DELIVERS DEEP, PROFESSIONAL-QUALITY BASS SOUND.
- EFFORTLESS BLUETOOTH PAIRING FOR EASY MUSIC STREAMING AND CONNECTIVITY.
- SLEEK DESIGN MATCHES ANY DECOR, PERFECT FOR STUDIOS OR LIVING SPACES.
Yamaha Audio 10" 100W Powered Subwoofer - Black (NS-SW100BL)
- CLEAR, TIGHT BASS WITH INNOVATIVE TWISTED FLARE PORT DESIGN.
- ENHANCED SOUND QUALITY WITH YAMAHA’S ADVANCED YST II TECHNOLOGY.
- SLEEK DESIGN ADDS STYLE TO ANY ROOM WHILE BOOSTING AUDIO EXPERIENCE.
When positioning studio subwoofers for balanced sound, it is important to consider factors such as room acoustics, speaker placement, and listening position. Ideally, subwoofers should be placed symmetrically in the room to ensure even bass distribution. It is recommended to place them perpendicular to walls to prevent reflections that can affect sound quality. Additionally, subwoofers should be positioned away from corners and walls to reduce bass build-up. Experimenting with different placements and adjusting settings based on room size and shape can help achieve optimal sound balance. Regularly calibrating subwoofers using a sound level meter or software can also help fine-tune the audio output for balanced and accurate sound reproduction.
What is the ideal distance between studio subwoofers and main speakers?
The ideal distance between studio subwoofers and main speakers can vary depending on the size and layout of the room, as well as personal preferences and acoustics. However, a general rule of thumb is to place the subwoofers close to the main speakers and equidistant from the listening position. This helps ensure a seamless integration of the low-frequency sound with the rest of the audio coming from the main speakers. Experimenting with different placements and distances can help you find the optimal setup for your specific studio setup.
How to prevent interference from other electronics with studio subwoofers?
- Use shielded cables: Shielded cables can help prevent interference from other electronics by blocking electromagnetic interference.
- Use power conditioners: Power conditioners can help filter out interference present in the electrical supply, reducing the likelihood of interference affecting your subwoofers.
- Keep distance from other electronics: Keep your studio subwoofers away from other electronic devices that may cause interference, such as computers, microwaves, or wireless routers.
- Use ferrite cores: Ferrite cores can be attached to cables to reduce electromagnetic interference, helping to prevent interference from affecting your subwoofers.
- Check for radio frequency interference: Radio frequency interference from nearby devices can also affect your subwoofers. Make sure to turn off or move away from devices emitting strong radio signals.
- Use isolation pads: Isolation pads can help reduce vibrations and interference from surrounding devices, ensuring clearer sound from your subwoofers.
- Ground the subwoofers properly: Ensuring that your subwoofers are properly grounded can help reduce interference from other electronic devices in the studio.
How to adjust the phase control on studio subwoofers?
Adjusting the phase control on studio subwoofers is a common practice for optimizing the sound and ensuring that the subwoofer is in sync with the main speakers. Here is how you can adjust the phase control on studio subwoofers:
- Locate the phase control knob on the back of the subwoofer. This knob is usually labeled with a 0 or 180 degrees marking.
- Play a familiar piece of music with a consistent bass line through your main speakers and the subwoofer.
- While the music is playing, slowly adjust the phase control knob. Start by setting it to the 0 degrees position and listen to the sound quality.
- If the bass sounds muddy or lacks clarity, try adjusting the phase control knob to the 180 degrees position.
- Listen to the sound again and see if there is an improvement. Keep adjusting the knob until you find the best phase setting that produces the tightest and most accurate bass response.
- Once you have found the optimal phase setting, lock the knob into place to ensure it does not move accidentally.
It's important to note that the best phase setting can vary depending on your room acoustics, speaker placement, and personal preference. Experiment with different phase settings to find the one that works best for your setup.
How to minimize standing waves in a room with studio subwoofers?
- Position the subwoofers properly: Place the subwoofers in a corner of the room or against a wall to help reduce standing waves. Experiment with different locations to find the best placement for minimizing standing waves.
- Use bass traps: Bass traps are acoustic panels designed to absorb low-frequency sound waves and reduce standing waves. Place bass traps in the corners of the room where standing waves are most likely to occur.
- Adjust the room dimensions: If possible, adjust the dimensions of the room to minimize standing waves. For example, adding furniture or acoustic panels to break up parallel walls can help reduce standing waves.
- Use room correction software: Many studio subwoofers come with room correction software that can help adjust the sound output to minimize standing waves. Follow the instructions provided with the software to optimize the subwoofers for the room acoustics.
- Use multiple subwoofers: Adding multiple subwoofers can help distribute the low-frequency sound more evenly throughout the room, reducing the impact of standing waves. Experiment with different subwoofer placements and configurations to find the best setup for minimizing standing waves.
How to avoid phase cancellation when using studio subwoofers?
- Proper placement: Ensure that the subwoofers are placed in a location where they will not interact with the room's acoustics in a negative way. Experiment with different placement options to find the best position for minimal phase cancellation.
- Use multiple subwoofers: By using two or more subwoofers, you can help distribute the bass frequencies more evenly throughout the room and reduce the chances of phase cancellation occurring.
- Delay time alignment: Use a delay time alignment tool to ensure that the subwoofers are in sync with the main speakers. This will help prevent phase cancellation and ensure a more cohesive sound.
- Use a crossover: Utilize a crossover to properly divide the frequency range between the main speakers and the subwoofers. This can help prevent overlap of frequencies that may cause phase cancellation.
- Check for phase issues: Use a phase alignment tool or test tone generator to determine if there are any phase issues between the subwoofers and main speakers. Adjust the phase settings as needed to minimize phase cancellation.
- Test and listen: Take the time to test the setup and listen to how the subwoofers interact with the main speakers. Make adjustments as needed to achieve the best possible sound quality and avoid phase cancellation.