Best Wireless Printers to Buy in July 2026
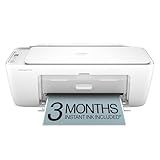
HP DeskJet 2827e Wireless All-in-One Color Inkjet Printer, Scanner, Copier, Best-for-Home, 3 Month Instant Ink Trial Included, AI-Enabled (6W7F5A)
- FAST PRINTING: 5.5 PPM COLOR & 7.5 PPM BLACK FOR QUICK TASKS!
- EFFORTLESS MOBILE PRINTING WITH HP APP FOR TOTAL CONVENIENCE!
- 3 MONTHS OF INSTANT INK-NEVER RUN OUT OF INK AGAIN!


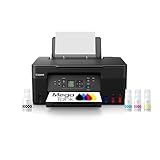
Canon MegaTank G3270 All-in-One Wireless Inkjet Printer. for Home Use, Print, Scan and Copy
- WIRELESS PRINT, COPY, AND SCAN FOR ULTIMATE CONVENIENCE.
- UP TO 2 YEARS OF INK INCLUDED-PRINT THOUSANDS OF PAGES!
- SAVE UP TO $1,000 ON INK COSTS WITH EVERY PURCHASE.

EXPLUX A4 UV Printer,with XP600 printhead Doubles The Speed of L805,Features Vacuum Platform, White Ink,one-Touch Cleaning,and high-res Flatbed Printing,Perfect for Phone Cases, Bottles, Wood, etc.
- TWO-YEAR INK SUPPLY: GET 5 BOTTLES & 500G POWDER SHIPPED EVERY 2 MONTHS!
- 6-COLOR XP600 QUALITY: ACHIEVE STUNNING PRINTS ON VARIOUS SURFACES!
- FLAWLESS PRECISION: INTEGRATED VACUUM BED ENSURES ACCURATE, CLEAN PRINTS!
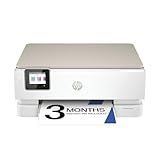
HP Envy Inspire 7255e Wireless Color Inkjet Printer, Print, scan, copy, Easy setup, Mobile printing, Best-for-home, 3 month Instant Ink trial included, AI-enabled (1W2Y9A)
- EFFORTLESS WIRELESS SETUP & CUSTOMIZABLE TOUCHSCREEN FOR EASY USE.
- TRUE-TO-PHONE QUALITY PRINTS WITH VIBRANT COLORS AND CREATIVE FEATURES.
- 3 MONTHS OF INSTANT INK DELIVERY FOR HASSLE-FREE PRINTING AT HOME.
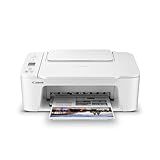
Canon PIXMA TS3720 Wireless All-in-One Printer for Basic Home Printing, White
-
ALL-IN-ONE CONVENIENCE: PRINT, COPY, AND SCAN WITH EASE AT HOME.
-
FAST PRINTING SPEEDS: ENJOY QUICK PRINTS-7.7 PPM BLACK, 4 PPM COLOR.
-
HASSLE-FREE CONNECTIVITY: EASY WIRELESS SETUP AND MOBILE DEVICE PRINTING.
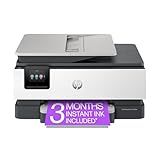
HP OfficeJet Pro 8125e Wireless All-in-One Color Inkjet Printer, Print, scan, Copy, ADF, Duplex Printing Best-for-Home Office, 3 Month Instant Ink Trial Included, AI-Enabled (405T6A)
-
PRINT PROFESSIONAL-QUALITY COLOR AT SPEEDS UP TO 20 PPM, EFFORTLESSLY!
-
HP AI DELIVERS PERFECTLY FORMATTED PRINTS, SAVING YOU TIME AND INK.
-
STAY CONNECTED WITH DUAL-BAND WI-FI AND MANAGE PRINTING VIA HP APP!
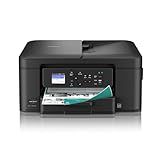
Brother Work Smart 1360 Wireless Color Inkjet All-in-One Printer with Automatic Duplex Printing and 1.8” Color Display | Includes Refresh Subscription Trial(1) (MFC-J1360DW) (Uses LC501 Series Inks)
- ALL-IN-ONE PRINTER: PRINT, COPY, AND SCAN FOR HOME OR OFFICE NEEDS.
- EASY CLOUD ACCESS: PRINT AND SCAN FROM TOP CLOUD APPS EFFORTLESSLY.
- FAST, EFFICIENT PRINTING: 16 PPM BLACK AND AUTOMATIC DUPLEX FEATURES.
Printing from an iPhone to a wireless printer is a convenient and simple process. Here is how you can do it:
- Ensure that your iPhone and wireless printer are connected to the same Wi-Fi network. This is necessary for them to communicate with each other.
- On your iPhone, open the document or photo you want to print. This can be from various apps such as Photos, Safari, or Mail.
- Look for the Share button, which is typically represented by an arrow pointing upwards or a square with an arrow coming out of it. It is usually located at the bottom of the screen (for older iPhones) or at the top (for newer iPhones with a notch).
- Tap the Share button, and a menu with various options will appear.
- Scroll down the menu until you find the Print option and tap on it.
- The printer selection screen will now appear. Make sure your wireless printer is turned on and connected to the same Wi-Fi network as your iPhone.
- Your iPhone will automatically search for available printers. Once your wireless printer is detected, tap on it to select it.
- Next, you can choose the number of copies you want to print, select the page range, and adjust any other print settings if needed. You may also be able to select the paper size or orientation.
- Once you have customized the settings, tap the Print button located in the top-right corner of the screen.
- Your iPhone will send the print job to the wireless printer, and you will see a confirmation message once the process is complete.
Please note that the steps may vary slightly depending on your iPhone model and the printer you are using, as different printers may have unique printing interfaces or require specific apps to be installed.
What is AirPrint and how to use it for printing from an iPhone?
AirPrint is a technology developed by Apple that allows wireless printing from iOS devices, such as iPhones and iPads, to compatible printers. With AirPrint, you can easily print documents, photos, emails, and webpages directly from your iPhone without the need for additional software or drivers.
To use AirPrint for printing from an iPhone, follow these steps:
- Ensure that your iPhone and the printer are connected to the same Wi-Fi network.
- Make sure that your printer supports AirPrint. Most modern printers from popular brands like HP, Canon, Epson, Brother, and others are AirPrint compatible. You can check the printer's manual or the manufacturer's website to confirm if it supports AirPrint.
- Open the app or content that you want to print. This could be a document, photo, email, webpage, or any other printable item.
- Tap the share button or the options button (represented by a square with an arrow pointing upwards).
- From the share/options menu, look for the "Print" option and tap on it. If you can't find it, swipe left on the bottom row of actions and tap "More" to enable the Print option.
- After tapping "Print," your iPhone will automatically search for and display available AirPrint printers. Select the printer you want to use for printing.
- Adjust any print settings if necessary, such as the number of copies, paper size, or double-sided printing, depending on the options provided by your printer.
- Finally, tap the "Print" button to start the printing process. You can monitor the print progress from the print queue, accessible by double-clicking the home button or swiping up from the bottom on newer iPhone models with Face ID.
Once you complete these steps, your selected content will be sent wirelessly to the AirPrint-enabled printer, and the printing will begin.
How to set up a wireless printer with an iPhone?
To set up a wireless printer with an iPhone, you can follow these steps:
- Make sure your printer is connected to the same Wi-Fi network as your iPhone.
- On your iPhone, go to the "Settings" app.
- Scroll down and tap on "Wi-Fi".
- Make sure Wi-Fi is turned on, and your iPhone is connected to the same Wi-Fi network as your printer.
- Once connected, open the document or image you want to print on your phone.
- Tap the "Share" button (usually represented by a box with an arrow).
- Scroll down and tap on "Print". If you don't see it, swipe left on the bottom row of icons and tap on "More".
- On the Printer Options screen, your iPhone will automatically search for available printers. Wait for your wireless printer to appear under the "Printers" section.
- Tap on your printer to select it.
- Configure any additional print settings, such as the number of copies or page range.
- Tap on "Print" to start printing your document using the wireless printer.
Ensure that your wireless printer is properly set up and connected to the same Wi-Fi network for a seamless printing experience.
What is the maximum number of pages that can be printed from an iPhone to a wireless printer at once?
The maximum number of pages that can be printed from an iPhone to a wireless printer at once can vary depending on several factors such as the printer model, network speed, and the iPhone's available memory. In most cases, however, there is no specific limit imposed by the iPhone itself.
Modern wireless printers and printing apps usually support multi-page printing, allowing users to send multiple documents or pages to print at once. The printer's memory and processing capabilities, as well as the available network resources, can determine the practical limit.
If you have a large number of pages to print, it's recommended to divide them into smaller batches and send them separately to avoid overwhelming the printer or encountering any network limitations.
What are the compatible file formats for printing from an iPhone to a wireless printer?
When printing from an iPhone to a wireless printer, the compatible file formats may vary based on the specific printer model and the printing app you are using. However, the most commonly supported file formats for wireless printing from an iPhone include:
- PDF (Portable Document Format)
- JPEG (Joint Photographic Experts Group)
- PNG (Portable Network Graphics)
- TXT (Plain Text)
- DOC/DOCX (Microsoft Word Documents)
- XLS/XLSX (Microsoft Excel Spreadsheets)
- PPT/PPTX (Microsoft PowerPoint Presentations)
- HTML (Hypertext Markup Language)
It's important to note that some printers may support additional file formats beyond these. Additionally, printing apps or third-party apps may offer conversion capabilities to enable printing of certain unsupported file formats.
How to print maps and directions from an iPhone to a wireless printer?
To print maps and directions from an iPhone to a wireless printer, you can follow these steps:
- Ensure that your iPhone and wireless printer are connected to the same Wi-Fi network.
- Open the Maps app on your iPhone and search for the desired location or enter the directions.
- Once you have the map or directions ready, take a screenshot by pressing the Home button and the Power button (or Volume Up button, depending on your iPhone model) simultaneously. The screenshot will be saved in your Photos app.
- Open the Photos app on your iPhone and find the screenshot you just took.
- Tap on the screenshot to open it in full-screen view.
- Tap the Share button, usually represented by a square with an upward arrow, located at the bottom of the screen.
- Scroll through the sharing options until you find the "Print" button. Tap on it.
- Your iPhone will automatically detect any nearby AirPrint-compatible printers. Choose the desired wireless printer from the list.
- Adjust any printing settings if required, such as the number of copies or paper size. Then, tap "Print" to start printing the map or directions.
Note: The steps provided here are general and may vary slightly depending on the iPhone model, iOS version, and printer brand.
How to print Microsoft Office documents from an iPhone to a wireless printer?
To print Microsoft Office documents from an iPhone to a wireless printer, you can follow these steps:
- Ensure that your iPhone and wireless printer are connected to the same Wi-Fi network.
- Install the official app for your wireless printer, if available, from the App Store. Alternatively, check if your printer supports Apple AirPrint, which allows for direct printing without the need for specific apps.
- Open the Office app on your iPhone, such as Microsoft Word, Excel, or PowerPoint.
- Open the document you want to print by tapping on it.
- Tap the "Share" button, usually represented by an arrow pointing out of a box or by three dots.
- Select the "Print" option from the share menu. If you don't see this option, look for an "Open in" or "More" button, then select "Print" from there.
- The iPhone will search for available printers on the same Wi-Fi network. Select your wireless printer from the detected printers.
- Configure any additional print settings, such as selecting the number of copies, page range, or page orientation.
- Tap the "Print" button to start printing the document.
- Wait for the printer to complete the printing process.