Best Wireless Printers to Buy in July 2026
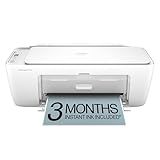
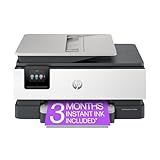
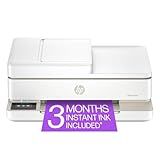
HP DeskJet 2827e Wireless All-in-One Color Inkjet Printer, Scanner, Copier, Best-for-Home, 3 Month Instant Ink Trial Included, AI-Enabled (6W7F5A)
-
EFFORTLESS PRINTING: CONNECT VIA WI-FI AND PRINT FROM ANY DEVICE!
-
INSTANT INK INCLUDED: GET 3 MONTHS OF INK DELIVERED TO YOUR DOOR!
-
COMPACT & ECO-FRIENDLY: DESIGNED FOR SMALL SPACES USING RECYCLED MATERIALS.


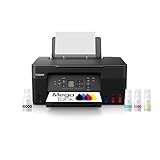
Canon MegaTank G3270 All-in-One Wireless Inkjet Printer. for Home Use, Print, Scan and Copy
- ENJOY 2 YEARS OF INK INCLUDED-PRINT UP TO 7,700 COLOR PAGES!
- SAVE UP TO $1,000 ON INK COSTS OVER TIME-HUGE SAVINGS!
- VERSATILE WIRELESS PRINT/COPY/SCAN FUNCTIONALITY FOR YOUR NEEDS!
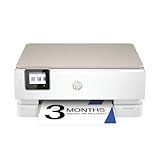
HP Envy Inspire 7255e Wireless Color Inkjet Printer, Print, scan, copy, Easy setup, Mobile printing, Best-for-home, 3 month Instant Ink trial included, AI-enabled (1W2Y9A)
-
VIBRANT, BORDERLESS PHOTOS: ACHIEVE TRUE-TO-LIFE PRINTS FROM YOUR DEVICE.
-
INTUITIVE HP APP: PRINT, SCAN, AND COPY EFFORTLESSLY FROM ANY DEVICE.
-
ECO-FRIENDLY DESIGN: MADE WITH OVER 45% RECYCLED PLASTIC FOR SUSTAINABILITY.
HP OfficeJet Pro 8125e Wireless All-in-One Color Inkjet Printer, Print, scan, Copy, ADF, Duplex Printing Best-for-Home Office, 3 Month Instant Ink Trial Included, AI-Enabled (405T6A)
-
PROFESSIONAL COLOR PRINTS: FAST, VIBRANT PRINTS FOR DOCUMENTS AND FLYERS.
-
SMART AI FORMATTING: PERFECTLY FORMATTED PAGES, NO WASTED PAPER-EVERY PRINT MATTERS.
-
EASY CONNECTIVITY: RELIABLE DUAL-BAND WI-FI & MOBILE APP FOR SEAMLESS PRINTING.
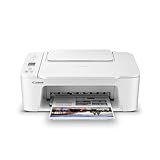
Canon PIXMA TS3720 Wireless All-in-One Printer for Basic Home Printing, White
- ALL-IN-ONE FUNCTIONALITY: PRINT, COPY, AND SCAN SEAMLESSLY AT HOME.
- FAST PRINT SPEEDS: QUICKLY PRINT UP TO 7.7 B/W PAGES PER MINUTE!
- EASY SETUP & WIRELESS CONNECT: GET STARTED IN MINUTES-NO COMPUTER NEEDED!
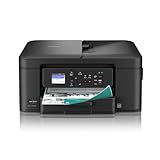
Brother Work Smart 1360 Wireless Color Inkjet All-in-One Printer with Automatic Duplex Printing and 1.8” Color Display | Includes Refresh Subscription Trial(1) (MFC-J1360DW) (Uses LC501 Series Inks)
- ALL-IN-ONE PRINTER: PRINT, COPY, SCAN FOR HOME AND OFFICE NEEDS.
- EASY CLOUD APP INTEGRATION FOR SEAMLESS PRINTING AND SCANNING.
- FAST PRINTING SPEEDS WITH DUPLEX CAPABILITIES FOR HIGHER PRODUCTIVITY.
![Canon Megatank G3290 All-in-One Wireless Supertank [Megatank] Printer | Print, Copy Scan | Mobile Printing |2.7" LCD Color Touchscreen | Auto Duplex](https://cdn.blogweb.me/1/41_S9v_If_HBSL_SL_160_bcb60da6c7.jpg)
Canon Megatank G3290 All-in-One Wireless Supertank [Megatank] Printer | Print, Copy Scan | Mobile Printing |2.7" LCD Color Touchscreen | Auto Duplex
- ENJOY UP TO 2 YEARS OF INK INCLUDED FOR HASSLE-FREE PRINTING!
- PRINT 6,000 B&W OR 7,700 COLOR PAGES WITH ONE INK SET!
- SAVE UP TO $1,000 ON INK COSTS WITH OUR EFFICIENT TECHNOLOGY!
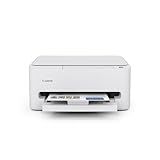
Canon PIXMA TS4320 Wireless Color Inkjet Printer for Duplex Printing, White – Cost Efficient Home Printer with Copier/Scanner, Compact Design, Easy Setup, 1 Year Limited Warranty
- AFFORDABLE ALL-IN-ONE PRINTER PERFECT FOR HOME AND HYBRID USE!
- ENJOY VIBRANT PRINTS WITH A HYBRID INK SYSTEM FOR SHARP QUALITY.
- EFFORTLESS SETUP AND WIRELESS CONNECTIVITY FOR SEAMLESS USE.
HP Envy 6555e Wireless All-in-One Color Inkjet Printer, Portobello, Print, scan, copy, Duplex printing Best-for-home, 3 month Instant Ink trial included, AI-enabled (714N5A)
- EFFORTLESS PRINTING WITH HP AI-PERFECT LAYOUTS, NO WASTED PAPER!
- RELIABLE DUAL-BAND WI-FI FOR SEAMLESS WIRELESS PRINTING ANYWHERE.
- INSTANT INK DELIVERY SERVICE-NEVER RUN OUT OF INK AGAIN!
Canon PIXMA TR160 Wireless Portable Printer, 50-Sheet Paper Tray and 1.44" Display
-
PRINT ANYWHERE: ULTRA-LIGHTWEIGHT DESIGN FOR ULTIMATE PORTABILITY.
-
VIBRANT QUALITY: HIGH-QUALITY PRINTS WITH SHARP TEXT AND RICH COLORS.
-
EASY CONNECTIVITY: PRINT EFFORTLESSLY VIA APPS OR WIRELESS DIRECT MODE.
To add a printer to a wireless network, follow these steps:
- Make sure your printer and wireless router are turned on and functioning properly.
- Check if your printer has built-in Wi-Fi functionality or if it requires a wireless adapter. If it requires an adapter, connect it to the printer's USB port.
- On your computer, open the Control Panel and navigate to the "Devices and Printers" or "Printers and Scanners" section.
- Click on the "Add a printer" or "Add a device" button.
- Windows will start searching for printers on the network. Wait for the search to complete.
- If the printer you want to add is detected, select it from the list and click "Next." If the printer is not detected, make sure it is within range of your wireless network and click the "The printer that I want isn't listed" option. Follow the instructions to manually enter the printer's IP address or hostname.
- Windows will start installing the necessary drivers for the printer. Wait for the installation to complete.
- Once the installation is finished, you will be prompted to set the printer as the default printer. Choose "Yes" or "No" according to your preference.
- Click "Finish" to complete the setup process.
- Test the printer by printing a document or webpage to ensure it is working correctly.
Note: The steps may vary slightly depending on your operating system and printer model, so refer to the printer's manual or manufacturer's website for more specific instructions.
What is the process for adding a wireless printer on a Mac?
To add a wireless printer on a Mac, follow these steps:
- Ensure that your printer is connected to the same Wi-Fi network as your Mac. And make sure the printer is turned on and in a ready state.
- On your Mac, click on the Apple menu in the top-left corner and select "System Preferences".
- In the System Preferences window, click on "Printers & Scanners" (or "Print & Fax", depending on your macOS version).
- Click on the '+' (plus) button present on the left pane, below the list of printers.
- Mac will then search for available printers. If the printer you want to add is listed, simply select it from the list and click on the "Add" button. Skip to step 8.
- If your printer is not automatically detected, click on "IP" at the top of the window to manually enter the printer's IP address.
- Enter the IP address of your printer in the "Address" field, and macOS should automatically detect the printer protocol and driver. If not, you may need to manually select it from the "Protocol" and "Use" drop-down menus.
- Once the printer is selected, click on the "Add" button to add it to your Mac.
- Your printer should now be successfully added. You can set it as the default printer or customize any other printer settings as desired.
Now, you should be able to print wirelessly from your Mac to the newly added printer.
How to configure a printer for wireless networking?
To configure a printer for wireless networking, follow these steps:
- Ensure that your printer supports wireless connectivity. Look for a wireless icon or Wi-Fi label on the printer itself or refer to the printer's user manual.
- Place the printer within range of your Wi-Fi network. Keep in mind that walls and other obstacles can affect wireless signal strength, so try to place the printer in a location where it can receive a strong signal.
- Connect the printer to a power source and turn it on.
- On your computer or mobile device, go to the settings or control panel.
- Access the Wi-Fi settings and search for available networks. Locate your Wi-Fi network and select it.
- If your network is password-protected, enter the network passphrase or password. Ensure you enter the correct details.
- After connecting to the Wi-Fi network, open your web browser.
- Type the printer's IP address into the browser's address bar and press Enter. The IP address may be found in the printer's user manual or by printing a network configuration page from the printer.
- The printer's embedded web server should now open in your browser. Navigate through the settings until you find the wireless setup or network setup options.
- In the wireless setup section, select your Wi-Fi network from the list of available networks. Enter the network password if prompted.
- Save the settings and allow the printer to establish a connection with the Wi-Fi network.
- Once updated, disconnect the printer from your computer or mobile device and restart the printer.
- Test the wireless connectivity by printing a document or running a printer diagnostic.
Your printer should now be successfully configured for wireless networking. Make sure to check the printer's user manual for specific instructions related to your printer model, as the steps may vary slightly.
How can I manage multiple printers connected to a wireless network?
To manage multiple printers connected to a wireless network, you can follow these steps:
- Ensure that all the printers are connected to the same wireless network.
- Install the necessary drivers and software for each printer on the computers you want to print from.
- Set a unique name or label for each printer to easily identify them in the network.
- Configure the printers' settings, such as quality, paper size, etc., according to your preferences.
- Use the printer management software provided by the printer manufacturer or a network management tool to monitor and control the printers.
- Schedule regular maintenance tasks like cleaning, calibration, and firmware updates for each printer to keep them running optimally.
- If available, use a print server or network printer to centralize print management, making it easier to control and distribute print jobs to different printers.
- Consider setting up print rules or access controls to restrict print usage, manage print quotas, or enforce security policies.
- Regularly check for software updates or firmware upgrades for your printers to ensure compatibility and access the latest features and security fixes.
- Train users on how to select the correct printer, troubleshoot basic print issues, and follow printing best practices to minimize problems and maximize efficiency.
By effectively managing the printers connected to your wireless network, you can streamline printing operations, enhance productivity, and reduce downtime.
What are the steps for adding a printer to a wireless network?
- Ensure that your printer is compatible with wireless connectivity. Look for the Wi-Fi logo or consult the printer's manual to confirm.
- Place the printer within range of your wireless network. Make sure it is not too far from the router to ensure a stable connection.
- Turn on the printer and navigate to its settings or network setup menu. The specific steps may vary based on the printer model, so refer to the manual if necessary.
- Connect the printer to your Wi-Fi network. Look for options like "Wireless Setup Wizard" or "Wi-Fi Setup" on the printer's menu. Select your Wi-Fi network from the available list and enter the password if prompted.
- Wait for the printer to establish a connection with the network. This may take a few moments as the printer tries to connect to your Wi-Fi.
- Verify the connection. You can print a network configuration page or test page from the printer's menu to check if it successfully connected to your wireless network.
- Install the printer on your computer. On your computer, go to "Settings" or "Control Panel" and select "Printers" or "Devices and Printers." Click on "Add a Printer" or "Add Device" and select your printer from the list of available devices. Follow the on-screen instructions to complete the installation.
- Test the printer. Print a test page or any document to confirm that the printer is now connected and working properly on the wireless network.
How do I connect a printer to a wireless network using WPS?
To connect a printer to a wireless network using Wi-Fi Protected Setup (WPS), follow these steps:
- Ensure that your printer supports WPS. Check the printer's user manual or the manufacturer's website for compatibility information.
- Place the printer within range of your Wi-Fi router.
- Power on your printer and navigate to its settings or setup menu. This can usually be accessed through the printer's control panel or a touchscreen interface.
- Look for the WPS setup option in the printer’s menu. The location of this option may vary depending on the printer model.
- On your Wi-Fi router, locate the WPS button. This button is typically labeled with “WPS” and is often located on the back or side of the router. If you can't find the WPS button, consult your router's user manual.
- Press the WPS button on the router and immediately press the corresponding WPS button on the printer. The icons or lights on the printer's control panel should indicate that the connection process has started.
- Wait for a few seconds while the printer establishes a wireless connection with the router. This may take up to a minute, so be patient.
- Once the printer successfully connects to the Wi-Fi network, it should display a confirmation message or indicator light.
- Test the wireless connection by printing a test page or document from a connected device, such as a computer or smartphone. Make sure the device is also connected to the same wireless network.
Note: If your printer does not have a WPS button, it may have alternative methods for setting up a wireless connection, such as using the printer's control panel or a software wizard on a computer.
If you encounter any difficulties or require more specific instructions, refer to your printer's user manual or contact the manufacturer's customer support for assistance.
How can I set up a wireless printer connection?
To set up a wireless printer connection, you can follow these general steps:
- Check compatibility: Ensure that your printer and computer/device support wireless connections. Consult the printer's manual or visit the manufacturer's website for specific instructions.
- Connect the printer to your Wi-Fi network: Access your printer's settings menu and select the option for wireless setup or network configuration. Choose your Wi-Fi network from the available list and enter the password if prompted. Once connected, the printer will obtain an IP address from the network.
- Install printer drivers: Install the necessary printer drivers on your computer/device if you haven't already done so. These drivers can usually be downloaded from the manufacturer's website. Make sure to select the correct drivers compatible with your operating system.
- Add the printer on your computer: Go to your computer's settings or control panel, and navigate to the "Printers" or "Devices" section. Click on "Add a printer" or "Add a device" and select the option to install a wireless or network printer. Your computer will search for available printers. When your printer's name appears, select it and follow any prompts to complete the installation.
- Test the connection: Print a test page or document to ensure that your printer is functioning properly over the wireless connection.
- Configure other devices (optional): If you have additional devices like smartphones or tablets, you can usually connect them to the printer using the same Wi-Fi network. Install the printer's app on your device, and follow the instructions provided to connect and print wirelessly.
Note: The specific steps may vary slightly depending on the make and model of the printer and computer/device you are using. It is recommended to refer to the instruction manual or the manufacturer's website for detailed instructions tailored to your specific equipment.