Best Wireless Print Security Tools to Buy in July 2026
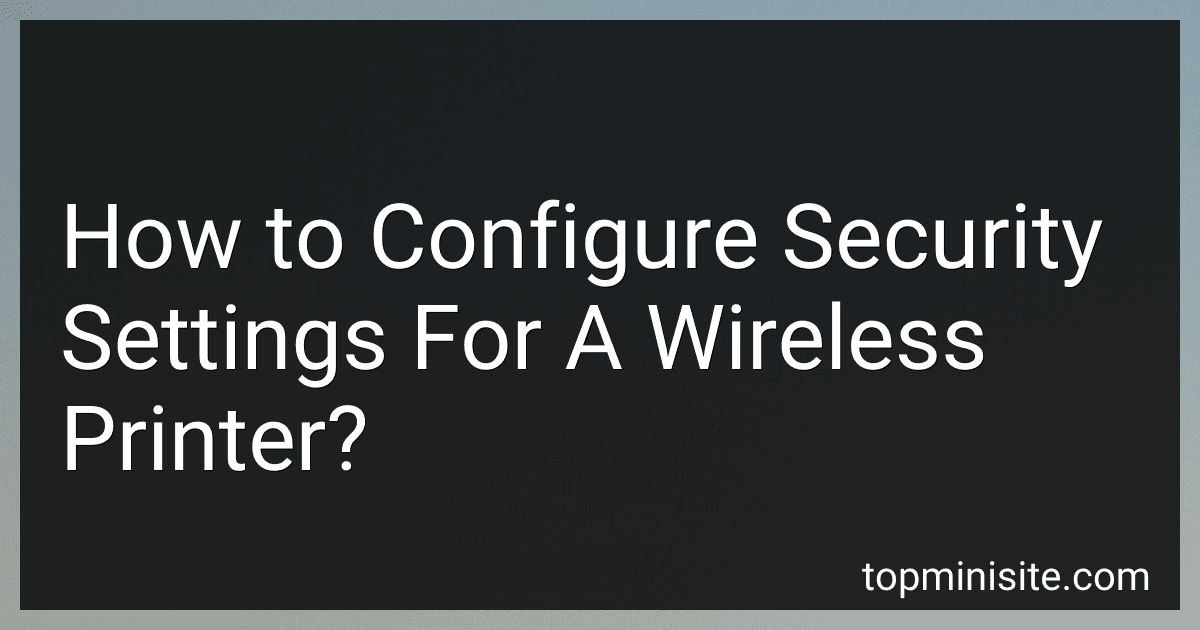
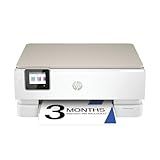
HP DeskJet 2827e Wireless All-in-One Color Inkjet Printer, Scanner, Copier, Best-for-Home, 3 Month Instant Ink Trial Included, AI-Enabled (6W7F5A)
- FAST PRINTING: 5.5 PPM COLOR & 7.5 PPM BLACK FOR QUICK TASKS.
- PRECISE LAYOUTS: HP AI ENSURES FLAWLESS PRINTS WITHOUT WASTED PAGES.
- EASY MOBILE ACCESS: PRINT & SCAN FROM SMARTPHONES USING HP APP.


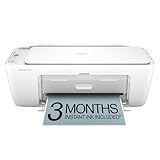
HP OfficeJet Pro 8125e Wireless All-in-One Color Inkjet Printer, Print, scan, Copy, ADF, Duplex Printing Best-for-Home Office, 3 Month Instant Ink Trial Included, AI-Enabled (405T6A)
- ACHIEVE PROFESSIONAL-QUALITY COLOR PRINTS AT FAST SPEEDS (10 PPM COLOR).
- CUT PRINTING COSTS WITH 3 MONTHS OF INSTANT INK UPON HP+ ACTIVATION.
- SECURE YOUR DOCUMENTS AND NETWORK WITH HP WOLF ESSENTIAL SECURITY.
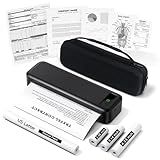
Portable Printers Wireless for Travel, Inkless Thermal Printer, A285M Small Bluetooth Mobile Printer Support 8.5" X 11" Letter & A4 Thermal Paper, Compatible with Phone Laptop for Home Office Receipt
-
COMPACT & LIGHTWEIGHT: WEIGHS JUST 1.5LB FOR EFFORTLESS TRAVEL.
-
INKLESS TECHNOLOGY: SAVE COSTS WITH NO INK OR TONER NEEDED.
-
WIRELESS PRINTING: CONNECT VIA BLUETOOTH FOR HASSLE-FREE PRINTING.
HP Envy Inspire 7255e Wireless Color Inkjet Printer, Print, scan, copy, Easy setup, Mobile printing, Best-for-home, 3 month Instant Ink trial included, AI-enabled (1W2Y9A)
-
HIGH-QUALITY PRINTS: VIBRANT BORDERLESS PHOTOS IN VARIOUS SIZES!
-
SEAMLESS WIRELESS SETUP: EASY MOBILE PRINTING FROM ANY DEVICE!
-
3 MONTHS OF INSTANT INK: HASSLE-FREE INK DELIVERY TO YOUR DOOR!
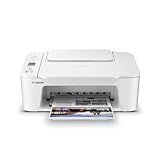
Canon PIXMA TS3720 Wireless All-in-One Printer for Basic Home Printing, White
-
ALL-IN-ONE FUNCTIONALITY: PRINT, COPY, AND SCAN FOR ULTIMATE CONVENIENCE.
-
FAST PRINT SPEEDS: GET BLACK/WHITE PRINTS IN JUST 7.7 PPM, COLOR IN 4 PPM!
-
EFFORTLESS MOBILE PRINTING: EASILY PRINT FROM SMARTPHONES AND TABLETS!
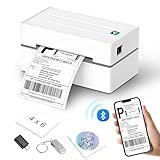
Anycash Bluetooth Thermal Label Printer, Wireless 4x6 Shipping Label Printers for Small Business, Compatible with Android&iOS and Windows, Address Label Printer for Amazon, Ebay, Shopify, Etsy, USPS
- SEAMLESS BLUETOOTH CONNECTIVITY FOR IOS & ANDROID
- FAST 180MM/S PRINTING WITH NO EXPENSIVE INK NEEDED
- COMPATIBLE WITH MAJOR PLATFORMS LIKE AMAZON, EBAY & MORE
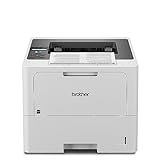
Brother Professional Laser Printer with High-Speed 50 ppm Output, Advanced Security Features, and Wireless Networking for Business, Monochrome Printing with Duplex Capability (HL-6210DW)
- 50 PPM OUTPUT: BOOST PRODUCTIVITY WITH RAPID HIGH-VOLUME PRINTING SPEEDS.
- 520-SHEET CAPACITY: MANAGE LARGE JOBS EFFORTLESSLY WITH EXPANDABLE TRAYS.
- ADVANCED CONNECTIVITY: SIMPLIFY PRINTER SHARING WITH SEAMLESS NETWORK INTEGRATION.
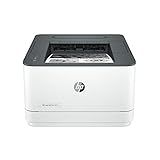
HP Laserjet Pro 3001dw Wireless Black & White Printer, Best-for-Office (3G65OF)
- HIGH-SPEED PRINTING: ACHIEVE 35 PAGES/MINUTE FOR EFFICIENCY.
- VERSATILE CONNECTIVITY: PRINT FROM ANY DEVICE, ANYWHERE, WIRELESSLY.
- ROBUST DATA SECURITY: SAFEGUARD INFO WITH HP WOLF PRO SECURITY FEATURES.
Portable Printers Wireless for Travel, A285M Bluetooth Inkless Thermal Printer Support 8.5" X 11" US Letter, Mobile Printer for Phone Laptop, with Case & 4 Rolls Thermal Paper, for Home Office Receipt
- COMPACT & LIGHTWEIGHT: TRAVEL-FRIENDLY DESIGN AT JUST 1.5 LBS!
- INKLESS TECHNOLOGY: SAVE ON INK WITH HASSLE-FREE THERMAL PRINTING.
- VERSATILE COMPATIBILITY: PRINT FROM ANY DEVICE WITH BLUETOOTH OR USB!
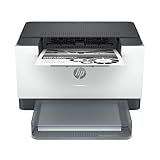
HP LaserJet M209dw Wireless Printer, Print, Fast speeds, Easy setup, Mobile printing,Best-for-small teams
- FASTEST TWO-SIDED PRINTING: UP TO 30 PAGES PER MINUTE EFFICIENCY.
- EFFORTLESS MOBILE PRINTING FROM ANY DEVICE, ANYTIME, ANYWHERE.
- STRONG SECURITY FEATURES SAFEGUARD YOUR PRINTER FROM THREATS.
To configure the security settings for a wireless printer, follow these steps:
- Access the printer's control panel: Locate the control panel on the printer, usually positioned on the front or top. Turn on the printer and navigate to the settings or setup menu.
- Connect to the printer's network: Ensure that your computer or mobile device is connected to the same Wi-Fi network that the printer uses. This allows you to access the printer's settings.
- Find the IP address: Print a network configuration page or find the IP address of the printer through its control panel. Note down the IP address as you'll need it later.
- Access the printer's web interface: Open a web browser on your computer or mobile device, and in the address bar, type the IP address of the printer that you acquired earlier. Press Enter to access the printer's web interface.
- Enter login credentials: Many printers require a username and password to log in. If you haven't set up any, consult the printer's manual or use default login details such as "admin" for both username and password.
- Locate the security settings: Once logged in, navigate through the printer's web interface to find the security settings. Depending on the printer model and brand, these settings may be labeled as "Wireless Settings," "Security," or something similar.
- Choose a security protocol: Look for the available security protocols and choose the one that suits your needs. The most commonly used protocol is WPA2 (Wi-Fi Protected Access II) as it offers strong encryption. Select the desired security protocol and save the changes.
- Set a password: To secure your wireless printer, set a strong password for it. This prevents unauthorized access and ensures only authorized devices can connect to the printer.
- Enable other security features: Some printers may offer additional security features such as MAC (Media Access Control) address filtering or IP address filtering. You can configure these features to allow only specific devices to connect to the printer.
- Save and apply the settings: Once you have configured the security settings, save and apply the changes. The printer will implement the new settings and restart if necessary.
By configuring the security settings for your wireless printer, you can enhance its protection against unauthorized access and ensure that only trusted devices can connect and print wirelessly.
How to access the settings interface of a wireless printer?
The process to access the settings interface of a wireless printer may vary slightly depending on the brand and model of the printer. However, here are the general steps to access the settings interface:
- Check that your printer is connected to the same Wi-Fi network as your computer or mobile device.
- Open a web browser (such as Google Chrome, Mozilla Firefox, or Microsoft Edge) on your computer or mobile device.
- In the address bar of the web browser, type the IP address of your printer. You can usually find the IP address by checking the printer's manual or by printing a network configuration page.
- Press Enter or Go to load the printer's web interface.
- You will be presented with the printer's settings interface, which may vary based on the printer model. Here, you can access various settings related to the wireless connection, network configuration, print quality, security, and more.
- Navigate through the different tabs and settings to make any desired changes or adjustments.
- Once you have made the necessary changes, remember to save the settings before exiting the interface.
Note: In some cases, the printer may offer a dedicated software or mobile app for accessing and managing its settings. In such cases, you can download and install the relevant software or app from the printer manufacturer's website or app store.
What is user access control and how to set it up on a wireless printer?
User access control refers to the process of restricting or allowing access to certain resources or devices based on the individual user's identity or privileges. It helps enhance security by regulating who can use or access specific functionalities or devices.
To set up user access control on a wireless printer, follow these general steps:
- Access the printer's administration console: Open a web browser on a computer that is connected to the same network as the printer, and enter the printer's IP address in the address bar. This will allow you to access the printer's settings.
- Log in to the printer's admin console: Enter the username and password provided by the printer manufacturer or set during the initial setup process. If you haven't changed the login credentials, you can usually find the default information in the printer's manual or documentation.
- Navigate to the user access control settings: Look for a section or tab related to user access control, security, permissions, or similar options within the printer's administration console. The exact location and options may vary depending on the printer model and manufacturer.
- Enable user access control: Once you have located the appropriate settings page, enable the user access control feature. This may involve flipping a switch, checking a box, or selecting a feature from a dropdown menu.
- Establish user accounts: Set up user accounts by adding individual usernames, passwords, and specific access permissions for each user. These permissions could include printing, scanning, document management, or other functionalities based on your printer's capabilities.
- Customize access permissions: Determine and assign different access levels or permissions for each user based on their specific requirements or roles. For example, a manager might have access to all printer functions, while a regular employee may only be able to print.
- Save and apply settings: After configuring the desired user access control settings, save and apply the changes within the printer's administration console. This will activate the user access control feature on the printer.
Keep in mind that the exact steps and options to set up user access control might differ based on the specific make and model of your wireless printer. It's advisable to refer to your printer's documentation or contact the manufacturer's support for detailed instructions tailored to your device.
How to update the firmware of a wireless printer for improved security?
To update the firmware of a wireless printer for improved security, follow these steps:
- Identify the printer model: Check the printer documentation or the manufacturer's website to find the exact model number of your wireless printer.
- Download the latest firmware: Visit the manufacturer's website and locate the support or downloads section. Search for your printer model and look for the latest firmware update file. Download this file to your computer.
- Connect the printer to the network: Ensure that your printer is connected to the same Wi-Fi network as your computer. If it is not already connected, refer to the printer's manual for instructions on how to set up a wireless connection.
- Access the printer's firmware update settings: On your computer, open a web browser and enter the IP address of the printer. This IP address can usually be found by printing a network configuration page from the printer. Alternatively, you may need to access the printer's settings menu to find the IP address.
- Log in to the printer settings: Once you enter the printer's IP address in the web browser, you will be prompted to enter login credentials. This varies depending on the printer model, but you may need to enter a username and password. If you don't know the credentials, check the printer's manual or consult the manufacturer's website.
- Locate the firmware update section: Inside the printer's settings, look for a section related to firmware, updates, or maintenance. The exact location will depend on the printer's interface, so refer to the user manual or manufacturer's website if needed.
- Upload and install the firmware update: In the firmware update section, click on the option to browse or select the firmware update file that you downloaded earlier. Once selected, initiate the firmware update process. Follow any on-screen instructions provided by the printer to complete the update.
- Wait for the update to finish: The printer will now begin the firmware update process, which may take a few minutes. Do not turn off the printer or interrupt the update during this time.
- Verify the firmware update: After the update completes, the printer may restart or reboot automatically. Once the printer is back online, check the printer settings or documentation to ensure that the firmware version has been successfully updated.
By regularly updating your printer's firmware, you can take advantage of security patches, bug fixes, and feature enhancements provided by the manufacturer.
How to hide the SSID of a wireless printer's network?
To hide the SSID of a wireless printer's network, you need to access the printer's settings through its web interface. Here are general steps to do so, although some printers might have slightly different processes:
- Make sure your printer is connected to your computer or the same network.
- Open a web browser and type the IP address of your printer in the address bar. The IP address can usually be found in the printer's documentation or by checking your computer's network settings.
- A login page for the printer's web interface will appear. Enter the login credentials if prompted. If you don't know the login credentials, check the printer's manual or search for the default login details online.
- Once logged in, navigate to the wireless settings or Wi-Fi settings section of the web interface. This section may have different names, depending on the printer model.
- Look for an option to disable or hide the SSID. It may be labeled as "SSID Broadcast," "Network Visibility," "Wireless Network Name," or similar. Check the printer's manual or help documentation if you're having trouble finding this setting.
- Disable or uncheck the option to broadcast the SSID. Save the changes before exiting the web interface.
Now, your printer's wireless network should be hidden, and it won't appear in the list of available networks on other devices. Keep in mind that after hiding the SSID, you will need to manually enter the network name (SSID) when connecting your devices to the printer's network.
How to restrict printing access based on user accounts on a wireless printer?
To restrict printing access based on user accounts on a wireless printer, follow these steps:
- Check if your wireless printer supports user account restrictions. Some printers have built-in features for managing access rights based on user accounts and authentication.
- Connect your printer to a wireless network and ensure that it is fully operational.
- Access the printer's settings or control panel. This can usually be done by typing the printer's IP address into a web browser or accessing the printer's settings directly using the control panel on the printer itself.
- Locate the user account settings or security settings in the printer's settings menu. This may be labeled as "Access Controls," "Security," or similar.
- Enable user account restrictions if not already enabled. This may involve selecting a user authentication method such as PIN code, password, or user ID.
- Create user accounts for each individual who requires printing access. Assign a unique identification method (PIN code, password, etc.) to each user account.
- Specify the printing permissions for each user account. You can set permissions to allow or restrict printing activities such as color printing, duplex printing, or the number of pages that can be printed.
- Save the settings and exit the printer's control panel or settings menu.
- Test the user account restrictions by attempting to print from a device connected to the same wireless network. You should be prompted to enter your user account details before being able to print.
By following these steps, you should be able to restrict printing access on your wireless printer based on user accounts, thus adding an additional layer of security and control.
How to set up a virtual private network (VPN) for a wireless printer?
To set up a virtual private network (VPN) for a wireless printer, follow these steps:
- Determine the type of VPN you want to use: There are different types of VPN protocols like OpenVPN, IKEv2, or L2TP/IPSec. Research and choose the most suitable option for your needs.
- Choose a VPN service provider: Sign up for a VPN service that supports the chosen protocol. Look for providers that offer good speeds, security features, and have servers in locations you need.
- Install VPN software: Download and install the VPN software provided by your chosen VPN service on the device you plan to use as the VPN gateway, such as your computer.
- Configure VPN software: Open the VPN software and configure the settings according to the instructions provided by your VPN service. Enter the server address, login credentials, and select the desired protocol.
- Connect to VPN: Connect to the VPN server through the VPN app or software. Once connected, your device's internet traffic will be encrypted and routed through the VPN server.
- Set up networking on your printer: Access the printer's settings menu through its control panel or web interface. Look for the networking or wireless section and select the option to configure the network settings.
- Set up a static IP address: Assign a static IP address to your printer so that it has a consistent and identifiable address on your network. This will ensure that you can connect to it reliably even when using the VPN.
- Configure VPN on the printer: In the printer's network settings, find the option to set up a VPN connection. Enter the VPN server address and any other required details, such as login credentials, VPN protocol, and encryption settings.
- Test the connection: Make sure the printer is connected to the same network as your VPN gateway device. Use a device connected to the VPN to test if you can access the printer and print documents. If successful, you have set up a VPN for your wireless printer.
Note: The exact steps may vary depending on the specific printer model and VPN service provider. It's recommended to consult the user manual or support documentation for your printer and VPN software for more detailed instructions.