
Best Wireless Printers to Buy in July 2026

HP DeskJet 2827e Wireless All-in-One Color Inkjet Printer, Scanner, Copier, Best-for-Home, 3 Month Instant Ink Trial Included, AI-Enabled (6W7F5A)
- PRINT WITH PRECISION: HP AI ENSURES PERFECTLY FORMATTED DOCUMENTS.
- SEAMLESS WIRELESS PRINTING: RELIABLE WI-FI CONNECTS EFFORTLESSLY.
- SAVE ON INK COSTS: ENJOY 3 MONTHS OF FREE INSTANT INK DELIVERY.


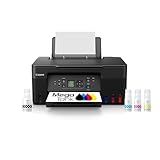
Canon MegaTank G3270 All-in-One Wireless Inkjet Printer. for Home Use, Print, Scan and Copy
- WIRELESS PRINT/COPY/SCAN FOR ULTIMATE CONVENIENCE AND FLEXIBILITY.
- UP TO 2 YEARS OF INK INCLUDED - SAVE TIME AND MONEY!
- PRINT 6,000 B&W OR 7,700 COLOR PAGES WITH ONE INK SET.
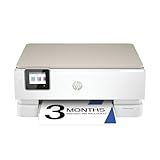
HP Envy Inspire 7255e Wireless Color Inkjet Printer, Print, scan, copy, Easy setup, Mobile printing, Best-for-home, 3 month Instant Ink trial included, AI-enabled (1W2Y9A)
- AI-DRIVEN PRECISION: PERFECTLY FORMATTED PRINTS, NO WASTED PAGES!
- VIBRANT PHOTOS: STUNNING TRUE-TO-LIFE PRINTS WITH CUSTOM OPTIONS!
- INSTANT INK SUBSCRIPTION: NEVER RUN OUT OF INK WITH DOORSTEP DELIVERY!
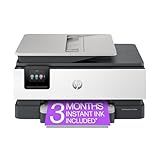
HP OfficeJet Pro 8125e Wireless All-in-One Color Inkjet Printer, Print, scan, Copy, ADF, Duplex Printing Best-for-Home Office, 3 Month Instant Ink Trial Included, AI-Enabled (405T6A)
-
PROFESSIONAL-QUALITY PRINTS AT SPEEDS UP TO 20 PPM FOR EFFICIENCY.
-
HP AI TECHNOLOGY ENSURES PERFECTLY FORMATTED, WASTE-FREE PRINTING.
-
ENJOY 3 MONTHS OF INSTANT INK DELIVERY WITH HP+ ACTIVATION!
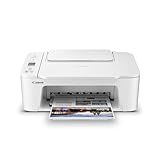
Canon PIXMA TS3720 Wireless All-in-One Printer for Basic Home Printing, White
-
ALL-IN-ONE FUNCTIONALITY: PRINT, COPY, AND SCAN WITH EASE!
-
FAST PRINT SPEEDS: ENJOY 7.7 PPM BLACK AND 4 PPM COLOR PRINTING.
-
EASY MOBILE PRINTING: EFFORTLESSLY PRINT FROM YOUR DEVICES VIA WI-FI.
Brother Work Smart 1360 Wireless Color Inkjet All-in-One Printer with Automatic Duplex Printing and 1.8” Color Display | Includes Refresh Subscription Trial(1) (MFC-J1360DW) (Uses LC501 Series Inks)
- ALL-IN-ONE PRINTER: PRINT, COPY, AND SCAN FOR HOME AND OFFICE NEEDS.
- EASY CLOUD ACCESS: PRINT AND SCAN VIA GOOGLE DRIVE, DROPBOX, AND MORE.
- FAST, EFFICIENT: DUPLEX PRINTING AND MOBILE CONTROL FOR SEAMLESS USE.
![Canon Megatank G3290 All-in-One Wireless Supertank [Megatank] Printer | Print, Copy Scan | Mobile Printing |2.7" LCD Color Touchscreen | Auto Duplex](https://cdn.blogweb.me/1/41_S9v_If_HBSL_SL_160_627cdfeda4.jpg)
Canon Megatank G3290 All-in-One Wireless Supertank [Megatank] Printer | Print, Copy Scan | Mobile Printing |2.7" LCD Color Touchscreen | Auto Duplex
- PRINT UP TO 6,000 BLACK & WHITE PAGES WITH INCLUDED INKS!
- SAVE UP TO $1,000 ON INK COSTS OVER 2 YEARS.
- ENJOY WIRELESS PRINT/COPY/SCAN WITH USER-FRIENDLY TOUCHSCREEN!
Canon PIXMA TS4320 Wireless Color Inkjet Printer for Duplex Printing, White – Cost Efficient Home Printer with Copier/Scanner, Compact Design, Easy Setup, 1 Year Limited Warranty
- AFFORDABLE ALL-IN-ONE PRINTER FOR HOME AND HYBRID WORK NEEDS.
- IMPRESSIVE PRINT QUALITY WITH VIBRANT COLORS AND SHARP TEXT.
- EASY SETUP & RELIABLE WIRELESS PRINTING FROM ANY DEVICE.
HP Envy 6555e Wireless All-in-One Color Inkjet Printer, Portobello, Print, scan, copy, Duplex printing Best-for-home, 3 month Instant Ink trial included, AI-enabled (714N5A)
-
HIGH-QUALITY COLOR PRINTS & FAST SPEEDS: 7 PPM COLOR, 10 PPM BLACK!
-
HP AI ENSURES PERFECTLY FORMATTED PRINTS WITH NO WASTED PAGES!
-
ENJOY 3 MONTHS OF FREE INK DELIVERY WITH INSTANT INK SUBSCRIPTION!
Troubleshooting wireless printer connectivity issues can be a frustrating experience, but it is essential in ensuring that your printer works seamlessly. Here are some steps you can follow to troubleshoot wireless printer connectivity issues:
- Verify printer and network status: Ensure that your printer is turned on and connected to the same Wi-Fi network as your computer. Check if the printer displays any error messages or issues related to connectivity.
- Restart devices: Restart your printer, computer, and router. Sometimes, a simple restart can resolve connectivity problems.
- Check your Wi-Fi signal: Make sure your printer is within range of your Wi-Fi network and that the signal strength is strong enough. Move the printer closer to the router if needed.
- Disable and enable Wi-Fi: Turn off the Wi-Fi on your printer and then turn it back on. This will force your printer to reconnect to the network.
- Update printer firmware: Check if there are any firmware updates available for your printer model. Updating the firmware can address compatibility issues and improve connectivity.
- Verify network settings: Ensure that your printer's IP address matches the IP range of your Wi-Fi network. You can access the printer settings through its control panel or by using its software on your computer.
- Configure firewall and antivirus settings: Verify that your firewall or antivirus software is not blocking the printer's communication with your computer. Temporarily disable these settings to see if it resolves the issue.
- Reinstall printer drivers: Uninstall the printer drivers from your computer and reinstall them. This will ensure you have the latest and compatible drivers.
- Check printing queues: Make sure that there are no pending print jobs or errors in the printing queue. Cancel any pending print jobs to prevent any conflicts.
- Reset network settings: If all else fails, you can try resetting the printer's network settings to default. However, be aware that you will need to set up the printer again as if it were new.
Remember, these steps may vary slightly depending on your printer model and software. It is always recommended to refer to the user manual or visit the manufacturer's website for specific troubleshooting instructions related to your printer.
How to check if the printer and computer are connected to the same network?
To check if the printer and computer are connected to the same network, you can follow these steps:
- Ensure that both your printer and computer are turned on and connected to the network.
- On your computer, go to the Control Panel (or Settings) and open the "Devices and Printers" (or "Printers & Scanners") option.
- Look for the printer in the list of available printers. If the printer is listed, it means that it is connected to the same network as your computer. If the printer is not listed, there are a few things you can try: Make sure the printer is connected to the same Wi-Fi network as your computer. You may need to check the printer's Wi-Fi settings or consult the printer's documentation for instructions on connecting it to your network. Restart both the printer and computer to refresh the network connection. If the printer is connected via a USB cable to the computer, it is not dependent on network connectivity and should be visible in the list.
- Alternatively, you can try printing a test page or document to the printer: Open a document or file that you want to print. Click on "File" and select "Print" or use the keyboard shortcut (e.g., Ctrl+P). In the print settings, choose the printer that you want to use. Click "Print" and check if the printer responds and starts printing. If the printer successfully prints the document, it is connected to the same network as your computer. If it does not print or fails to connect, verify the network connections or consult the printer's manual or manufacturer's support.
Please note that the steps may vary slightly depending on your operating system and printer model.
What is the correct way to set up a wireless printer?
To set up a wireless printer, follow these steps:
- Place the printer within range of your wireless network. Make sure it is close enough to receive a strong signal.
- Connect the printer to a power source and turn it on.
- On your computer or mobile device, go to the network settings and locate your wireless network. Connect to the same Wi-Fi network that your printer will be connected to.
- Install the printer drivers on your computer. Most printers come with a CD that contains the necessary drivers. If you don't have a CD drive, you can usually download the drivers from the printer manufacturer's website.
- Open the printer's setup or control panel. Look for a wireless setup or network setup option. Select it and follow the on-screen prompts to connect the printer to your Wi-Fi network. You may need to enter your Wi-Fi network name (SSID) and password.
- Once the printer is connected to the network, your computer should automatically detect it. Go to your computer's settings or control panel, find the printers section, and add the newly connected printer.
- Test the printer by printing a test page or document to ensure it is working properly.
Note: The exact steps may vary slightly depending on the printer model and operating system you are using. It's recommended to refer to the printer's instruction manual or the manufacturer's website for precise instructions specific to your printer.
What are some common error messages related to wireless printer connectivity issues?
Some common error messages related to wireless printer connectivity issues include:
- "Printer not found": This error message indicates that the printer could not be detected or is not available on the network.
- "Connection failed" or "Unable to connect to the printer": This message suggests that there is a problem establishing a connection between the computer or device and the printer.
- "Offline printer": This error message occurs when the printer is not set as the default printer or is disconnected from the network.
- "Printer not responding": This message implies that the printer is not responding to the computer's commands or requests.
- "Network or wireless connection lost": This error message occurs when the network connection between the printer and computer is lost, hindering communication.
- "Authentication failed" or "Incorrect password": This error message indicates that the entered password for the wireless network is either incorrect or does not match the printer's settings.
- "IP address conflict": This message suggests that there is an IP address conflict between the printer and another device on the network, resulting in connection issues.
- "Out of range" or "Signal too weak": This error message implies that the wireless signal strength between the printer and the router is too weak for a stable connection.
- "Firewall or security settings blocking printer": This message occurs when the printer's communication is being blocked by the firewall or security settings on the computer or device.
- "Driver not installed or outdated": This error message suggests that the printer driver is not installed correctly or is outdated, resulting in connectivity problems.
What are the troubleshooting steps for wireless printer connectivity on a Windows PC?
- Check Wi-Fi Connectivity: Ensure that your PC is connected to the Wi-Fi network correctly. Verify that the router is working properly, and no connectivity issues exist.
- Restart Printer and PC: Turn off the printer and your PC. Then, turn them back on after a few seconds. Sometimes, a simple restart can resolve connectivity problems.
- Verify Printer Settings: Make sure your printer is in the wireless setup mode and connected to the same Wi-Fi network as your PC. Refer to the printer's manual for guidance or use the printer's control panel to check the wireless settings.
- Check Printer Driver: Ensure that the printer driver is installed and up to date on your Windows PC. Visit the printer manufacturer's website to download the latest driver if needed.
- Restart Print Spooler Service: The Print Spooler service manages print jobs and can sometimes cause connectivity issues. Restart it by opening the Run dialog (Win + R), typing "services.msc," finding the Print Spooler service, right-clicking on it, and selecting "Restart."
- Disable Firewall/Antivirus: Temporarily disable any installed firewall or antivirus software on your PC to determine if they are causing the connectivity problem. If disabling the software resolves the issue, configure it to permit printer communication.
- Remove and Re-add Printer: Open the "Settings" app on your Windows PC, go to "Devices" -> "Printers & scanners," select the wireless printer, and click on "Remove device." Then, add the printer back by clicking on "Add a printer or scanner" and follow the on-screen instructions.
- Update Windows: Ensure that your Windows operating system is up to date. Go to "Settings" -> "Update & Security" -> "Windows Update" and click on "Check for updates." Install any pending updates and restart your PC.
- Temporarily Connect via USB: If all else fails, try connecting the printer to your PC using a USB cable. This can help troubleshoot if the issue lies with the wireless connection itself.
- Contact Support: If the problem persists, contact the printer manufacturer's support or consult their online support forums for further assistance specific to your printer model and Windows version.