
Best Logitech Mouse Accessories to Buy in July 2026
![HOTLINEGAMES [Grip Upgrade] 2.0 Plus Mouse Anti Slip Grip Tape Compatible with Logitech G PRO Wireless Gaming Mouse Skins,Sweat Resistant,Cut to Fit,Easy Apply,Pro Performance Upgrade](https://cdn.blogweb.me/1/513f_Ik_A_Xgr_L_SL_160_db5d060642.jpg)
HOTLINEGAMES [Grip Upgrade] 2.0 Plus Mouse Anti Slip Grip Tape Compatible with Logitech G PRO Wireless Gaming Mouse Skins,Sweat Resistant,Cut to Fit,Easy Apply,Pro Performance Upgrade
-
ENHANCED GRIP FOR CONSISTENT GAMING, EVEN WITH DRY HANDS.
-
DIAMOND TEXTURE DESIGN BOOSTS FRICTION, PREVENTING SLIPS IN GAMEPLAY.
-
EASY APPLICATION WITH PRECISE FIT FOR RAZER MICE, NO MESS GUARANTEED.
![HOTLINEGAMES [Grip Upgrade] 2.0 Plus Mouse Anti Slip Grip Tape Compatible with Logitech G PRO Wireless Gaming Mouse Skins,Sweat Resistant,Cut to Fit,Easy Apply,Pro Performance Upgrade](https://cdn.flashpost.app/flashpost-banner/brands/amazon.png)
![HOTLINEGAMES [Grip Upgrade] 2.0 Plus Mouse Anti Slip Grip Tape Compatible with Logitech G PRO Wireless Gaming Mouse Skins,Sweat Resistant,Cut to Fit,Easy Apply,Pro Performance Upgrade](https://cdn.flashpost.app/flashpost-banner/brands/amazon_dark.png)

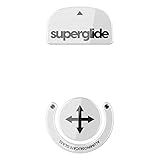
Superglide Glass Mouse Skates for Logitech G Pro X Superlight 2 (Type-C, Black) - Polished Smooth Glide, Durable Gaming Mouse Feet
- EXPERIENCE UNMATCHED SPEED AND GLIDE WITH MICRO-SURFACED TEXTURE.
- DURABLE TEMPERED GLASS ENSURES LASTING PERFORMANCE FOR GAMERS.
- POLISHED ROUND EDGE DELIVERS THE SMOOTHEST GLIDE IN EVERY GAME.
Superglide Glass Mouse Skates for Logitech G Pro X Superlight (Type-S, White) - Ultra Smooth Glide, Polished Round Edge, Compatible with G Pro Superlight 2, Superlight Mouse Skates
-
ULTRA-FAST GLIDE WITH ALUMINOSILICATE GLASS FOR PRECISE TRACKING.
-
DURABLE TEMPERED GLASS: LASTS LONGER THAN STANDARD PTFE FEET.
-
ESPORTS GRADE DESIGN ENSURES TOP-TIER PERFORMANCE FOR GAMERS.
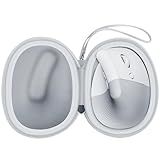
ANKHOH Case for Logitech Lift Vertical Ergonomic Mouse, Travel Carrying Holder Storage Box for Logi Wireless Bluetooth Cordless Upright Mouse - Bag Only (Grey)
- TAILOR-MADE CASE FOR LOGITECH LIFT VERTICAL MOUSE-PERFECT FIT!
- DURABLE, WATERPROOF DESIGN PROTECTS AGAINST SCRATCHES AND DAMAGE.
- LIGHTWEIGHT AND PORTABLE WITH A DETACHABLE HANDLE FOR EASY CARRYING.
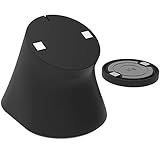
Soarking Charging Dock for Logitech Computer Mouse G Pro X Superlight 2/1,G502/G502X/G502X Plus Lightspeed,G703,G903 Lightspeed and G PRO Computer Mice Powerplay Charging System
-
SEAMLESS CHARGING: ALWAYS READY FOR ACTION, JUST DOCK AND GO!
-
COMPACT DESIGN: SPACE-SAVING SIZE FITS EASILY ON ANY DESK OR NIGHTSTAND.
-
STABLE & SECURE: NON-SLIP BASE ENSURES YOUR DOCK STAYS IN PLACE!
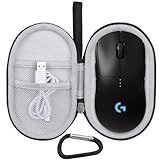
Mouse Case for Logitech G PRO X Superlight 2/2 DEX/ 2c for X Superlight for Pro 2 Lightspeed Wireless/Wired Gaming Mouse (Case Only) (Black-Grey)
-
PERFECT FIT: TAILORED FOR LOGITECH G PRO SERIES MICE-MAXIMUM PROTECTION!
-
PREMIUM PROTECTION: HARD MATERIAL ENSURES SHOCK AND WATER RESISTANCE.
-
CONVENIENT STORAGE: INCLUDES MESH POCKET AND EASY-ACCESS ZIPPER FOR ACCESSORIES.
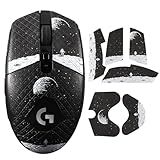
IMMOENUC Mouse Grip Tape Sticker for Logitech G305/G304/G203/G102 Wireless Mouse Anti Slip Skin Self-Adhesive,Pre-Cut,Sweat-Resistant Game Mice Accessories(Earth Pattern)
- ENHANCE GRIP AND STABILITY WITH OUR ANTI-SLIP DESIGN TECHNOLOGY.
- EASY, PRECISE INSTALLATION; TAILORED FOR YOUR LOGITECH MOUSE MODELS.
- DURABLE, RESIDUE-FREE ADHESIVE ENSURES A CLEAN AND COMFY GRIP.
![[Grip Upgrade] HOTLINEGAMES 2.0 Plus Mouse Anti Slip Grip Tape Compatible with Logitech MX Master 3 / 3S Gaming Mouse Skins, Sweat Resistant, Cut to Fit, Easy to Apply, Professional Mice Upgrade](https://cdn.blogweb.me/1/5175_H4_G_Whs_L_SL_160_a0d7715779.jpg)
[Grip Upgrade] HOTLINEGAMES 2.0 Plus Mouse Anti Slip Grip Tape Compatible with Logitech MX Master 3 / 3S Gaming Mouse Skins, Sweat Resistant, Cut to Fit, Easy to Apply, Professional Mice Upgrade
- ULTIMATE GRIP: DIAMOND TEXTURE ENHANCES FRICTION FOR PRECISE CONTROL.
- TAILORED FIT: PRE-CUT DESIGN PERFECTLY FITS LOGITECH MX MASTER 3/3S.
- EASY REMOVAL: 3M ADHESIVE LEAVES NO RESIDUE, HASSLE-FREE INSTALLATION!
To customize buttons on a Logitech mouse, you can follow these steps:
- Install Logitech Options software: Visit the official Logitech website and download the Logitech Options software. Install it on your computer and ensure that your mouse is connected.
- Launch Logitech Options: Once installed, open the Logitech Options software. It will automatically detect your connected Logitech mouse.
- Select your mouse: In the Logitech Options window, you will see the available Logitech devices listed. Choose your mouse from the list.
- Button customization: Look for the customization options specific to your mouse model. It could be listed under "Mouse," "Buttons," or a similar category in the software.
- Select a button to customize: Within the customization menu, you will see a visual representation of your mouse. Click on the button you want to customize. This will bring up more options.
- Assign a function: From the available options, choose the desired function you want to assign to the selected button. It can be a predetermined action or a keystroke. You can also program mouse buttons to launch specific applications, control media playback, or perform various other tasks.
- Repeat for other buttons: If you want to customize other buttons, repeat steps 5 and 6 for each button individually.
- Adjust sensitivity or speed: Additionally, you may have settings to adjust DPI (dots per inch) sensitivity or cursor speed. These options assist in customizing the mouse's overall performance.
- Application-specific settings: Some Logitech mice allow you to create application-specific button configurations. This means you can have different button functions assigned for specific applications. Explore the software further to set up these preferences.
- Save settings: Once you are satisfied with your button configurations, click on the "Apply" or "Save" button to save the changes. The Logitech Options software will store the customized settings within the mouse's onboard memory, so they remain even if you connect the mouse to different computers.
Remember that the customization options might vary depending on the model of your Logitech mouse and the version of the Logitech Options software.
What is the difference between onboard memory and software profiles for Logitech mouse customization?
Onboard memory and software profiles are two different methods used for customizing Logitech mouse settings.
Onboard memory refers to the internal storage present in some Logitech mice. These mice have the ability to save customized settings directly into their built-in memory. This means that once the settings are programmed onto the mouse, they can be used on any computer without the need for software or driver installation. Onboard memory allows for a plug-and-play experience and is particularly useful for gamers who often switch between different computers or use their mouse on multiple systems.
Software profiles, on the other hand, rely on Logitech's software, such as Logitech Gaming Software or Logitech G HUB. These programs provide a graphical user interface (GUI) that allows users to configure various settings for their Logitech mouse, including DPI sensitivity, button assignments, lighting effects, and macros. With software profiles, users can create and save multiple profiles specific to their needs or preferences. These profiles are stored on the computer or cloud, and once the software is installed, users can switch between profiles easily depending on their requirements.
In summary, onboard memory stores customized mouse settings directly on the mouse itself, allowing for a plug-and-play experience across different computers. Software profiles, on the other hand, rely on Logitech's software to save and manage customized settings on the computer, providing more flexibility and options for customization.
How to create a custom profile for your Logitech mouse?
To create a custom profile for your Logitech mouse, you can follow these steps:
- Install Logitech G HUB software: Visit the Logitech support website and download the Logitech G HUB software specific to your mouse model. Install the software on your computer.
- Launch Logitech G HUB: Open the Logitech G HUB software on your computer.
- Connect your mouse: Connect your Logitech mouse to your computer using the supplied USB cable or via wireless connectivity.
- Select your mouse: Once connected, the software should detect your mouse automatically. Click on your mouse model to select it.
- Access profiles: Look for a tab or section in the software that allows you to access profiles. The name and location of this tab may vary depending on the software version, but it is typically labeled "Profiles" or "Customize".
- Create a new profile: Click on the "New Profile" or similar button to create a new profile. Give your profile a name that reflects its purpose or the game/application you will use it for.
- Customize settings: Once the profile is created, you can start customizing various settings for your mouse. This can include adjusting DPI sensitivity levels, changing button assignments, configuring lighting effects, macros, and more. Explore the available options and adjust them according to your preferences.
- Apply the profile: After making the desired changes, click on the "Apply" or "Save" button to save the profile and make it active.
- Switch profiles: If you create multiple profiles, you can switch between them as needed. Typically, there are options to manually switch profiles from within the software or automatically switch based on the game/application being used.
Note: The specific steps and options may vary depending on the Logitech mouse model and the version of Logitech G HUB software you are using. The provided steps serve as a general guide, so make sure to refer to the software's user manual or Logitech support for detailed instructions related to your specific mouse model.
How to reset all customization settings to default on a Logitech mouse?
The specific steps to reset customization settings on a Logitech mouse may vary slightly depending on the model. However, you can generally follow these steps:
- Install the Logitech Options software (if you have not already) on your computer. You can download it from the Logitech website.
- Open the Logitech Options software and locate your mouse in the connected devices list.
- Click on your mouse to reveal the customization settings.
- Look for a "Restore Defaults" or "Reset to Defaults" option. This option is usually found in the settings or customization menu.
- Click on the "Restore Defaults" or "Reset to Defaults" button.
- Confirm the reset action when prompted.
- Close the Logitech Options software and restart your computer.
After following these steps, your Logitech mouse should be restored to its default customization settings.
What is button chording and how to enable it on a Logitech mouse?
Button chording, also known as button combining or macro buttons, is a feature that allows you to combine multiple button presses into a single action on your Logitech mouse. This can be useful for gaming or increasing productivity by assigning complex commands or shortcuts to a single button press.
To enable button chording on a Logitech mouse, you need to use Logitech's software called Logitech G HUB. Here's how you can do it:
- Download and install Logitech G HUB from the official Logitech website. Make sure you have a compatible Logitech gaming mouse.
- Launch Logitech G HUB and connect your Logitech mouse to your computer.
- Once your mouse is detected, click on it in the G HUB window to access its settings.
- In the left-hand menu, look for "Commands" or "Assignments." The name may vary depending on the version of G HUB you're using.
- In the Commands or Assignments section, find the button you want to enable button chording on and click on it.
- In the button's settings, look for an option called "Multi-Key" or "Macro." Enable that option.
- Once enabled, you may see a text box or a recording button. If it's a text box, you can manually enter the combination of keys you want to chord. If it's a recording button, you can press it and then press the combination of keys on your keyboard or click other mouse buttons.
- After entering or recording the button chording combination, save the settings.
Now, whenever you press the assigned button on your Logitech mouse, it should trigger the button chording combination you set up.
Keep in mind that the exact steps may vary depending on the Logitech mouse model and the version of Logitech G HUB. However, the general concept remains the same.
What is the sensitivity adjustment feature in Logitech mouse customization?
The sensitivity adjustment feature in Logitech mouse customization allows users to adjust the sensitivity or speed of the mouse cursor. This feature is particularly useful for tasks that require precise movements, such as gaming or graphic design. By tweaking the sensitivity settings, users can customize the mouse's tracking speed to their preference, making it more responsive or slower depending on their needs.
What is the Purpose of customizing buttons on a Logitech mouse?
The purpose of customizing buttons on a Logitech mouse is to enhance productivity, efficiency, and user experience. It allows the user to assign different functions or actions to the buttons, such as shortcuts, macros, media controls, or application-specific commands, based on their personal preferences or specific needs.
By customizing buttons, users can achieve quicker access to frequently used functions, streamline workflow, and reduce the reliance on keyboard inputs. This can be particularly useful in gaming, design, programming, and other professional tasks where repetitive actions or quick access to complex commands is required.
Overall, customizing buttons on a Logitech mouse provides users with a personalized and efficient way to interact with their computer and applications, ultimately improving productivity and user satisfaction.