Best Wireless Printers to Buy in July 2026
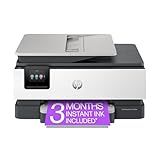
HP DeskJet 2827e Wireless All-in-One Color Inkjet Printer, Scanner, Copier, Best-for-Home, 3 Month Instant Ink Trial Included, AI-Enabled (6W7F5A)
- PRINT HIGH-QUALITY DOCUMENTS UP TO 7.5 PPM WITH HP AI PRECISION.
- ENJOY WIRELESS PRINTING AND EFFORTLESS MOBILE ACCESS WITH THE HP APP.
- GET 3 MONTHS OF INSTANT INK DELIVERED TO YOUR DOOR-HASSLE-FREE!


Canon MegaTank G3270 All-in-One Wireless Inkjet Printer. for Home Use, Print, Scan and Copy
- PRINT/COPY/SCAN WIRELESSLY FOR ULTIMATE CONVENIENCE!
- UP TO 6,000 BLACK & WHITE / 7,700 COLOR PAGES PER INK SET!
- SAVE UP TO $1,000 ON INK COSTS-PRINT MORE, SPEND LESS!
HP Envy Inspire 7255e Wireless Color Inkjet Printer, Print, scan, copy, Easy setup, Mobile printing, Best-for-home, 3 month Instant Ink trial included, AI-enabled (1W2Y9A)
-
VIBRANT PHOTOS & PRINTS: ENJOY TRUE-TO-LIFE COLOR AND BORDERLESS PRINTS.
-
SMART PRINTING FEATURES: EFFORTLESS WIRELESS SETUP AND CUSTOMIZABLE SHORTCUTS.
-
INSTANT INK SUBSCRIPTION: GET 3 MONTHS OF INK DELIVERED BEFORE YOU RUN OUT!
HP OfficeJet Pro 8125e Wireless All-in-One Color Inkjet Printer, Print, scan, Copy, ADF, Duplex Printing Best-for-Home Office, 3 Month Instant Ink Trial Included, AI-Enabled (405T6A)
-
PRINT PRO-QUALITY DOCUMENTS FAST: 20 PPM BLACK, 10 PPM COLOR SPEEDS.
-
SMART HP AI ENSURES PERFECTLY FORMATTED PRINTS EVERY TIME.
-
ENJOY 3 MONTHS OF INSTANT INK FOR HASSLE-FREE PRINTING.
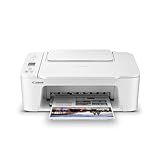
Canon PIXMA TS3720 Wireless All-in-One Printer for Basic Home Printing, White
- ALL-IN-ONE FUNCTIONALITY: PRINT, COPY, AND SCAN AT YOUR FINGERTIPS.
- FAST PRINTS: 7.7 BLACK/4 COLOR PPM FOR QUICK, EFFICIENT OUTPUT.
- EASY WIRELESS SETUP: CONNECT IN MINUTES AND PRINT FROM ANY DEVICE.
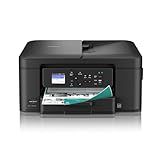
Brother Work Smart 1360 Wireless Color Inkjet All-in-One Printer with Automatic Duplex Printing and 1.8” Color Display | Includes Refresh Subscription Trial(1) (MFC-J1360DW) (Uses LC501 Series Inks)
- ALL-IN-ONE PRINTER: PRINT, COPY, AND SCAN FOR HOME AND OFFICE USE.
- EFFORTLESS CLOUD PRINTING: CONNECT TO GOOGLE DRIVE, DROPBOX, AND MORE.
- FAST AND EFFICIENT: DUPLEX PRINTING AND 20-SHEET ADF FOR HIGH PRODUCTIVITY.
![Canon Megatank G3290 All-in-One Wireless Supertank [Megatank] Printer | Print, Copy Scan | Mobile Printing |2.7" LCD Color Touchscreen | Auto Duplex](https://cdn.blogweb.me/1/41_S9v_If_HBSL_SL_160_e6110854f9.jpg)
Canon Megatank G3290 All-in-One Wireless Supertank [Megatank] Printer | Print, Copy Scan | Mobile Printing |2.7" LCD Color Touchscreen | Auto Duplex
- WIRELESS PRINT/COPY/SCAN - STREAMLINE YOUR WORKFLOW EFFORTLESSLY!
- UP TO 2 YEARS OF INK INCLUDED – CUT COSTS & SAVE TIME!
- PRINT 6,000 B/W & 7,700 COLOR PAGES – EXCEPTIONAL VALUE!
Adding a wireless printer to a MacBook involves a few simple steps. Here's a step-by-step guide on how to do it:
- Ensure that your wireless printer is properly set up and connected to your Wi-Fi network. Check the printer's manual for instructions on how to connect it to a wireless network.
- On your MacBook, click on the Apple menu located in the top-left corner of the screen.
- From the drop-down menu, choose "System Preferences."
- In the System Preferences window, click on the "Printers & Scanners" icon.
- In the Printers & Scanners window, click on the "+" button located at the bottom left to add a new printer.
- A list of available printers will appear. Look for your wireless printer in the list and select it.
- If your wireless printer is not listed, click on the "IP" tab at the top of the window. Enter the IP address of the printer manually and choose the proper communication protocol (such as "Internet Printing Protocol - IPP" or "Line Printer Daemon - LPD").
- After selecting your printer, macOS will automatically recognize the printer's driver and install it. If required, you might need to download and install the driver from the printer manufacturer's website.
- Once the printer is installed, click on the "Add" button to add the printer to your MacBook.
- Your wireless printer should now be successfully added to your MacBook. You can give it a test by opening any document or file and selecting the print option.
Remember to ensure that your MacBook and wireless printer are connected to the same Wi-Fi network for successful communication. If you encounter any issues, consult the printer's manual or the manufacturer's support website for troubleshooting guidance.
How to print wirelessly from a MacBook to a printer connected to another Mac device on the same network?
To print wirelessly from a MacBook to a printer connected to another Mac device on the same network, you can follow these steps:
- Ensure that both Mac devices are connected to the same Wi-Fi network.
- On the Mac that is connected to the printer, go to "System Preferences" from the Apple menu.
- In "System Preferences," click on "Printers & Scanners" or "Print & Fax," depending on the macOS version.
- Make sure the printer is turned on and connected to the Mac device.
- In the Printers & Scanners window, click the "+" button to add a printer.
- Choose your printer from the list of available printers and click "Add."
- Close the Printers & Scanners window.
Once the printer is set up on the Mac device connected to it, you can proceed to print wirelessly from your MacBook:
- Open the document or file you want to print on your MacBook.
- Go to "File" and select "Print" or use the Command + P shortcut.
- In the print dialog box that appears, select the printer you added earlier.
- Configure any necessary settings for your print job, such as the number of copies or page range.
- Click "Print" to send the print job wirelessly to the printer connected to the other Mac device.
The print job should now be sent and printed on the remote printer connected to the other Mac device on the same network.
How to install printer drivers on a MacBook for a wireless printer?
To install printer drivers for a wireless printer on a MacBook, follow these steps:
- Connect the printer to your Wi-Fi network by following the printer's instructions.
- Open the "System Preferences" on your MacBook by clicking on the Apple icon in the top-left corner of the screen and selecting "System Preferences."
- In the "System Preferences" window, click on "Printers & Scanners."
- Click on the "+" button on the left side of the window to add a new printer.
- Your MacBook will automatically search for available printers on the network. Select your wireless printer from the list of available printers and click "Add."
- If your printer is not automatically detected, click on the "IP" tab and enter the IP address of the printer manually. You can find the IP address of the printer by printing a network configuration page from the printer itself.
- Once you select your printer, you might be prompted to download and install the necessary printer drivers. Follow the on-screen instructions to download and install the drivers. If a printer driver is already available on your MacBook, it will be added automatically.
- After the drivers are installed, your printer should be successfully installed and ready to use.
- To test your printer, open any document or image and go to "File" -> "Print" to select your wireless printer and click on "Print."
Note: Some printer manufacturers provide additional software or apps that can enhance the functionality of the printer. You can check the manufacturer's website for any additional software or apps specific to your wireless printer model.
How to print using a wireless printer from the MacBook's built-in applications?
To print using a wireless printer from the MacBook's built-in applications, follow these steps:
- Make sure your wireless printer is set up and connected to the same Wi-Fi network as your MacBook.
- Open the document or file you want to print from one of the built-in applications such as Safari, Pages, Notes, etc.
- Click on the "File" menu in the top-left corner of the screen.
- From the dropdown menu, select the "Print" option. You can also use the shortcut "Command + P" to directly access the print dialog.
- The Print dialog window will appear, displaying various printing options.
- From the "Printer" drop-down menu, select your wireless printer. It should be listed if it is connected to the same network.
- Choose the desired print settings such as page orientation, number of copies, paper size, etc. You can adjust these settings according to your preferences.
- Click on the "Print" button to initiate the printing process.
- Monitor the printer to ensure the document is printed correctly.
By following these steps, you should be able to print wirelessly from the MacBook's built-in applications using a wireless printer.
What is the default security protocol used when adding a wireless printer to a MacBook?
The default security protocol used when adding a wireless printer to a MacBook is usually WPA2 (Wi-Fi Protected Access 2). WPA2 is a widely used security protocol that provides encryption and authentication for wireless networks, ensuring secure communication between devices.
How do I connect a wireless printer to my MacBook?
To connect a wireless printer to your MacBook, follow these steps:
- Make sure that your printer and MacBook are connected to the same wireless network.
- Turn on your printer and make sure it is in a ready state.
- On your MacBook, click on the Apple menu in the top-left corner and select "System Preferences."
- In System Preferences, click on "Printers & Scanners."
- Click the "+" button at the bottom-left corner of the printer list to add a new printer.
- Your MacBook will search for available printers on the network. Select your wireless printer from the list.
- If your printer is not listed, click on "Add Printer or Scanner" and follow the prompts to manually add your printer by specifying its IP address or other details.
- Follow the on-screen instructions to install the necessary drivers if prompted.
- Once the setup is complete, your wireless printer should be successfully connected to your MacBook.
Note: The steps may vary slightly depending on your macOS version and printer model. It is recommended to refer to the printer's manual or the manufacturer's website for specific instructions if needed.