Best Wireless Printers to Buy in July 2026
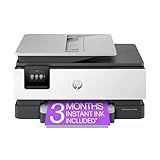
HP DeskJet 2827e Wireless All-in-One Color Inkjet Printer, Scanner, Copier, Best-for-Home, 3 Month Instant Ink Trial Included, AI-Enabled (6W7F5A)
- COMPACT DESIGN FITS ANY HOME, IDEAL FOR TO-DO LISTS AND LETTERS.
- WIRELESS PRINTING WITH RELIABLE WI-FI FOR HASSLE-FREE CONNECTIVITY.
- 3 MONTHS OF INSTANT INK DELIVERY-NEVER RUN OUT OF INK AGAIN!


Canon MegaTank G3270 All-in-One Wireless Inkjet Printer. for Home Use, Print, Scan and Copy
- WIRELESS PRINT, COPY, AND SCAN FOR SEAMLESS MULTITASKING.
- UP TO 2 YEARS OF INK INCLUDED-PRINT OVER 12,000 PAGES!
- SAVE UP TO $1,000 ON INK COSTS WITH EVERY PURCHASE.
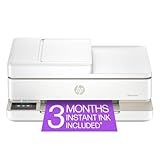
HP Envy Inspire 7255e Wireless Color Inkjet Printer, Print, scan, copy, Easy setup, Mobile printing, Best-for-home, 3 month Instant Ink trial included, AI-enabled (1W2Y9A)
-
VIBRANT PHOTOS: PRINT TRUE-TO-PHONE QUALITY PHOTOS AT HOME EFFORTLESSLY.
-
SMART PRINTING: HP AI ENSURES PERFECTLY FORMATTED PRINTS WITH NO WASTE.
-
CONVENIENT FEATURES: WIRELESS SETUP, MOBILE PRINTING, AND INSTANT INK SERVICE.
HP OfficeJet Pro 8125e Wireless All-in-One Color Inkjet Printer, Print, scan, Copy, ADF, Duplex Printing Best-for-Home Office, 3 Month Instant Ink Trial Included, AI-Enabled (405T6A)
- HIGH-SPEED PRINTING: UP TO 20 PPM BLACK, 10 PPM COLOR FOR EFFICIENCY.
- SMART FEATURES: HP AI OPTIMIZES LAYOUTS, REDUCING WASTE AND HASSLE.
- MOBILE PRINTING: EFFORTLESSLY PRINT VIA SMARTPHONE WITH THE HP APP.
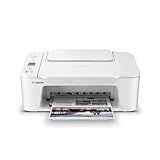
Canon PIXMA TS3720 Wireless All-in-One Printer for Basic Home Printing, White
-
ALL-IN-ONE FUNCTIONALITY: PRINT, COPY, SCAN FOR MAXIMUM VERSATILITY!
-
FAST PRINT SPEEDS: BLACK PAGES IN 7.7 PPM, COLOR IN 4 PPM!
-
EASY WIRELESS SETUP: CONNECT IN MINUTES TO PRINT FROM ANY DEVICE!
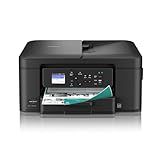
Brother Work Smart 1360 Wireless Color Inkjet All-in-One Printer with Automatic Duplex Printing and 1.8” Color Display | Includes Refresh Subscription Trial(1) (MFC-J1360DW) (Uses LC501 Series Inks)
- ALL-IN-ONE PRINTER: PRINT, COPY, SCAN FOR HOME AND OFFICE USE.
- EASY CLOUD PRINTING: CONNECT TO GOOGLE DRIVE, DROPBOX, AND MORE.
- FAST, PRODUCTIVE: DUPLEX PRINTING, ADF, AND MOBILE APP FOR CONTROL.
![Canon Megatank G3290 All-in-One Wireless Supertank [Megatank] Printer | Print, Copy Scan | Mobile Printing |2.7" LCD Color Touchscreen | Auto Duplex](https://cdn.blogweb.me/1/41_S9v_If_HBSL_SL_160_2a30ac3a63.jpg)
Canon Megatank G3290 All-in-One Wireless Supertank [Megatank] Printer | Print, Copy Scan | Mobile Printing |2.7" LCD Color Touchscreen | Auto Duplex
- ENJOY 2 YEARS OF INK INCLUDED-PRINT MORE, SAVE MORE!
- PRINT UP TO 7,700 COLOR PAGES-GET MORE VALUE FOR YOUR MONEY!
- USER-FRIENDLY 2.7” TOUCHSCREEN-NAVIGATE WITH EASE!
HP Envy 6555e Wireless All-in-One Color Inkjet Printer, Portobello, Print, scan, copy, Duplex printing Best-for-home, 3 month Instant Ink trial included, AI-enabled (714N5A)
- SEAMLESS WIRELESS PRINTING: DUAL-BAND WI-FI ENSURES RELIABLE CONNECTIONS.
- AI-ENHANCED PRECISION: PERFECTLY FORMATTED PRINTS WITHOUT WASTED PAGES.
- SUSTAINABLE DESIGN: MADE WITH 60% RECYCLED PLASTIC FOR AN ECO-FRIENDLY CHOICE.
Sharing a wireless printer on a network allows multiple devices to use the same printer wirelessly. Here's how you can do it:
- Connect the printer to the network: Ensure that your printer is connected to the same Wi-Fi network as the devices you want to print from. You may need to follow the printer's manual or on-screen instructions to connect it to the wireless network.
- Install printer software: Install the printer software on each device you want to print from. You can usually find the software on the manufacturer's website or on a CD that came with the printer.
- Add the printer: On each device, go to the Control Panel or Settings and find the "Printers and Scanners" or "Devices and Printers" section. Click on "Add a Printer" or "Add a Device" and let the computer search for available printers.
- Select the printer: Once the computer identifies the printer, select it from the list and click "Next" or "Finish" to complete the installation. Repeat this step for all devices you want to connect to the printer.
- Test the connection: To ensure everything is working correctly, try printing a test page from each device. If the test page successfully prints, the printer is now shared on the network.
Note: Some printers may have additional steps or settings depending on the brand and model. Always refer to the printer's manual or support documentation for specific instructions.
By following these steps, you can easily share a wireless printer on a network, allowing multiple devices to print wirelessly.
How to connect a wireless printer to a router?
To connect a wireless printer to a router, follow these steps:
- Ensure that your printer is within the range of your router's wireless network.
- Turn on your printer and make sure it is connected to a power source.
- Access the printer's settings or menu on the control panel (usually a physical button or touch screen).
- Look for the "Setup" or "Network" option and select it.
- Choose "Wireless Setup Wizard" or a similar option.
- The printer will begin scanning for available wireless networks. Select your router's network name (SSID) from the list of available networks.
- If prompted, enter the wireless network password. Make sure you enter it correctly.
- Follow the on-screen instructions to complete the wireless connection setup process.
- Once the printer is connected to your router, it should obtain an IP address automatically.
- Test the connection by printing a test page or document wirelessly from a device connected to the same network.
Note: The steps may slightly vary depending on the printer model and brand. It is recommended to consult the printer's user manual for specific instructions.
How to connect multiple computers to a shared wireless printer?
To connect multiple computers to a shared wireless printer, you can follow these steps:
- Ensure that the printer is set up and connected to the wireless network. Refer to the printer's user manual for specific instructions on how to do this.
- On each computer, ensure that Wi-Fi is turned on and connected to the same wireless network as the printer.
- Go to the Control Panel or System Preferences on each computer.
- Locate the "Printers" or "Print & Fax" option, and open it.
- Click on "Add Printer" or "Add device," depending on your operating system.
- Your computer should then search for available printers on the network. Select the shared wireless printer from the list.
- Follow the on-screen instructions to install the printer driver if prompted.
- Once the installation is complete, the shared wireless printer should be ready to use on that computer.
- Repeat the above steps on each computer you want to connect to the shared wireless printer.
Now all the connected computers should be able to print wirelessly to the shared printer.
How to check the ink or toner levels on a wireless printer?
The process for checking ink or toner levels on a wireless printer may vary slightly based on the printer model and operating system. However, here is a general guide on how to check ink or toner levels:
- Start by making sure your printer is connected to the wireless network and turned on.
- Open a web browser on your computer or mobile device that is connected to the same network as the printer.
- Enter the IP address of your printer into the browser's address bar. This IP address can usually be found in the printer's settings or by printing a configuration page.
- Press Enter to access the printer's web interface.
- Look for a "Supplies" or "Cartridge" tab or option in the printer's web interface. Click on it to access the ink or toner levels.
- The printer's web interface should display the current levels of each ink or toner cartridge. It may also show a visual representation or a percentage of ink remaining for each cartridge.
- Some printers may also allow you to receive email alerts or notifications when ink or toner levels are low. Check the printer's settings or web interface for such options.
If you are unable to access the printer's web interface, you can also check ink or toner levels using the printer software installed on your computer:
- Open the printer software on your computer. This software is usually installed during the printer setup process.
- Look for an option to check ink or toner levels. It is typically found in the maintenance or settings section of the software.
- Click on the option to check ink or toner levels, and the software will display the respective levels for each cartridge.
If you can't find the printer software or are unsure if it's installed, you can also check ink or toner levels through the printer's control panel display. Again, the process may vary depending on your printer model, but generally:
- On the printer's control panel, locate or press the "Setup" or "Menu" button.
- Look for the "Supplies" or "Ink Levels" option in the menu and select it.
- The printer's display will show the current ink or toner levels for each cartridge.
Note that some printers may require physically checking the ink or toner cartridges themselves. In this case, refer to the printer's user manual for instructions on how to access and check the levels.
How to troubleshoot wireless printer connectivity issues?
Here are some steps you can follow to troubleshoot wireless printer connectivity issues:
- Check the basics: Ensure that your printer is powered on and properly connected to a power source. Verify that the printer is connected to the same Wi-Fi network as the device you are trying to print from. Make sure there are no physical obstructions or interference that may disrupt the wireless signal.
- Restart devices: Restart both your printer and the device you are trying to print from (e.g., computer, smartphone, tablet). Sometimes, restarting the devices can resolve temporary connectivity issues.
- Check Wi-Fi signal strength: Move the printer closer to the wireless router or access point to improve the Wi-Fi signal strength. If possible, avoid placing the printer near devices that emit electromagnetic waves or interfere with the Wi-Fi signal.
- Verify printer settings: Access the printer settings menu and make sure the wireless connectivity is turned on. Ensure that the correct Wi-Fi network name (SSID) and password are entered in the printer settings.
- Update printer firmware/drivers: Check the manufacturer's website for any available firmware updates for your printer model. Similarly, ensure that you have updated printer drivers installed on the device you are printing from.
- Restart network equipment: Restart your wireless router or access point by unplugging it from the power source, waiting for a few seconds, and then plugging it back in. Allow all the devices connected to the network to reconnect.
- Reset network settings: If the above steps did not resolve the issue, try resetting the network settings on your printer and then set up the Wi-Fi connection again. This may involve accessing the printer's control panel or using the printer software on your computer.
- Check firewall or antivirus settings: Disable any firewall or antivirus software temporarily and try connecting to the printer again. If the issue is resolved, adjust the settings of these programs to allow printer communication.
- Consult the printer manufacturer's support: If you have followed all the steps above and the issue persists, reach out to the printer manufacturer's support team for further assistance. They may provide specific troubleshooting steps or offer solutions tailored to your printer model.
Keep in mind that these steps may vary slightly depending on your printer model and operating system.
How to set up a static IP address for a wireless printer?
To set up a static IP address for a wireless printer, you need to access the printer's configuration settings. The process may vary slightly depending on the make and model, but here are the general steps:
- Find the printer's IP address: Print a network setup page or configuration page from the printer. This page will display the current IP address of the printer.
- Access the printer's web interface: Open a web browser on a computer connected to the same network as the printer. Enter the IP address of the printer into the address bar and press Enter.
- Log in to the printer's web interface: Input the username and password for the printer. If you haven't set up a username and password before, consult the printer's manual or use default credentials that come with the device.
- Locate the network settings: Navigate to the network or TCP/IP settings in the printer's web interface. These settings control the printer's IP address.
- Assign a static IP address: Look for an option to configure a static IP address. Select this option and enter the desired IP address you wish to assign to the printer. Make sure the address you choose is within the same network range as your router's IP address.
- Confirm settings: Save the changes and wait for the printer to restart. Some printers require a reboot for the new static IP address to take effect.
After completing these steps, your wireless printer should have a static IP address that is fixed and unaffected by DHCP lease renewals. This allows for more consistent and reliable communication with the printer on your network.