
Best Logitech Gaming Mice for Button Remapping to Buy in July 2026
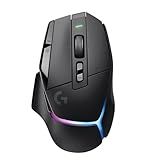
Logitech G502 X Plus Wireless Gaming Mouse - LIGHTSPEED Optical, LIGHTFORCE Switches, LIGHTSYNC RGB, HERO 25K Sensor for PC/Mac - Black
-
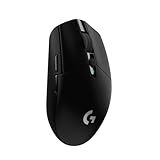
POWERPLAY COMPATIBLE: STAY CHARGED WHILE YOU GAME ENDLESSLY!
-
INNOVATIVE DESIGN: CHOOSE FROM SLEEK BLACK OR WHITE OPTIONS!
-
ADVANCED HERO 25K SENSOR: EXPERIENCE UNMATCHED PRECISION IN EVERY GAME!


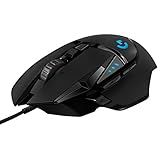
Logitech G502 HERO High Performance Wired Gaming Mouse, HERO 25K Sensor, 25,600 DPI, RGB, Adjustable Weights, 11 Buttons, On-Board Memory, PC/Mac
- FREE SOFTWARE UPGRADE: ENJOY ENHANCED HERO 25K SENSOR PERFORMANCE!
- PERSONALIZE YOUR SETUP: ADJUSTABLE WEIGHTS FOR PERFECT BALANCE AND FEEL.
- CUSTOM COMMANDS: 11 PROGRAMMABLE BUTTONS FOR TAILORED GAMING ACTIONS!
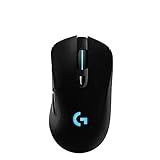
Logitech G703 Lightspeed Wireless Gaming Mouse W/Hero 25K Sensor, PowerPlay Compatible, Lightsync RGB, Lightweight 95G+10G Optional, 100-25, 600 DPI, Rubber Side Grips - Black
- EXPERIENCE 1:1 TRACKING & 100-25,600 DPI FOR UNBEATABLE PRECISION.
- ENJOY PRO-LEVEL LIGHTSPEED WIRELESS WITH 35-HOUR BATTERY LIFE.
- STAY CHARGED EFFORTLESSLY WITH POWERPLAY WIRELESS CHARGING SYSTEM.
Logitech G PRO X SUPERLIGHT Wireless Gaming Mouse, Ultra-Lightweight, HERO 25K Sensor, 25,600 DPI, 5 Programmable Buttons, Long Battery Life, Compatible with PC / Mac - Black
- DESIGNED WITH ESPORTS PROS FOR UNBEATABLE PERFORMANCE AND PRECISION.
- ULTRA-LIGHTWEIGHT DESIGN AT UNDER 63G FOR UNMATCHED AGILITY IN GAMING.
- FASTEST, MOST RELIABLE WIRELESS TECH WITH HERO SENSOR FOR SUPERIOR CONTROL.
Logitech G305 LIGHTSPEED Wireless Gaming Mouse, Hero 12K Sensor, 12,000 DPI, Lightweight, 6 Programmable Buttons, 250h Battery Life, On-Board Memory, PC/Mac - Black
-
ULTRA-LIGHTWEIGHT AT 99G FOR UNMATCHED GAMING AGILITY.
-
LAG-FREE LIGHTSPEED WIRELESS FOR PEAK COMPETITIVE PERFORMANCE.
-
PLAY 250 HOURS ON A SINGLE AA BATTERY-NO INTERRUPTIONS!
Logitech G305 LIGHTSPEED Wireless Gaming Mouse, Hero 12K Sensor, 12,000 DPI, Lightweight, 6 Programmable Buttons, 250h Battery Life, On-Board Memory, PC/Mac - White
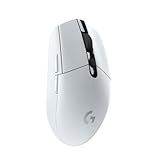
- ULTRA-LIGHTWEIGHT AT 99G FOR UNMATCHED MANEUVERABILITY IN GAMING.
- LAG-FREE LIGHTSPEED WIRELESS WITH 1MS REPORT RATE FOR TOP PERFORMANCE.
- 250 HOURS OF PLAYTIME ON A SINGLE AA BATTERY-GAME WITHOUT LIMITS!
Remapping buttons on a Logitech gaming mouse allows you to customize the functionality of each button according to your preference. The process typically involves using Logitech's software, such as Logitech Gaming Software (LGS) or Logitech G Hub, to change the default button assignments to different actions or macros. This gives you the flexibility to create a personalized setup that enhances your gaming experience.
To begin remapping buttons, first, make sure you have the relevant Logitech software installed on your computer. Connect your Logitech gaming mouse to your computer and open the software. It will then detect the mouse and display its configuration options.
Within the configuration interface, you can see the different buttons available on your gaming mouse. Select the button you want to remap, and a list of functions or commands will be presented. These options usually include predefined commands like "Left-click," "Right-click," "Scroll up," "Scroll down," or more advanced features like assigning keyboard shortcuts or macros.
Choose the desired function or command that you want to assign to the selected mouse button. You may also have the option to create and assign macros, which are sequences of actions that can be executed with a single button press.
Once you have selected and assigned the desired function or command to a button, save the changes, and the new button configuration will take effect immediately. You can repeat this process for all the buttons you wish to remap on your Logitech gaming mouse.
Additionally, some Logitech software allows the creation of profiles. Profiles let you create multiple button configurations for different games or applications. This way, you can switch between profiles quickly based on your needs without having to remap buttons each time.
Overall, remapping buttons on a Logitech gaming mouse offers a convenient way to tailor the mouse functionalities to your specific gaming or productivity requirements, enhancing your efficiency and comfort while using the mouse.
How to test the functionality of remapped buttons?
To test the functionality of remapped buttons, follow these steps:
- Identify the remapped buttons: Determine which buttons have been remapped and what their new functions are. Make sure you have a clear understanding of the changes.
- Verify the remapping settings: Check the remapping settings on the device or software being used. Ensure that the remapping has been correctly configured and saved.
- Test one button at a time: Start by testing each remapped button individually. Press the button and observe if it performs the expected action. Repeat the test multiple times to ensure consistency.
- Test combinations: If multiple buttons have been remapped to perform a certain function together, test these combinations. Press the buttons as required and see if the desired action is executed appropriately.
- Test in different scenarios: Test the remapped buttons in various scenarios or applications where they are intended to be used. This will help ensure that the remapping works across different contexts.
- Test under different conditions: Try testing the remapped buttons under different conditions. For example, test them with different devices, operating systems, or software versions, if applicable, to ensure compatibility.
- Document any issues: If any issues or malfunctions are encountered during the testing process, document them systematically. Take note of the specific button, action, and any patterns or inconsistencies observed.
- Retest after adjustments: If any issues are discovered, make adjustments to the remapping settings and retest the affected buttons to check if the problems have been resolved.
- Observe user experience: Finally, consider gathering feedback from users or conducting user testing to ensure that the remapped buttons are intuitive and provide a positive user experience.
By following these steps, you can systematically test the functionality of remapped buttons and ensure that they perform as intended.
How to switch between different button configurations?
To switch between different button configurations, you can follow these steps:
- Identify the buttons or settings you want to switch between. It could be different modes, profiles, or button presets.
- Determine if the device or software you are using supports button configuration switch. Some devices or software, especially gaming peripherals, may have built-in options to switch between different button configurations.
- If the device or software supports button configuration switch, find the corresponding settings or options. It may be available in the device's control panel, settings menu, or software interface.
- Once you have accessed the button configuration settings, look for an option to switch between different configurations. This could be labeled as "profiles," "modes," or "presets." Select the option that allows you to switch.
- If there are already pre-configured button configurations, select the desired one from the available list. Alternatively, you may have the option to create and customize your own configurations.
- After selecting the desired button configuration, save the changes and exit the settings.
- Test the new button configuration to ensure it works correctly. Check if the buttons and settings have switched according to your preference.
Some devices or software may offer additional features such as dedicated buttons, programmable macros, or keyboard shortcuts for quick switching between button configurations. Familiarize yourself with the specific functionalities and capabilities of your device/software to maximize its potential.
How to troubleshoot button remapping issues on a Logitech mouse?
If you're experiencing button remapping issues on a Logitech mouse, you can follow these troubleshooting steps:
- Check the Connection: Ensure that your Logitech mouse is properly connected to your computer. If it's a wireless mouse, try reconnecting the receiver or verifying that the Bluetooth connection is stable.
- Update Mouse Software: Make sure you have the latest software installed for your Logitech mouse. Visit the Logitech support website, locate your mouse model, and download the latest drivers and software. Install them on your computer.
- Configure Button Mapping: Launch the Logitech mouse software on your computer. It may be called Logitech Options or Logitech Gaming Software, depending on your mouse model. Look for the button customization options within the software.
- Reset Customizations: If you previously remapped buttons and are now experiencing issues, try resetting the default settings. Look for an option to restore factory defaults within the Logitech mouse software and apply it.
- Reboot Mouse: Some Logitech mice have a hardware reset option. Usually, this involves flipping the mouse over and finding a small reset button or switch. Refer to your mouse's user manual or check the Logitech support website for instructions specific to your model.
- Test with Another Computer: If possible, try using the Logitech mouse on another computer. This can help determine if the issue is specific to your computer or the mouse itself. If the mouse works fine on another computer, the issue might be with your computer's settings or incompatible software.
- Check for Conflict with Other Software: Certain software, such as gaming or screen capture applications, can interfere with Logitech mouse button mapping. Try closing any background applications and see if the button remapping works as intended.
- Contact Logitech Support: If none of the above steps help resolve the problem, reach out to Logitech support. Provide them with detailed information about the issue, including the model of your mouse and steps you have already taken. They can guide you through further troubleshooting or assist with a potential hardware replacement if needed.
What is the function of the "DPI Shift" button on a Logitech gaming mouse?
The "DPI Shift" button on a Logitech gaming mouse typically allows for the sudden adjustment of the mouse's sensitivity or DPI (dots per inch) setting, providing users with the ability to switch between different sensitivity levels on-the-fly. It allows gamers to quickly toggle between high and low DPI settings, giving them agile control over cursor movement speeds for various tasks or gaming scenarios. This can be especially useful when precise aiming or fast cursor movement is required in different gaming situations.
How to create and assign macros on Logitech gaming mice?
To create and assign macros on Logitech gaming mice, you can follow these steps:
- Download and install the Logitech Gaming Software (LGS) for your specific mouse model from the Logitech website.
- Open the Logitech Gaming Software on your computer. It should detect and display your connected Logitech gaming mouse.
- Select your mouse from the list of devices in the software window.
- Click on the "Command Editor" tab to access the macro creation and assignment feature.
- To create a new macro, click on the "+" icon or select "New Macro" from the drop-down menu.
- In the command editor window, you can assign a name to your macro and choose the desired button to which you want to assign the macro.
- Click on the "Record" button to begin recording your macro. Perform the sequence of actions or keystrokes you want to record. Once done, click on the "Stop" button to end the recording.
- To modify the recorded macro, you can use the "Edit" button to fine-tune the timing and add delays if necessary.
- Once the macro is created and customized, click on the "Assign G-Keys" option to assign the macro to a specific G key or button on your Logitech gaming mouse.
- A list of available G keys or buttons will be shown. Select the desired button, and from the drop-down list, choose the assigned macro.
- Click on "Apply" or "OK" to save the changes and apply the assigned macro to your Logitech gaming mouse.
Note: The steps may vary depending on the model of your Logitech gaming mouse and the version of Logitech Gaming Software you are using.