
Best Treadmill Belt Replacement Guides to Buy in July 2026

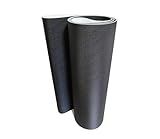
Treadmill Walking Belt (Running Belt) Compatible with Horizon T-101 Treadmill,Part Number 1000303302,1000101285,Model Number TM621,TM684,TM659,TM734
-
ENHANCED DURABILITY: TWO-LAYER DESIGN ENSURES LONG-LASTING PERFORMANCE.
-
SUPERIOR MATERIAL: PVC WITH 20% LOWER WEAR RATE FOR RELIABLE OPERATION.
-
WORRY-FREE WARRANTY: ONE-YEAR GUARANTEE FOR PEACE OF MIND AND SUPPORT.


Treadmill (Running Belt) Walking Belt Compatible with Golds Gym Trainer 430i,Model GGTL396173,GGTL396174
- DURABLE TWO-LAYER DESIGN ENSURES SAFETY AND LONGEVITY FOR USERS.
- HIGH-QUALITY PVC OFFERS SUPERIOR WEAR RESISTANCE AND SOFTER TEXTURE.
- ONE-YEAR WARRANTY AND RESPONSIVE SUPPORT GUARANTEE CUSTOMER SATISFACTION.
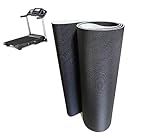
Treadmill (Running Belt) Walking Belt Compatible with Proform 505 CST,Part Number 262854,Model PFTL609101,PFTL609130,PFTL609131,PFTL609166
-
PREMIUM PVC MATERIAL: 20% LOWER WEAR RATE, SOFT TEXTURE FOR DURABILITY.
-
PRE-LUBRICATED FOR EASY SETUP: READY TO USE; JUST ADD OIL IF NEEDED.
-
ONE-YEAR WARRANTY: GUARANTEED SUPPORT FOR YOUR SATISFACTION AND PEACE OF MIND.
SHEJIO Treadmill Walking Belt (Running Belt) Compatible with Nordictrack T 6.5 S Treadmill,Model Number 250160,Part Number 263241
- DURABLE DESIGN: COMMERCIAL-QUALITY, TWO-LAYER BELT ENSURES LONGEVITY.
- PREMIUM MATERIAL: PVC CONSTRUCTION REDUCES WEAR BY UP TO 20%.
- ONE-YEAR WARRANTY: ENJOY PEACE OF MIND WITH OUR SATISFACTION GUARANTEE.

Treadmill (Running Belt) Walking Belt Compatible with Weslo Cadence G 5.9,Model WLTL296090,WLTL296130,WLTL296132
- DURABLE TWO-LAYER DESIGN: STURDY BELTS ENSURE LONGEVITY AND SAFETY.
- PREMIUM PVC MATERIAL: 20% LESS WEAR, SOFTER TEXTURE FOR BETTER PERFORMANCE.
- ONE-YEAR WARRANTY INCLUDED: HASSLE-FREE SUPPORT FOR TOTAL CUSTOMER SATISFACTION.

Treadmill (Running Belt) Walking Belt Compatible with Proform Crosswalk 395,397,Model 248330,248332,248430,248432,248433,248434
-
DURABLE DESIGN: COMMERCIAL-QUALITY, TWO-LAYER CONSTRUCTION FOR LONGEVITY.
-
HIGH-QUALITY MATERIAL: PVC THAT WEARS 20% LESS THAN TRADITIONAL BELTS.
-
WARRANTY INCLUDED: ONE-YEAR GUARANTEE FOR PEACE OF MIND AND SUPPORT.
Replacing the treadmill belt is a relatively simple process, but it requires some time and effort. Here are the steps to follow:
- Start by unplugging the treadmill and ensuring it is completely turned off.
- Locate the bolts or screws that secure the motor cover and remove them using the appropriate tools (usually a screwdriver or hex key).
- Carefully remove the motor cover, exposing the treadmill belt and deck.
- Inspect the condition of the belt. If it is worn, torn, or damaged, it needs to be replaced. Note any additional issues with the deck, such as excessive wear or unevenness.
- Use a wrench or socket to loosen the bolts/tension roller at the rear of the treadmill. This will release tension on the old belt.
- Once the tension is released, carefully remove the old belt from the treadmill, taking note of how it is attached and threaded through the machine.
- Clean the deck surface thoroughly, removing any dust or debris that may have accumulated.
- Take the new treadmill belt and thread it through the machine in the same path as the old belt. Pay attention to the correct alignment and ensure it is properly centered on the deck.
- Secure the tension roller/bolts at the rear of the treadmill, tightening them to achieve proper tension. Refer to the manufacturer's instructions for the recommended tension specifications based on your specific model.
- Carefully adjust the belt alignment, making sure it is centered and not too tight or too loose. A properly aligned belt should have a slight tension of about 2-3 inches when lifted at the center.
- Once the belt is properly aligned and tensioned, replace the motor cover and secure it with the bolts or screws.
- Plug in the treadmill, power it on, and give it a test run at low speed to ensure the belt is running smoothly and evenly.
- Finally, make any additional adjustments as needed.
It is important to note that these steps may vary slightly depending on the specific make and model of your treadmill. Consulting the manufacturer's manual or contacting their customer support can provide you with more precise instructions for your machine.
How to remove the treadmill deck for belt replacement?
The process of removing the treadmill deck for belt replacement will vary slightly depending on the specific treadmill model. However, below is a general guide that should help you with the process:
- Start by disconnecting the power cord from the outlet to ensure your safety.
- Locate the screws or bolts that secure the side rails to the deck. These are usually on the sides of the treadmill near the base. Use the appropriate tools, like a screwdriver or Allen wrench, to remove these fasteners and detach the side rails from the deck.
- Once the side rails are removed, locate the rear roller adjustment bolts. These are typically located at the back of the treadmill near the rear roller. Use a wrench to loosen these bolts, but do not remove them completely.
- Move to the front of the treadmill and locate the front roller adjustment bolts. These are usually at the front of the treadmill near the front roller. Again, use a wrench to loosen these bolts, but do not remove them completely.
- Now that both the front and rear roller adjustment bolts are loose, you can begin to lift the treadmill belt and deck assembly. With one hand on each side of the deck, lift it up and away from the frame. Take caution as the belt and deck assembly can be heavy, so it may be easier to have someone help you with this step.
- Once the deck is lifted, you can carefully slide it out from under the belt. Be sure to keep it level and avoid damaging any components or wiring.
With the deck removed, you can proceed with the belt replacement by following the manufacturer's instructions or seek professional help if necessary.
What factors can affect the lifespan of a treadmill belt?
Several factors can affect the lifespan of a treadmill belt. These include:
- Usage: The frequency and intensity of usage play a significant role in determining the lifespan of a treadmill belt. If the treadmill is used extensively, such as in a commercial gym setting, the belt may wear out more quickly compared to residential use.
- Maintenance: Regular cleaning and lubrication of the belt can help prevent excessive wear and prolong its lifespan. Neglecting maintenance can cause increased friction and heat build-up, leading to faster belt deterioration.
- User weight: The weight of the user can put additional strain on the treadmill belt. Heavier users may wear out the belt faster compared to lighter users.
- Running style: Running or walking with sharp starts or stops, excessive sideways motion, or dragging feet can cause extra friction and wear on the treadmill belt.
- Belt quality: The quality of the treadmill belt itself can impact its lifespan. Higher-quality belts made from durable materials are likely to last longer than cheaper, low-quality belts.
- Environment: The environment in which the treadmill is placed can affect the belt's lifespan. Dust, dirt, or moisture can accumulate on the belt, increasing friction and causing accelerated wear.
- Belt tension and alignment: Proper belt tension and alignment are crucial for the longevity of the treadmill belt. Incorrect tension or misalignment can lead to uneven wearing and premature deterioration.
- Incline and speed: Running at higher speeds or using the treadmill at higher inclines can put more stress on the belt, potentially shortening its lifespan.
- Belt thickness: Thicker treadmill belts tend to be more durable and long-lasting compared to thinner ones. A thicker belt can withstand regular use and heavy impacts better.
- Manufacturer and warranty: The reputation and quality of the treadmill manufacturer can also impact the lifespan of the belt. Additionally, a longer warranty period usually indicates that the manufacturer has confidence in the durability of the belt.
How to disconnect the power before replacing a treadmill belt?
To safely disconnect the power before replacing a treadmill belt, follow these steps:
- Make sure the treadmill is turned off and unplugged from the power source.
- Locate the power switch on the treadmill and turn it off if it is not already in the off position.
- Unplug the treadmill from the power outlet or remove its power cord from the wall socket.
- For added safety, it is recommended to verify that the treadmill is indeed disconnected from the power supply by checking that all lights and displays on the treadmill are turned off.
- Once you have confirmed that the treadmill is entirely disconnected from the power source, you can proceed with replacing the treadmill belt.
Remember to follow the manufacturer's instructions or consult a professional if you are unsure about the process or need additional guidance.
How to properly stretch a replacement treadmill belt before installation?
- Begin by placing the replacement treadmill belt on a clean, flat surface, such as a table or the floor.
- Ensure that the belt is properly aligned and centered, according to the manufacturer's instructions or the markings on the belt itself.
- Using your hands or a soft mallet, gently tap or push the belt to align it perfectly and remove any air pockets or wrinkles.
- Once the belt is aligned, use a belt stretching tool or a long, sturdy object, such as a broomstick or a bar, to create tension on the belt.
- Position the stretching tool or bar at one end of the belt, near the edge, and apply gradual pressure to stretch the belt. Move along the length of the belt, applying pressure at regular intervals to evenly stretch it.
- Continue stretching the belt until it reaches the desired tension level. Be careful not to overstretch it, as it can cause damage to the belt or the treadmill.
- Check the tension of the belt by pressing down on the middle of the belt with your fingers. It should feel firm but not excessively tight.
- Once the belt is properly stretched, carefully lift it and place it on the treadmill deck. Make sure it is centered and aligned with the pulley system.
- To secure the belt, follow the manufacturer's instructions regarding tightening or adjusting the tensioning mechanism.
- After installation, test the treadmill to ensure the belt is running smoothly and evenly. Make any necessary adjustments if needed.
- Regularly monitor the tension and alignment of the belt during use, as it may require periodic adjustments for optimal performance.