
Best Wireless Mouse Reset Solutions to Buy in July 2026
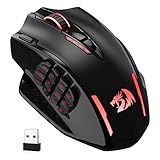
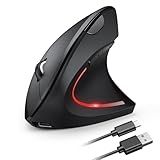
Redragon M913 Impact Elite Wireless Gaming Mouse, 16000 DPI Wired/Wireless RGB Mouse with 16 Programmable Buttons, 45 Hr Battery and Pro Optical Sensor, 12 Side Buttons MMO Mouse
- DUAL MODES: WIRELESS & WIRED FOR VERSATILE GAMING PERFORMANCE.
- ULTRA-FAST SENSOR: 1MS RESPONSE TIME GUARANTEES PEAK PRECISION.
- LONG BATTERY LIFE: UP TO 80 HOURS OF GAMEPLAY WITH ECO MODE ON.


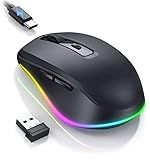
PEIOUS Wireless Mouse Jiggler - LED Wireless Mice with Build-in Jiggler Mover, Rechargeable Moving Mouse for Computer with Undetectable Random Movement Keeps PC Laptop Awake - Black
-
2-IN-1 MOUSE & JIGGLER KEEPS YOUR PC ACTIVE WHILE YOU STEP AWAY!
-
RECHARGEABLE WITH 4 DPI SETTINGS FOR PRECISION ON ANY SURFACE.
-
PLUG & PLAY DESIGN PERFECT FOR LAPTOPS WITH LIMITED USB PORTS!
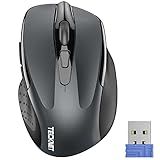
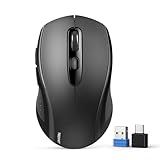
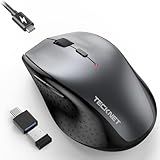
TECKNET Wireless Mouse, 2.4G Ergonomic Optical Mouse, Computer Mouse for Laptop, PC, Computer, Chromebook, Notebook, 6 Buttons, 24 Months Battery Life, 2600 DPI, 5 Adjustment Levels
- TRAVEL-FRIENDLY DESIGN: COMPACT AND LIGHTWEIGHT FOR ON-THE-GO USE.
- ERGONOMIC COMFORT: CURVED SHAPE AND RUBBER GRIPS FOR ALL-DAY COMFORT.
- HIGH-PRECISION TRACKING: 5 ADJUSTABLE DPI SETTINGS FOR ULTIMATE CONTROL.
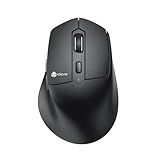
iClever MD360 Ergonomic Bluetooth Mouse with Mouse Jiggler, Wireless Rechargeable Mouse for 3 Devices (BT/2.4G), 4 DPI Settings, Compatible with iPad, Mac, PC
- SEAMLESSLY SWITCH BETWEEN 3 DEVICES FOR MULTI-SCREEN PRODUCTIVITY.
- INVISIBLE MOUSE JIGGLER KEEPS CALLS ACTIVE DURING SHORT BREAKS.
- LONG-LASTING BATTERY: 90 DAYS OF SILENT CLICKING WITH USB-C CHARGE.
TECKNET Ergonomic Mouse Wireless, Echargeable Mouse Wireless Silent for Carpal Tunnel Right Hand, 2.4GHz USB-A Vertical Mouse for Laptop,5 Adjustable 4800 DPI, Computer,MacBook, Desktop(Not-USB-C)
-
ERGONOMIC COMFORT: REDUCES HAND FATIGUE FOR LONG HOURS OF USE.
-
RAPID CHARGING: FULLY CHARGED IN 1.5 HOURS, 2-MONTH BATTERY LIFE.
-
SILENT OPERATION: IDEAL FOR NOISY ENVIRONMENTS; PERFECT FOR MOBILE WORKERS.
TECKNET Bluetooth Mouse, 4000DPI Wireless Mice for Laptop 2-in-1(BT 5.0/3.0+2.4Ghz) Computer Mouse with USB Receiver for Mac (USB-A/C+Bluetooth, Black)
-
SEAMLESSLY SWITCH BETWEEN 2 DEVICES WITH ONE-CLICK CONNECTIVITY.
-
CUSTOMIZE DPI SETTINGS FOR PRECISE TRACKING ON ANY SURFACE.
-
ERGONOMIC DESIGN WITH LONG BATTERY LIFE-PERFECT FOR TRAVEL!
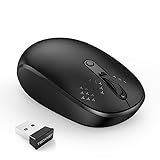
TECKNET Wireless Mouse, 2.4G Quiet Computer Mouse with USB Receiver, 4 Buttons Portable Cordless Mice for Chromebook, Laptop, PC, Mac, 800/1200/1600 DPI - Black
- COMPACT & PORTABLE: FITS EASILY IN BAGS FOR TRAVEL CONVENIENCE.
- SILENT OPERATION: ENJOY QUIET CLICKS WITHOUT DISTURBING OTHERS NEARBY.
- UNIVERSAL COMPATIBILITY: WORKS SEAMLESSLY WITH VARIOUS DEVICES AND OS.
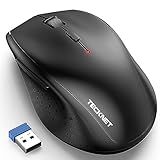
TECKNET Wireless Mouse, 2.4G USB Computer Mouse with 6-Level Adjustable 4800 DPI, Silent Quiet Click,30 Months Battery, Ergonomic Grips, 6 Buttons Portable for PC, Chromebook, Mac
-
6 LEVELS DPIS FOR PRECISION: ADJUSTABLE DPI ENSURES SMOOTH TRACKING ON ALL SURFACES.
-
30-MONTH BATTERY LIFE: ENJOY EXTENDED USE WITH ENERGY-EFFICIENT DESIGN.
-
SILENT CLICKS FOR PEACE: PERFECT FOR QUIET ENVIRONMENTS LIKE LIBRARIES AND OFFICES.
TECKNET Wireless Mouse Jiggler, Silent Click Rechargeable Mouse, Plug & Play with USB-C Adapter, 6400 DPI Ergonomic Mouse, Build-in Mouse Mover, 2.4G Computer Mice for Mac, Laptop, Desktop, PC
- STAY ACTIVE WITH BUILT-IN JIGGLER MODE-NO MORE SCREEN LOCKS!
- 3X FASTER CHARGING: FULL BATTERY IN 2 HOURS, LASTS 90 DAYS!
- SILENT CLICK TECHNOLOGY-WORK DISTRACTION-FREE IN ANY ENVIRONMENT!
TECKNET Wireless Mouse (2.4G & BT5.0/3.0) Silent 4800 DPI Computer USB A & Bluetooth Mouse 6 Buttons, Wide Compatibility - Black
-
DUAL CONNECTIVITY: CONNECT VIA BLUETOOTH OR USB; SWITCH BETWEEN DEVICES EASILY.
-
CUSTOMIZABLE SENSITIVITY: CHOOSE FROM 6 DPI SETTINGS FOR PRECISE CONTROL.
-
WHISPER-QUIET DESIGN: ENJOY SILENT CLICKS, PERFECT FOR QUIET ENVIRONMENTS.
To reset a Logitech wireless mouse, you can follow these steps:
- Turn off the mouse. Locate the power switch on the underside of the mouse and switch it off.
- Remove the receiver. If your Logitech mouse uses a USB receiver, unplug it from your computer's USB port.
- Remove the batteries. Open the battery compartment located on the underside of the mouse. Take out the batteries and wait for approximately 10 seconds before proceeding.
- Reset the connection. Press and hold the "Reconnect" button or the "Connect" button (exact name may vary based on the model) located on the underside of the mouse. While holding the button down, turn on the mouse by switching on the power button.
- Reconnect the receiver. If your mouse uses a USB receiver, plug it back into the USB port of your computer.
- Test the connection. Check if the mouse is functioning properly by moving it around.
By following these steps, you will be able to reset your Logitech wireless mouse.
How to identify if a Logitech wireless mouse is successfully reset?
To identify if a Logitech wireless mouse has been successfully reset, follow these steps:
- Ensure that the mouse is turned on and connected to your computer.
- Look for a small reset button on the bottom or side of the mouse. It is often recessed and may require a pointed object like a paperclip to press it.
- Press and hold the reset button for a few seconds until the LED light on the mouse starts blinking. The blinking light indicates that the reset process is in progress.
- Release the reset button and wait for a few moments. The mouse will reestablish its connection with the computer.
- Test the mouse by moving it around and checking if the cursor moves on the screen.
If the mouse cursor moves smoothly and the mouse functions as expected, it means that the reset was successful. Additionally, if any previous connectivity issues or pairing problems have been resolved, it is a good indicator that the mouse has been successfully reset.
What is the difference between resetting and recalibrating a Logitech wireless mouse?
Resetting a Logitech wireless mouse usually refers to a process that restores the mouse's default settings or reconnects it to the computer. This process may involve pressing a specific combination of buttons, such as the reset button on the bottom of the mouse, to power cycle or establish a new connection.
On the other hand, recalibrating a Logitech wireless mouse typically refers to adjusting its sensitivity or fine-tuning its tracking behavior. This can be done through software settings or dedicated buttons on the mouse. Recalibration allows users to customize the mouse's response to their preferences or different usage scenarios.
In summary, resetting a Logitech wireless mouse deals with restoring defaults or reconnecting, whereas recalibrating focuses on modifying sensitivity or tracking settings based on individual needs. The specific procedures may vary depending on the model and software used.
What is the recommended approach for resetting a Logitech wireless mouse with multiple connectivity options?
The recommended approach for resetting a Logitech wireless mouse with multiple connectivity options may vary depending on the specific model of the mouse. However, here are some general steps you can try:
- Check the mouse manual: Look for the user manual or instruction guide that came with your mouse. It should provide detailed instructions on how to reset the mouse.
- Power off the mouse: Turn off the mouse by flipping the power switch located on the bottom or the side of the mouse.
- Remove batteries: If your wireless mouse uses replaceable batteries, remove the batteries from the mouse. If the mouse has a built-in rechargeable battery, skip this step.
- Disconnect any USB dongles: If your wireless mouse uses a USB dongle for connectivity, unplug the dongle from your computer or device.
- Wait for a few seconds: Leave the mouse and dongle (if applicable) disconnected for at least 10 seconds. This allows any residual power to discharge.
- Reconnect dongle and batteries: If you removed the dongle and batteries, now is the time to reconnect them. Insert the batteries into the mouse and plug in the USB dongle into an available USB port on your computer or device. Alternatively, if your mouse supports Bluetooth connectivity, follow the pairing instructions for Bluetooth connection.
- Power on the mouse: Flip the power switch on the mouse to the "On" or "Connect" position.
- Pair the mouse (if necessary): Depending on the mouse model, you may need to manually pair the mouse with your computer or device. Follow the pairing instructions provided in the mouse manual.
- Test the mouse: Once the mouse is connected and paired, test it by moving it around to ensure it is working properly.
If these steps don't work, you may need to consult the specific user manual or contact Logitech support for further assistance.